Start of work
First steps
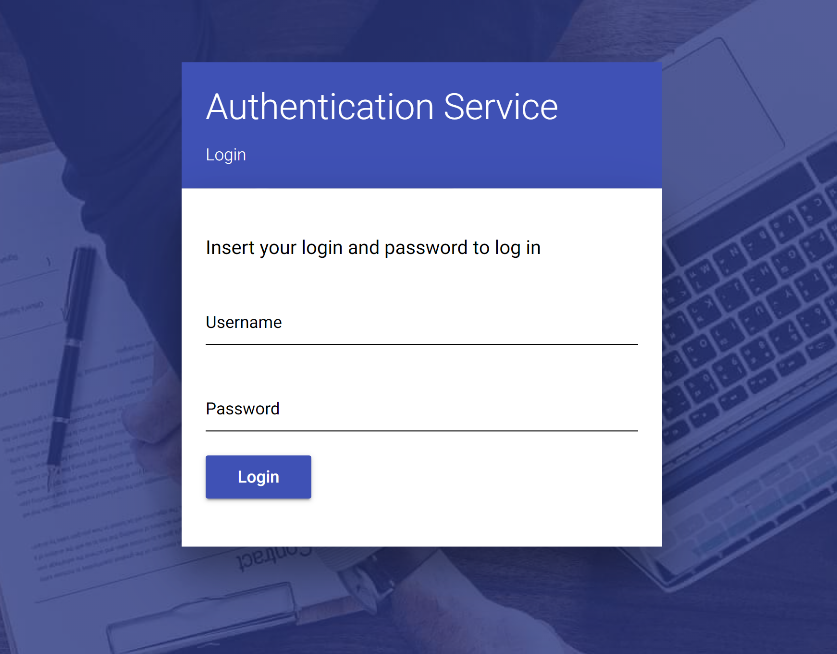
To access Device Management Server (DMS) identify yourself by providing "Username" and "Password" requested in the fields below and then click "Login". From now on, all mandatory fields in Device Management Server (DMS) will be marked with an asterisk, please follow the instructions.
After successful login, you will be automatically redirected to the Dashboard where you will see all resources you have the access to.
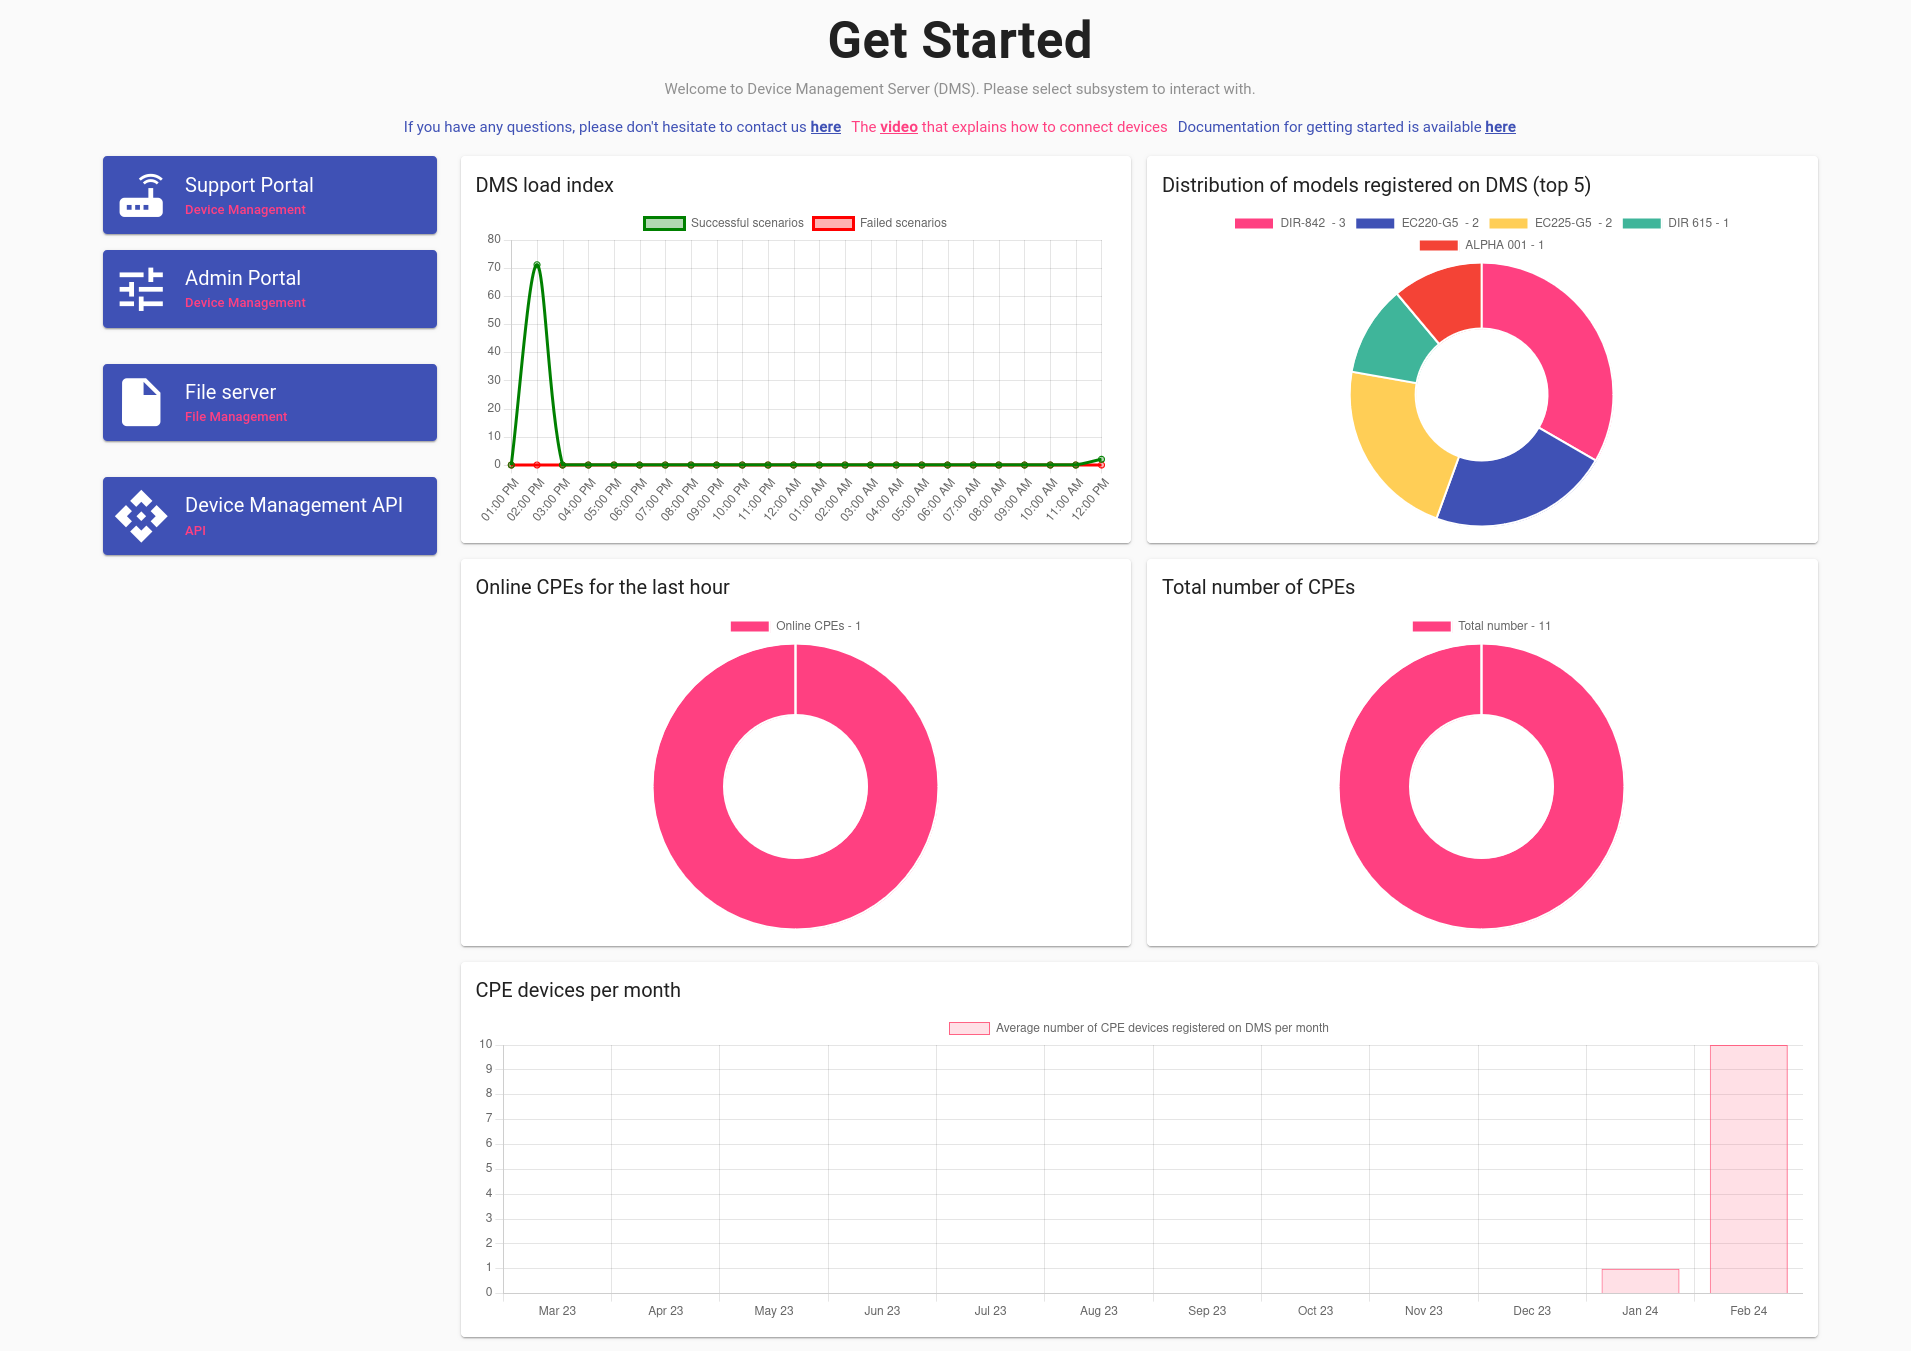
Leave the original view of the Dashboard or change it to another available option at your discretion using the switch located in the upper right corner of the console screen.
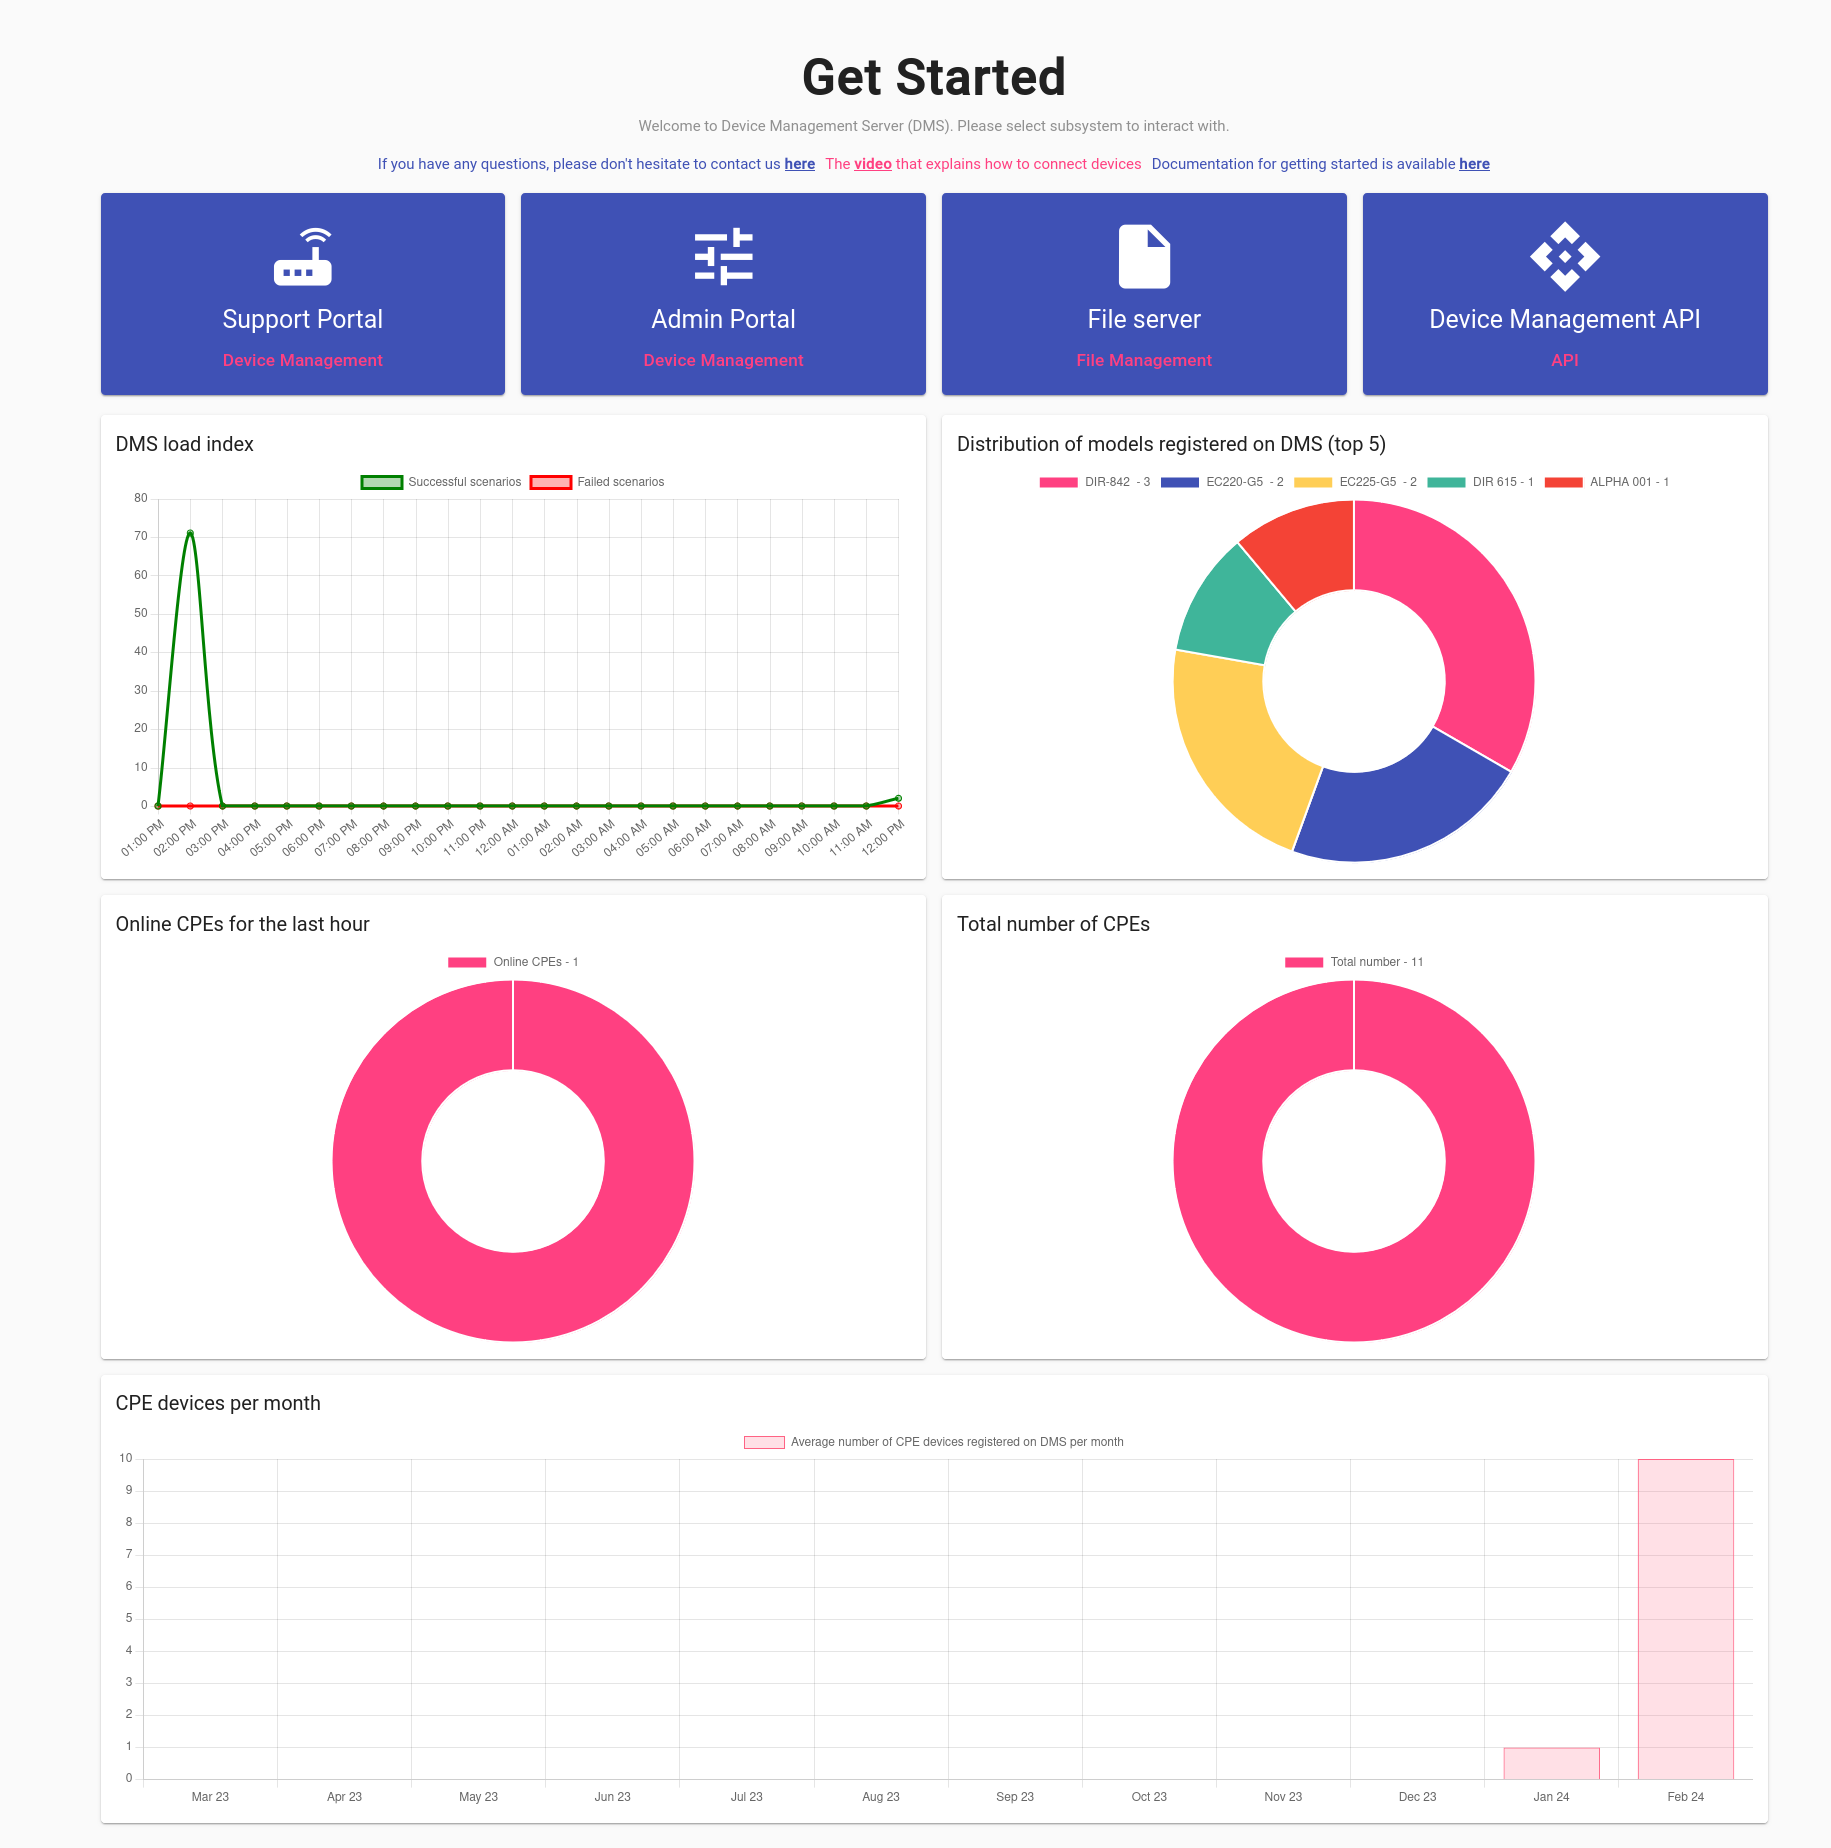
Depending on access rights granted to you, you can either see all access levels or only those to which you have been authorized. Besides access levels, Dashboard displays DMS metrics such as "Load index" - indicating the number of successfully executed or failed scenarios for a certain period of time, "Distribution of CPE models registered on DMS" and "CPE devices registered with DMS per month".
Common interface features and usage
The common interface elements that you will encounter throughout different sections of our service will be discussed in this chapter. Detailed descriptions of specific elements can be found in the respective sections of our service overview.
Header toolbar
At the top of the page, you see the buttons that will help you to make your work in the system more convenient. Select the required language, animation settings or return to the main page if necessary.

Widgets
 Takes you back to the landing page.
 Opens the settings menu where you can configure page animations and reset entity messages.
 Allows you to select a theme.
 Enables you to choose from supported languages.
 Logs you out from the current instance.
Tables
Using DMS, you will interact with a set of tables. Here is the description of the main features of table management. However, each table will have its own specific features, which will be discussed separately
View
You can customize the display of data in tables according to your needs, and for this purpose, there are several tools available. They can temporarily alter the display, such as sorting, or act as widgets for adjusting the layout settings, which can be saved between sessions.
Sort
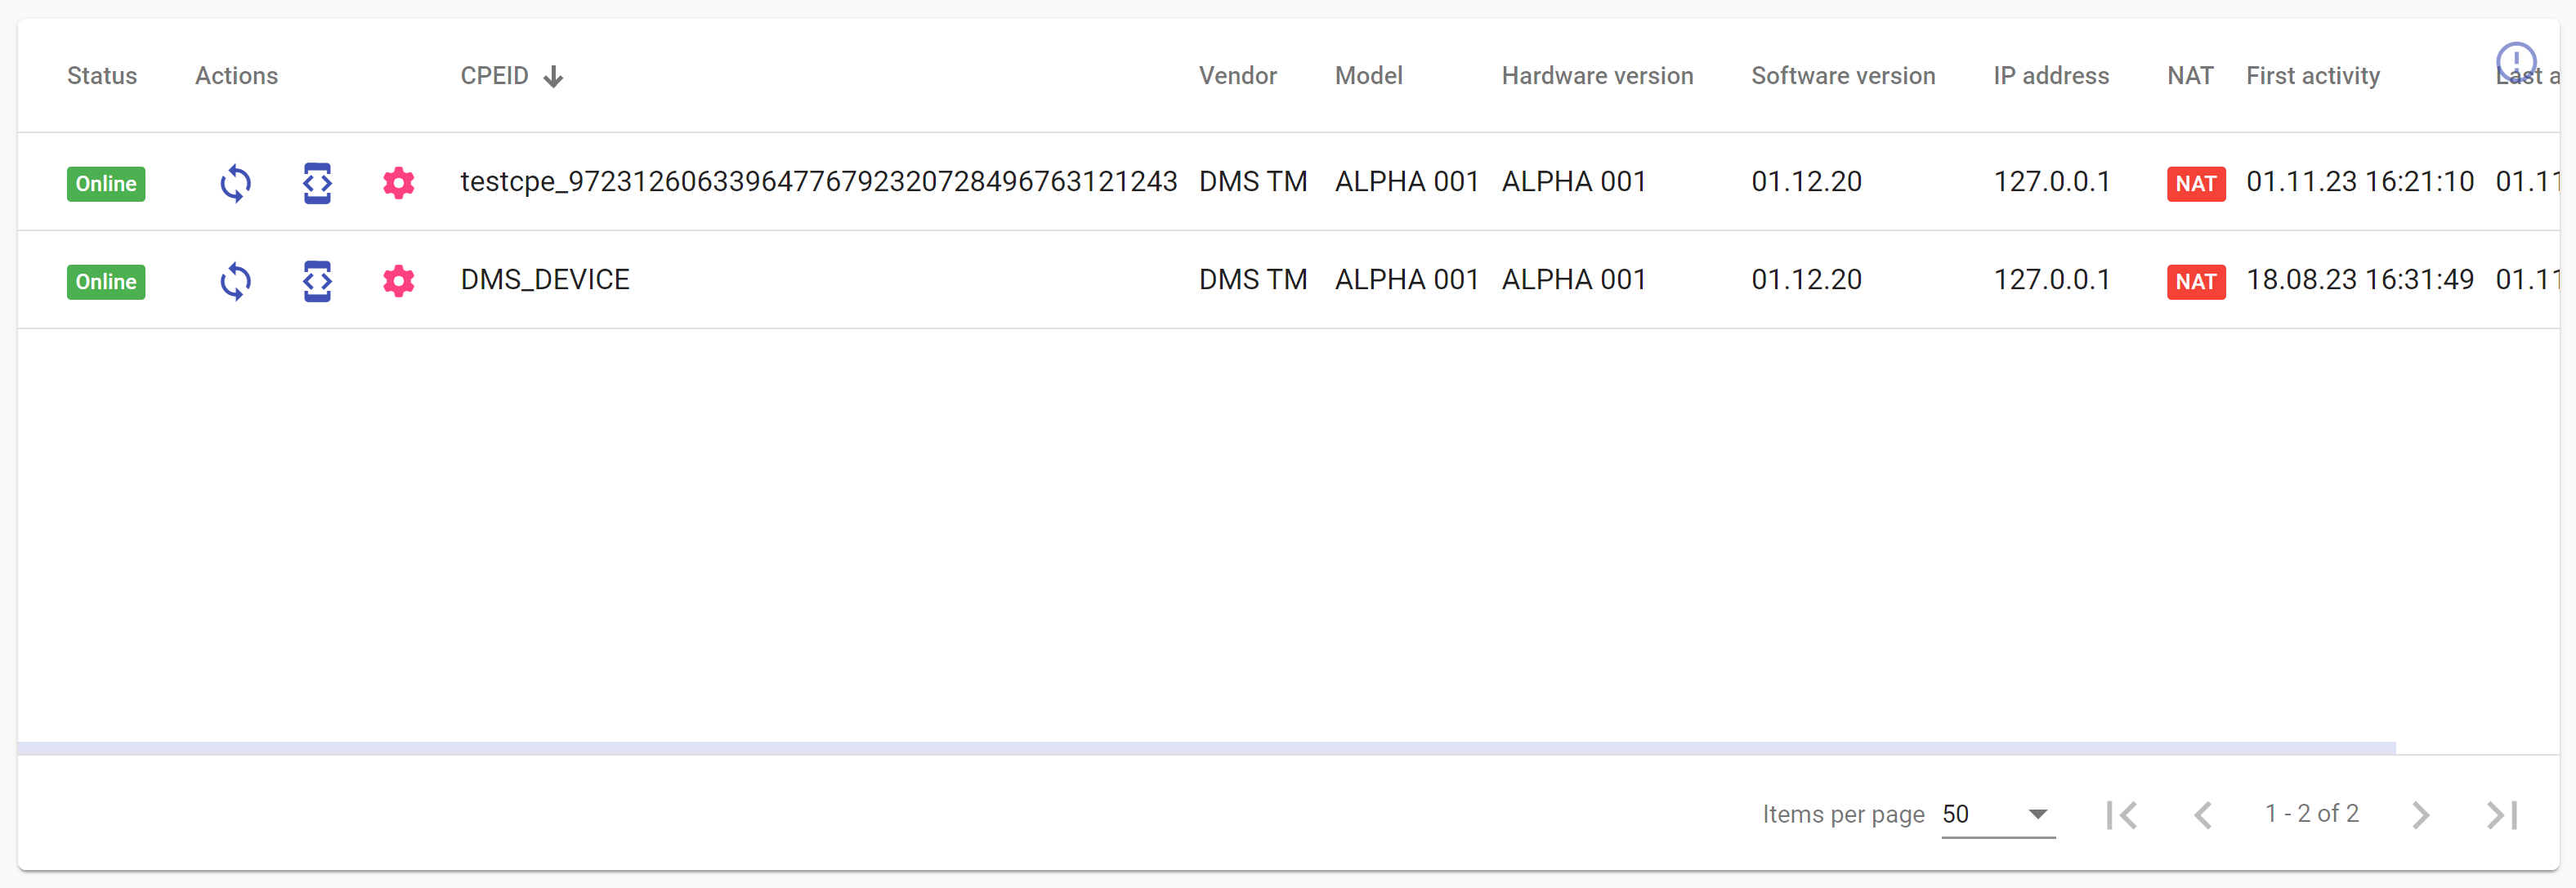
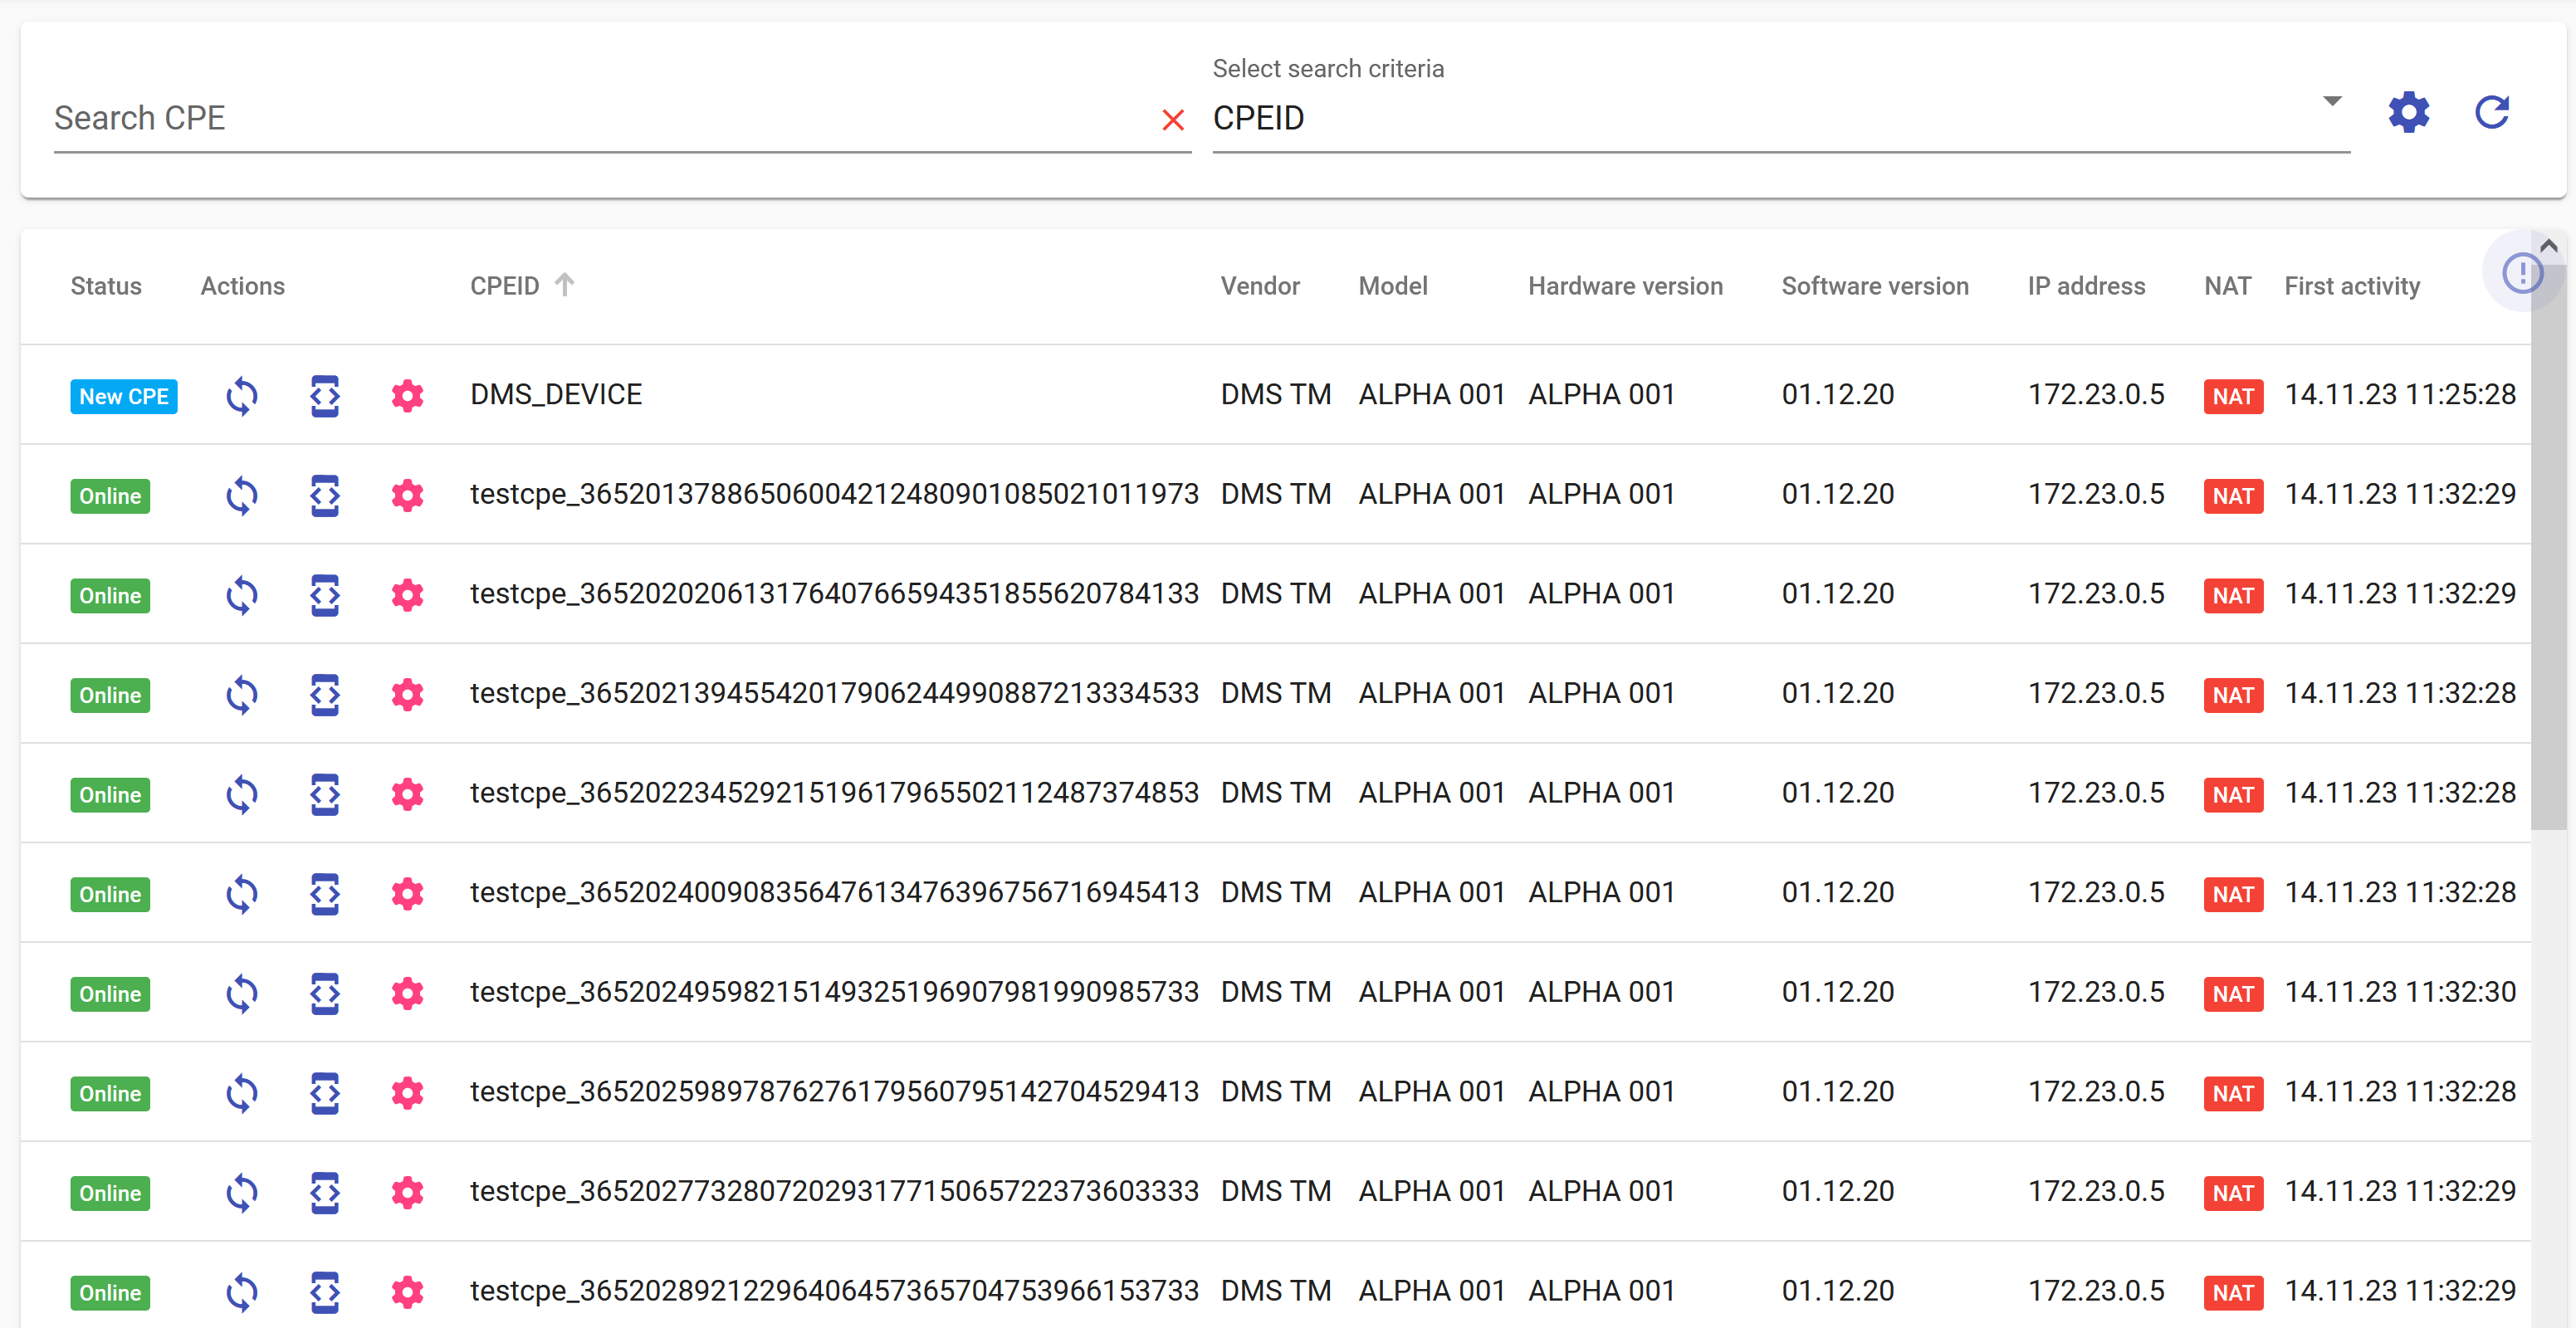
To sort the table based on a specific criterion, hover over the header. Clicking on the header changes the sorting sequence sequentially: descending -> ascending -> unsorted for that column. By default, entries are sorted by the CPEID field.
Navigation
In tables with a large amount of data, pagination is implemented to improve readability. Page control is located at the bottom of the table. Here, you can choose the number of entries per page and navigate between pages.

View widget
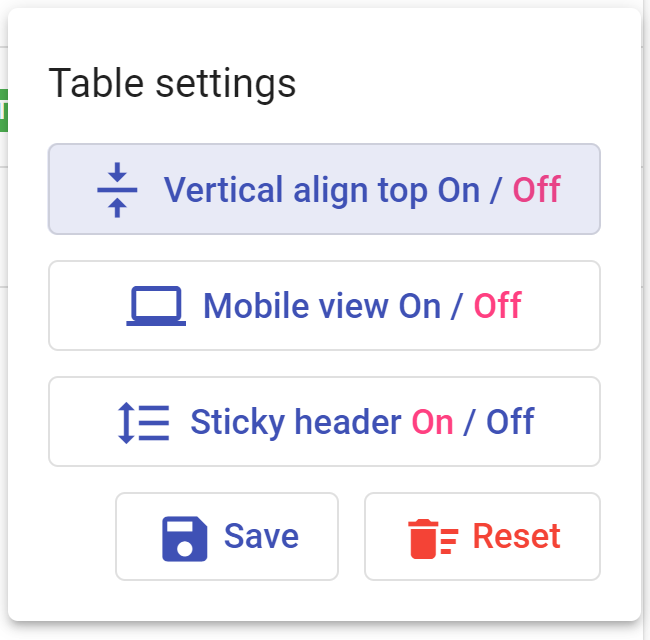
You can customize how entries are displayed in the table using the icon in the top right corner of the table header. Clicking on ![]() will open a widget where you can modify the table entries in the following ways: display them vertically (convenient for mobile devices), have the text of the row at the top of the block, and choose whether the table header should be fixed or unfixed during scrolling. To save this configuration, press the "Save" button. To restore default settings, use the "Restore" button.
will open a widget where you can modify the table entries in the following ways: display them vertically (convenient for mobile devices), have the text of the row at the top of the block, and choose whether the table header should be fixed or unfixed during scrolling. To save this configuration, press the "Save" button. To restore default settings, use the "Restore" button.
Switch to the mobile version table
| base_table_view | table_mobile_version |
|---|---|
 |  |
Adjust row positioning
| base_table_view | table_vertical_align_top_on |
|---|---|
|  |
Lock on top or unlock the table header.
Toolbar
Above the table header is its toolbar. It helps manage data within the table.
Row settings
In each table, there is a tool that helps customize the display of table columns, their order, and visibility. To configure this, you need to click on the icon ![]() . A widget will open, allowing you to adjust the parameters of column display.
. A widget will open, allowing you to adjust the parameters of column display.
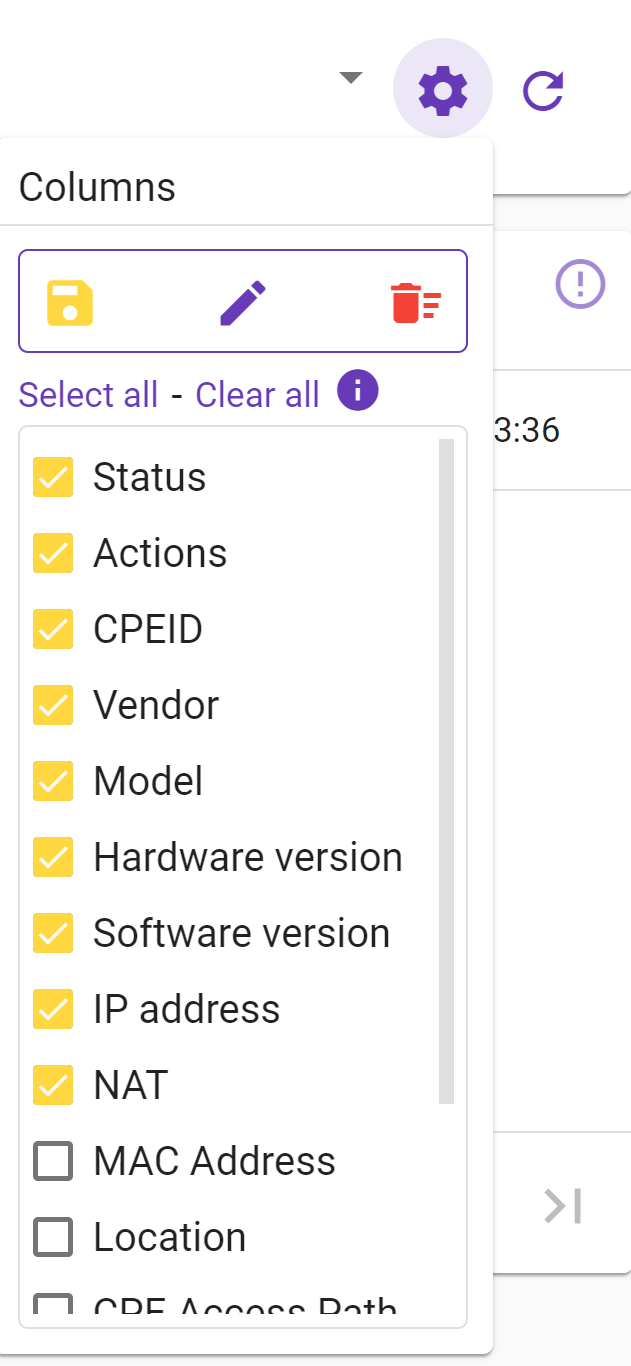
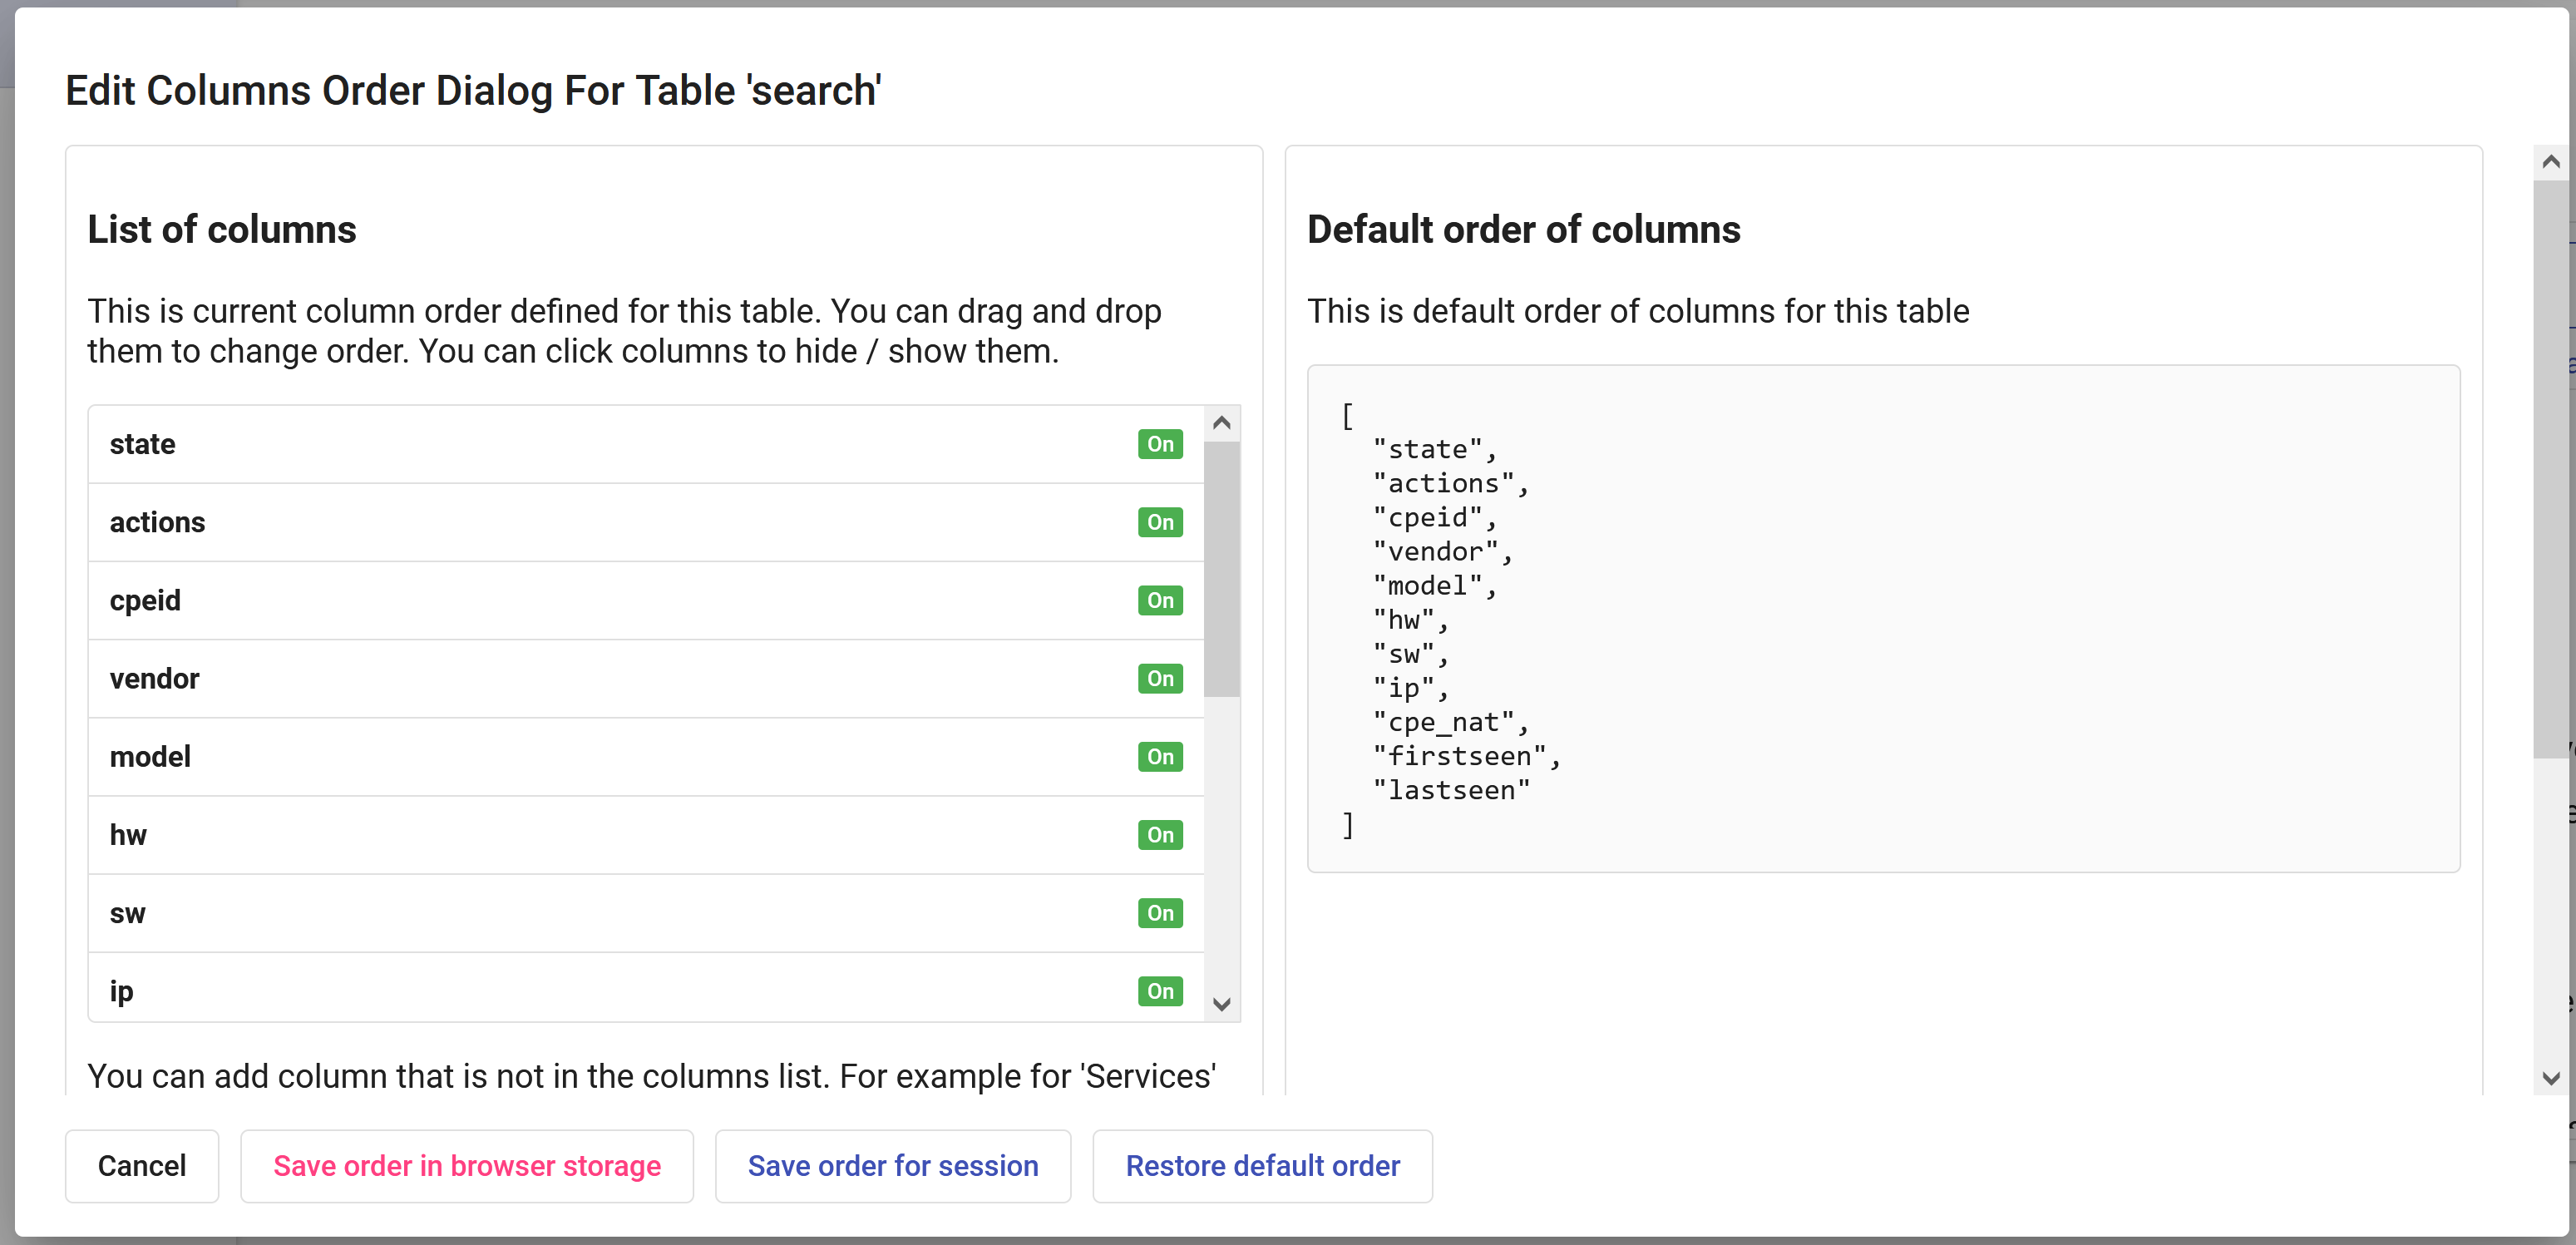
Adjust the visibility of columns using the checkbox next to each of the headers. To make it more convenient, you can make all columns visible (click on "Select All") or make all columns invisible (click on "Clear All") to clear all columns. This way, you can easily leave only the necessary columns. To arrange their order, you can drag the header up or down the list.
- You can save the column arrangement for this table by clicking on the
 .
. - The
 will reset the column order and visibility to the default view.
 - For more detailed editing, there is the
 . Clicking on it will open a dialog box.
Search
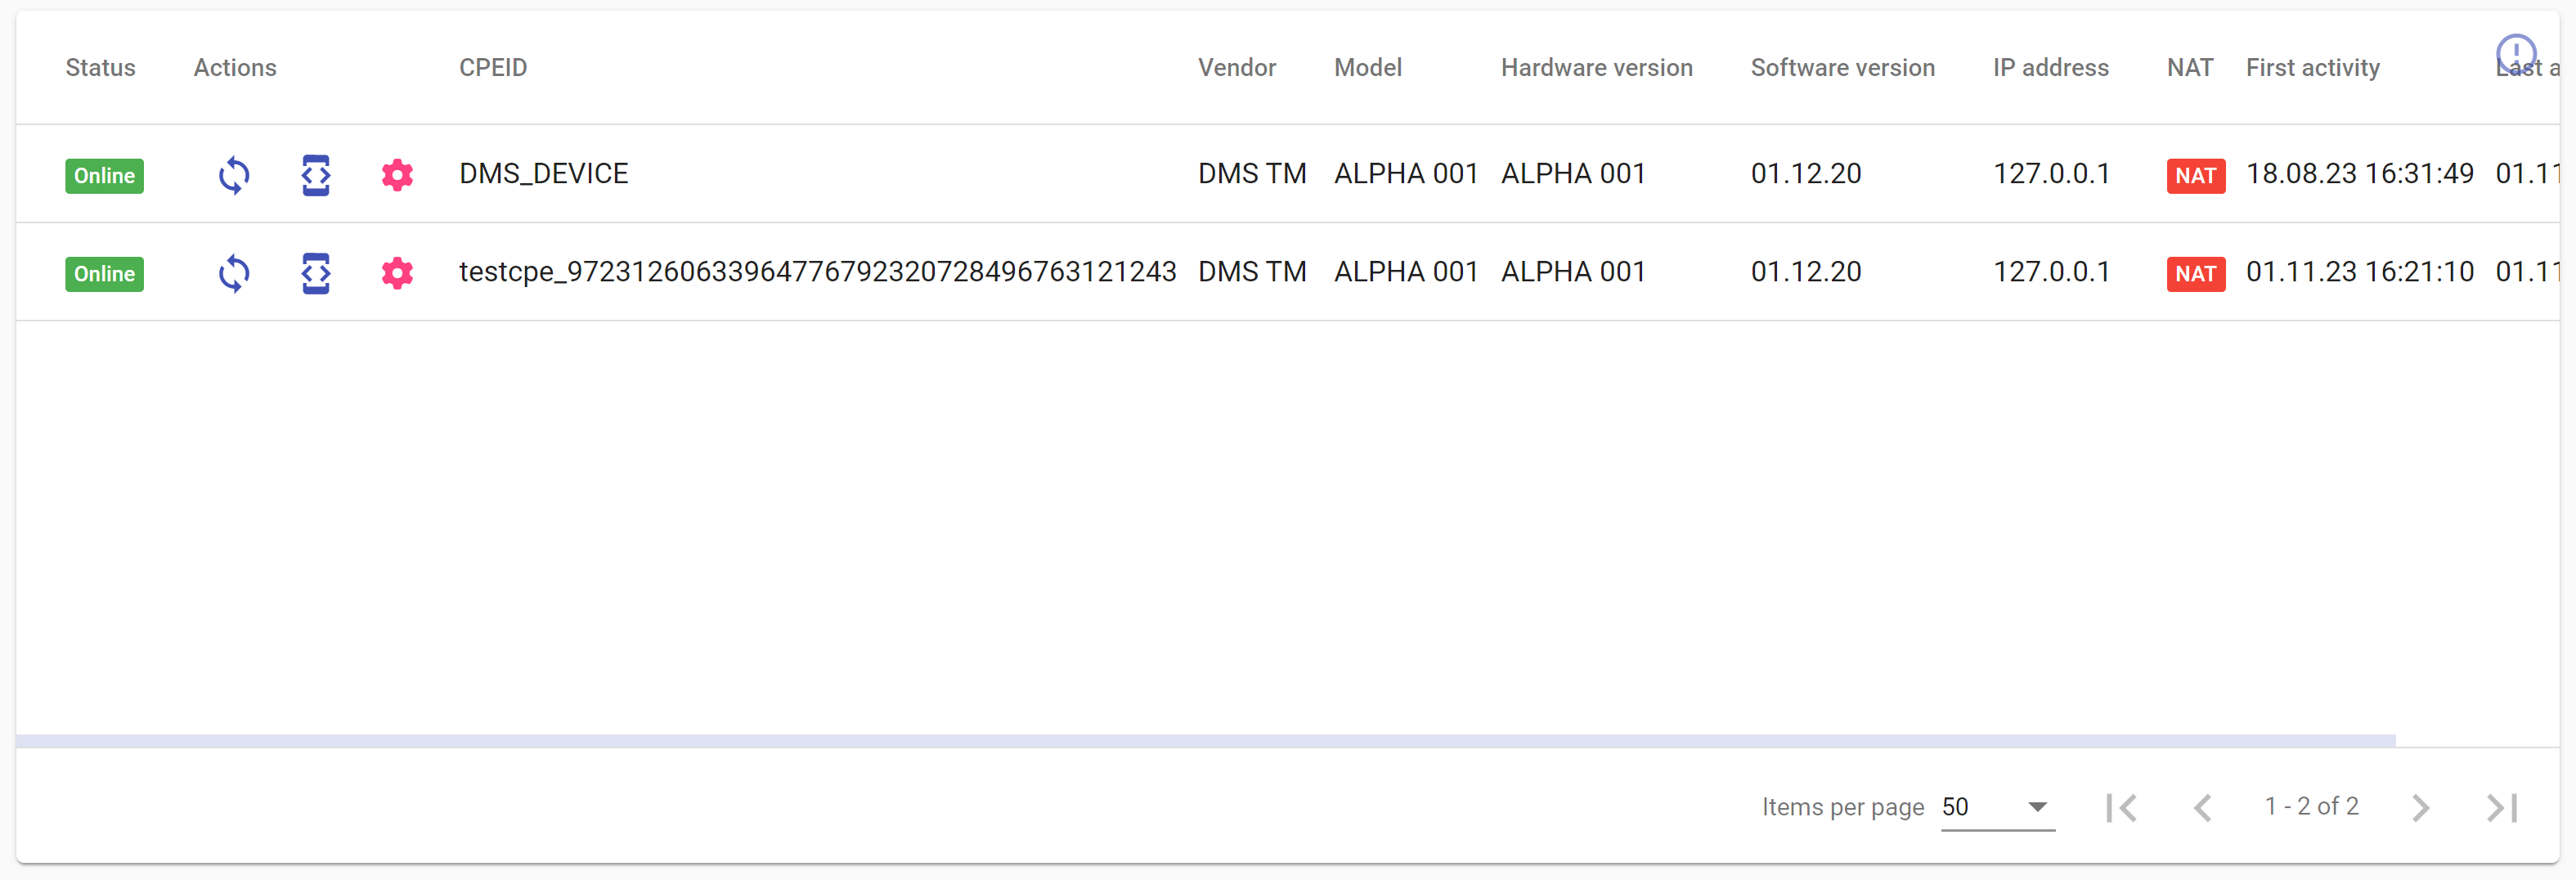
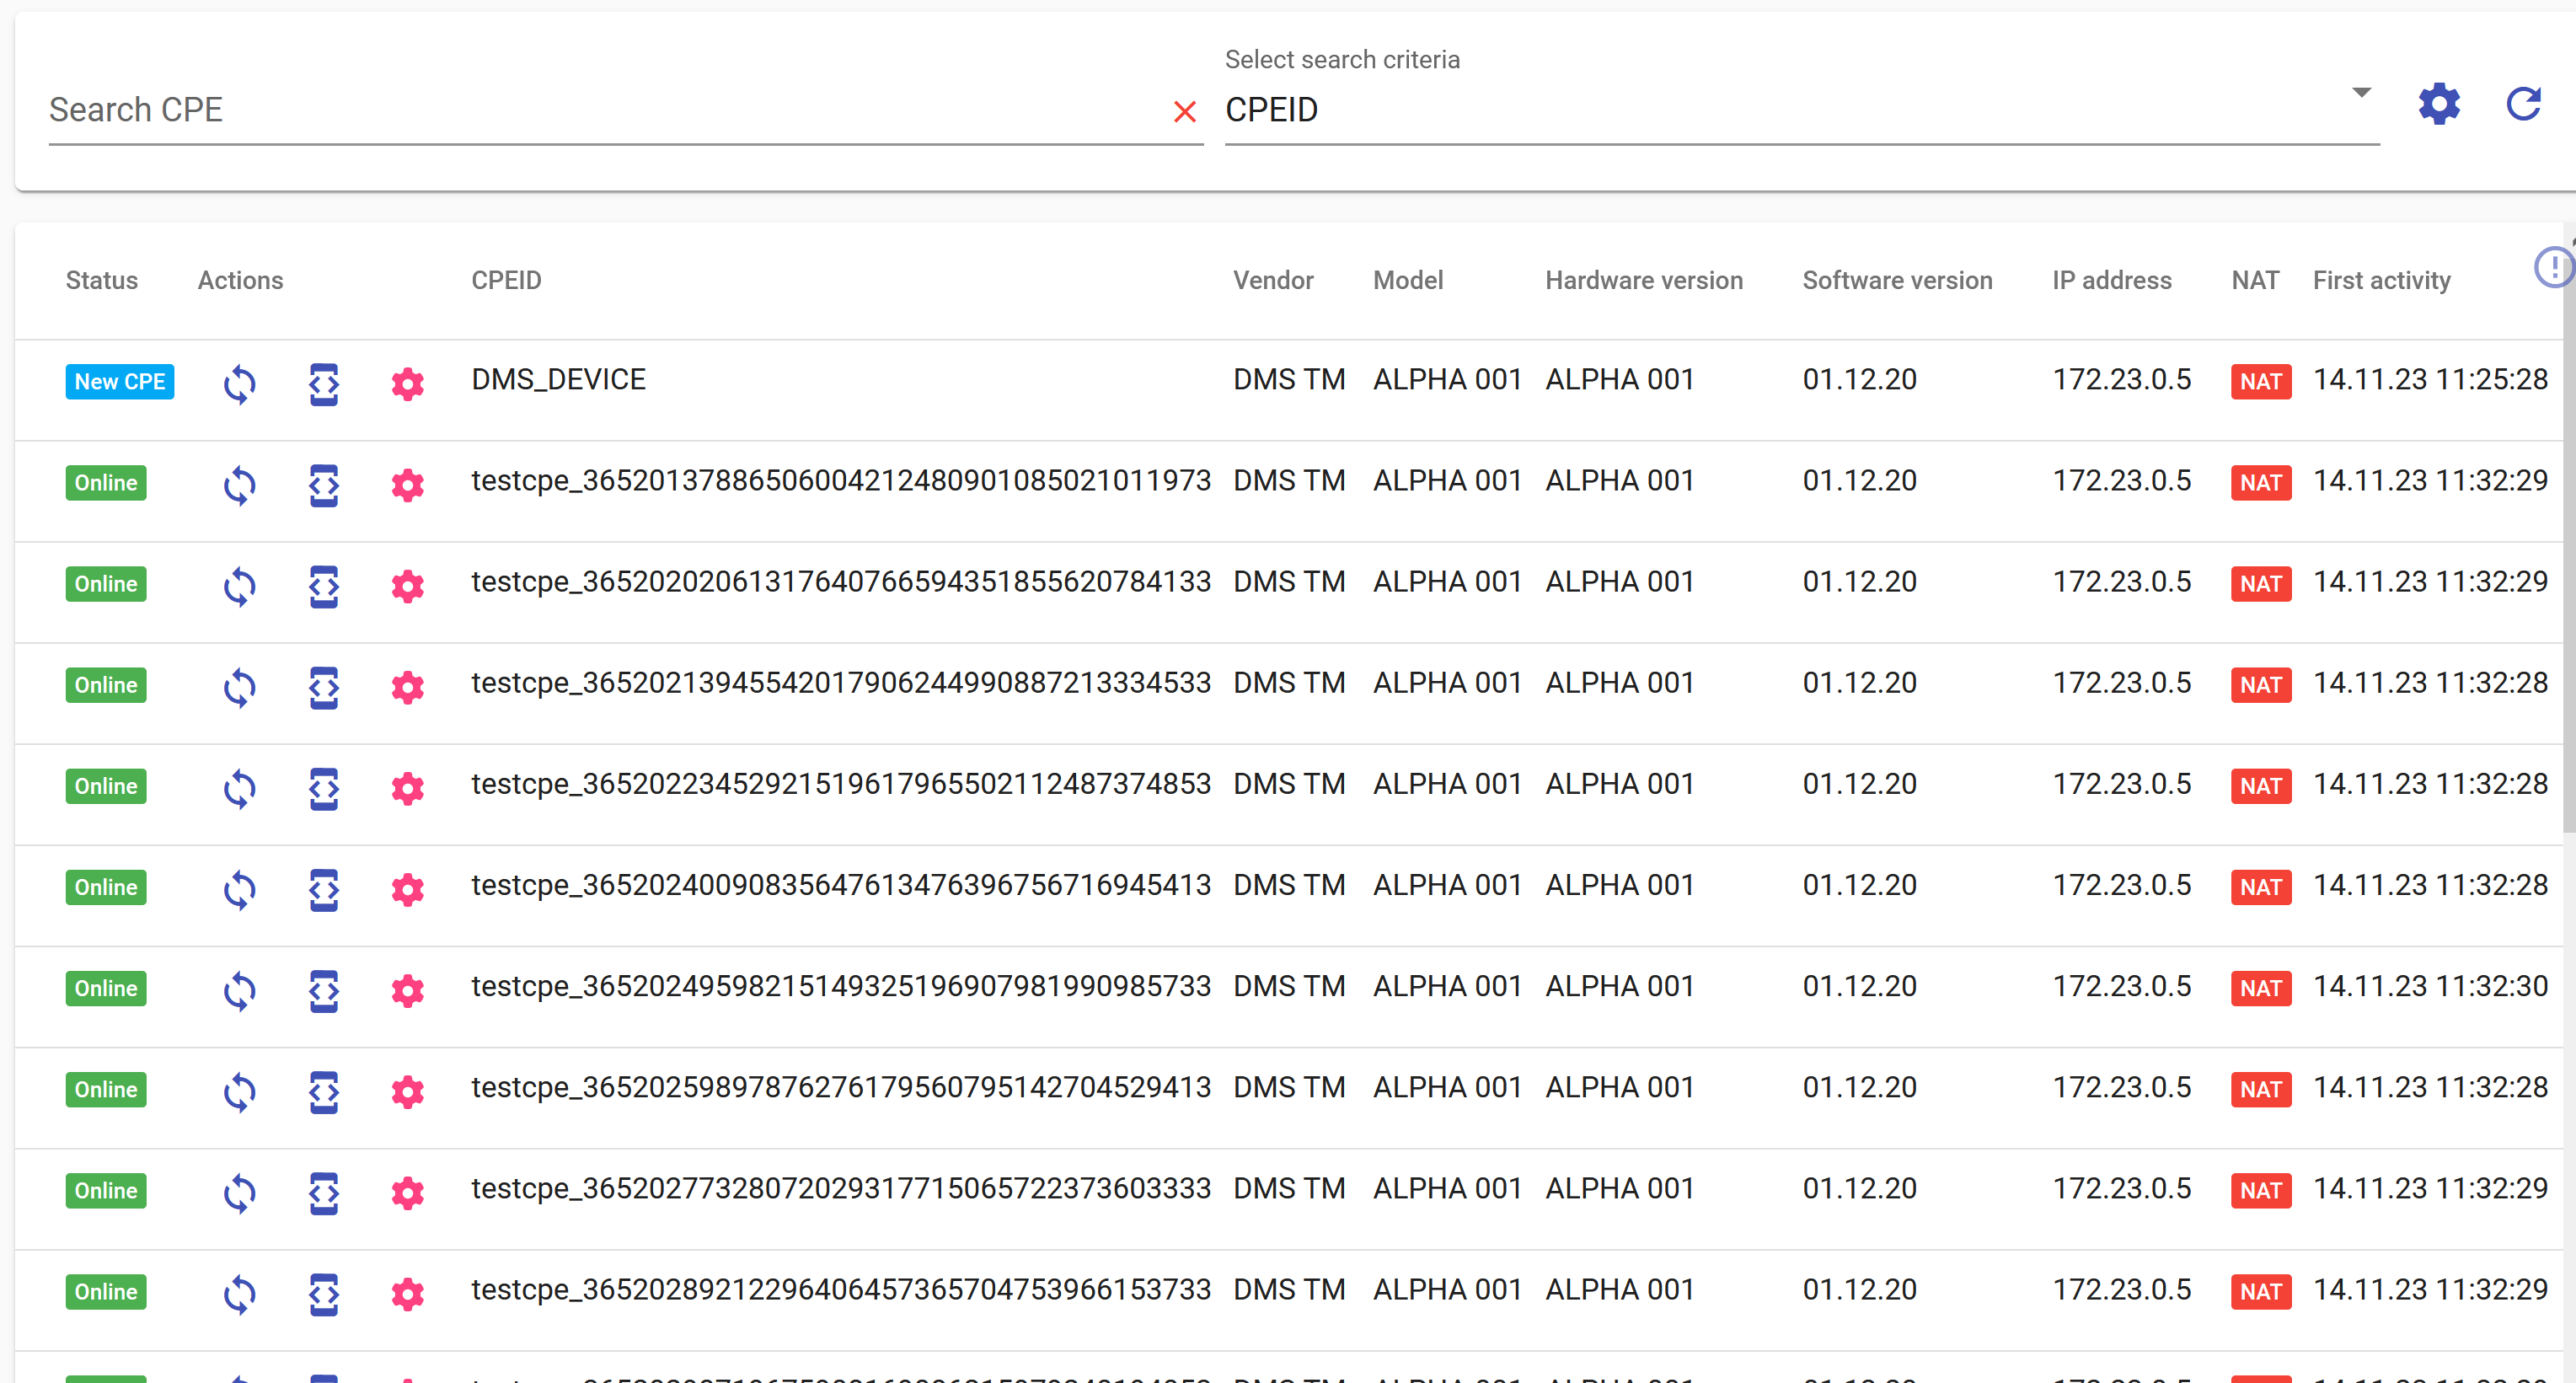
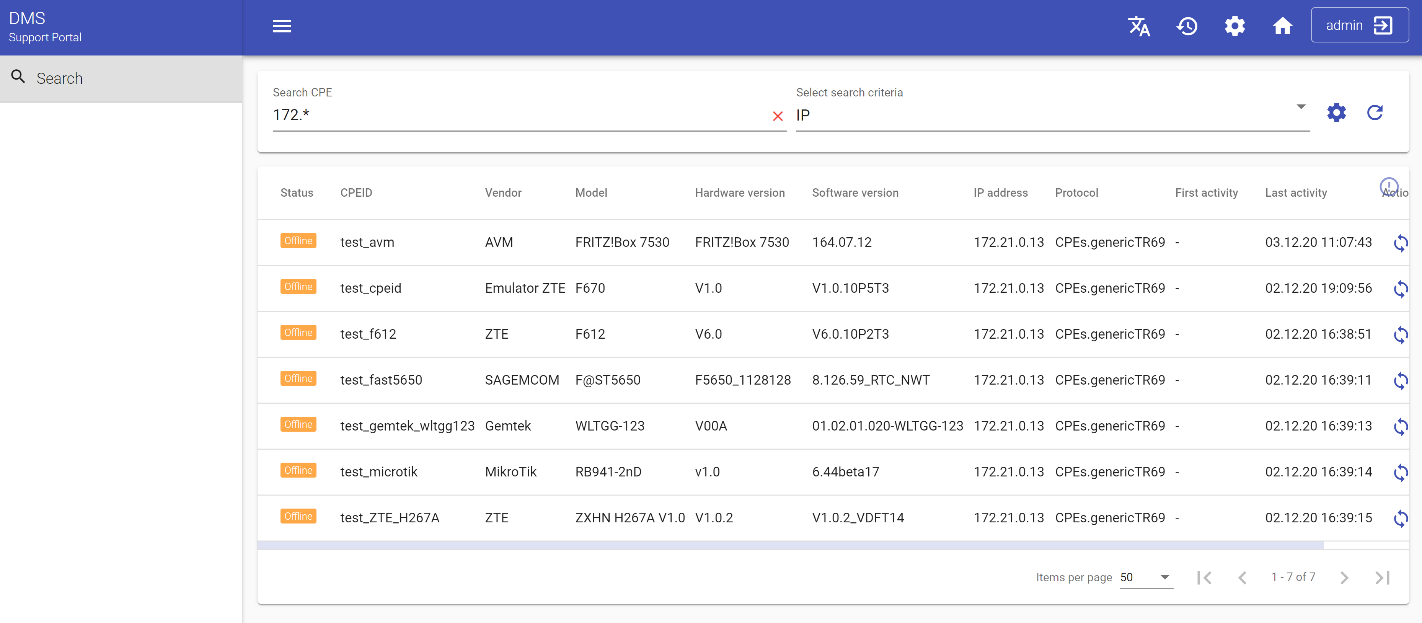
For searching records in tables, there is a search system. Its operation is quite simple yet specific. We will now illustrate the use of the search feature with an example using the CPEStorage table. Firstly, let's determine the criterion by which we will search for a device. To do this, select one of the parameters from the dropdown list to the right of the search box. In our case its "IP address"
Before entering a search value, select the search criteria. Changing the criteria will reset the search value.
In the table with results, you will see all devices linked to this "IP address". You will get the information about "Status of device" (Online/Offline), "Model", "Software" and "Hardware" version etc. If you don’t know all the information about the device you intend to find and possess only partial or incomplete information, you can use the wild card search in the "Search CPE'' field. The wildcard is an advanced search technique that can be used to maximize your search results by providing all the information that includes this partial data. The two most commonly used wildcards that you can use in Device Management Server are:
- An asterisk (*) may be used to specify any number of characters. It is typically used at the end of a root word or number. For example: searching for any number from IP address will tell the server to look for all possible devices that have this number in their IP address
- An exclamation mark (!) at the beginning of the search field means that from the list of results will be excluded all devices which have an exact match with the text in the search field. If you add asterisk after exclamation mark, from the list of results will be excluded all devices that have any match with the text in the search field. Select all table configuration parameters ("Status", "CPEID", "Vendor", "Model", "Hardware", "Software", "IP Address", "First Message", "Last Message", "Actions" etc.) or specify only necessary.
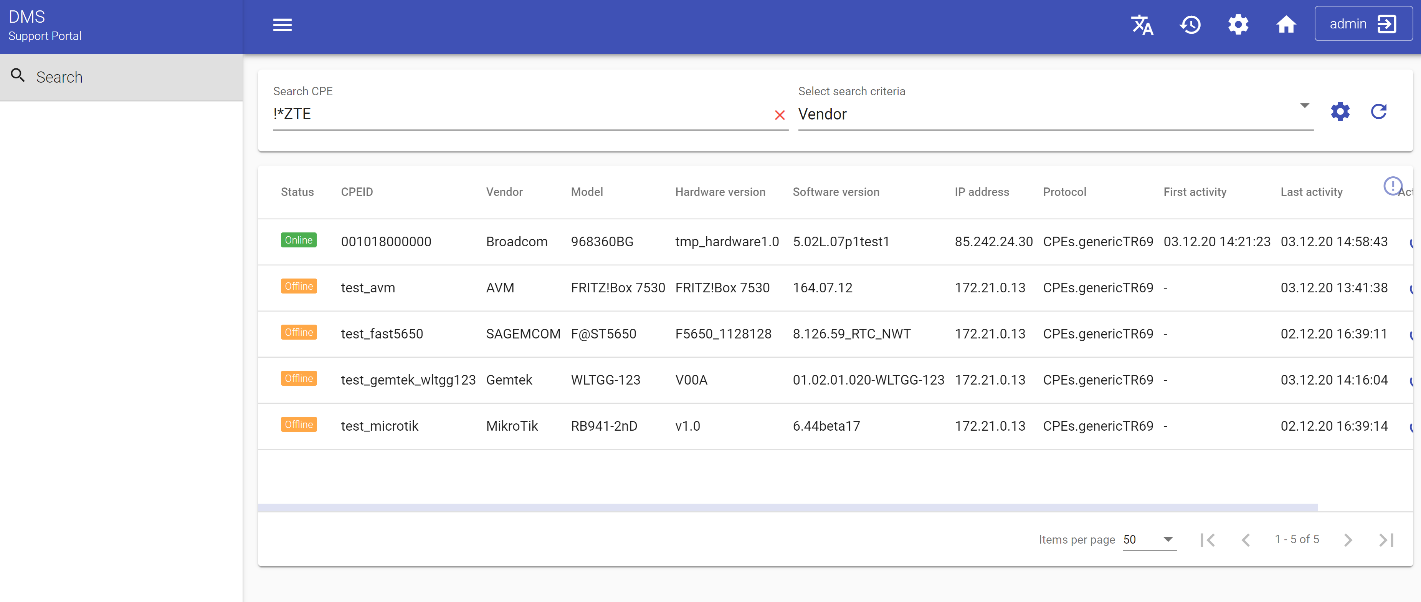
The principle of searching by multiple parameters is based on logical AND. In other words, it returns entries that match one or all parameters in the search.
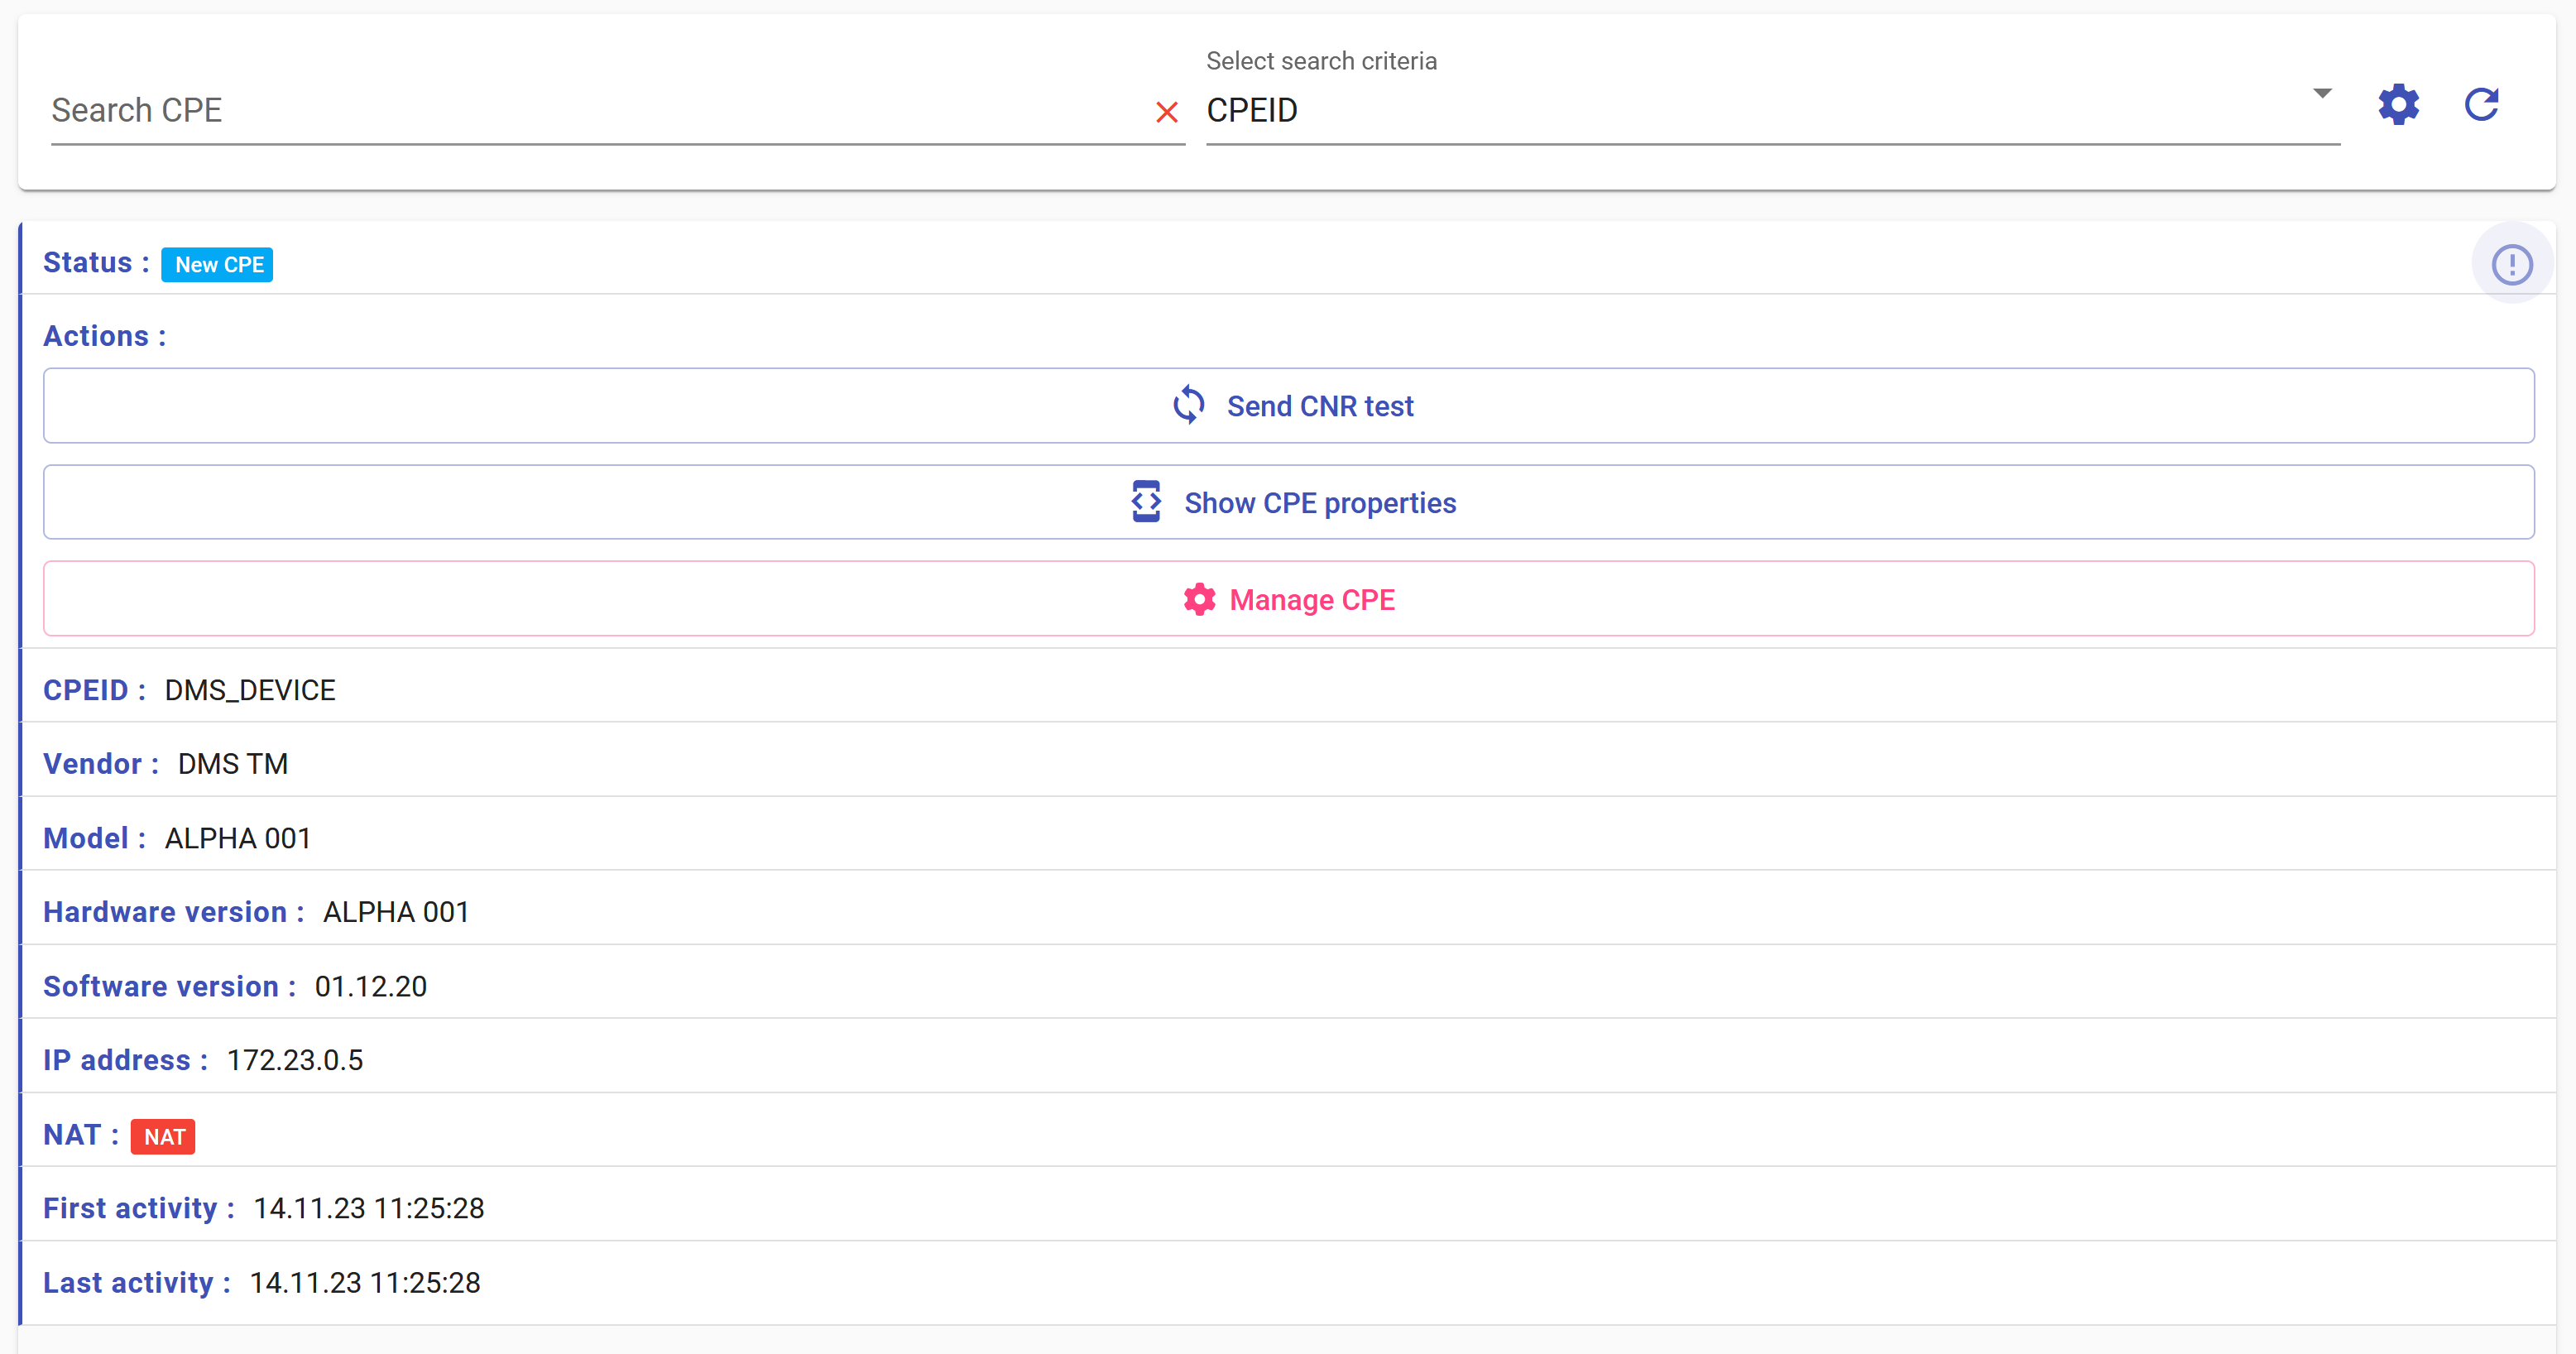
Actions buttons
With records in tables, you can interact using the active buttons, and each of them has a column with such buttons. For the majority of tables, these buttons differ, so they will be described separately for each one.
