Admin Portal
Our Admin Portal provides you with all the information necessary for Administrators. You can add or delete users, schedule mass operations for a number of different devices or groups of devices of the same model or type. You can determine when firmware upgrades will be installed and make changes to the received information about any hotspot appliance. The list of all possible functions is shown on the left side of our Administrator’s dashboard. Now let's take a closer look at all these possibilities.
Common interface features
Tables
Toolbar

Delete
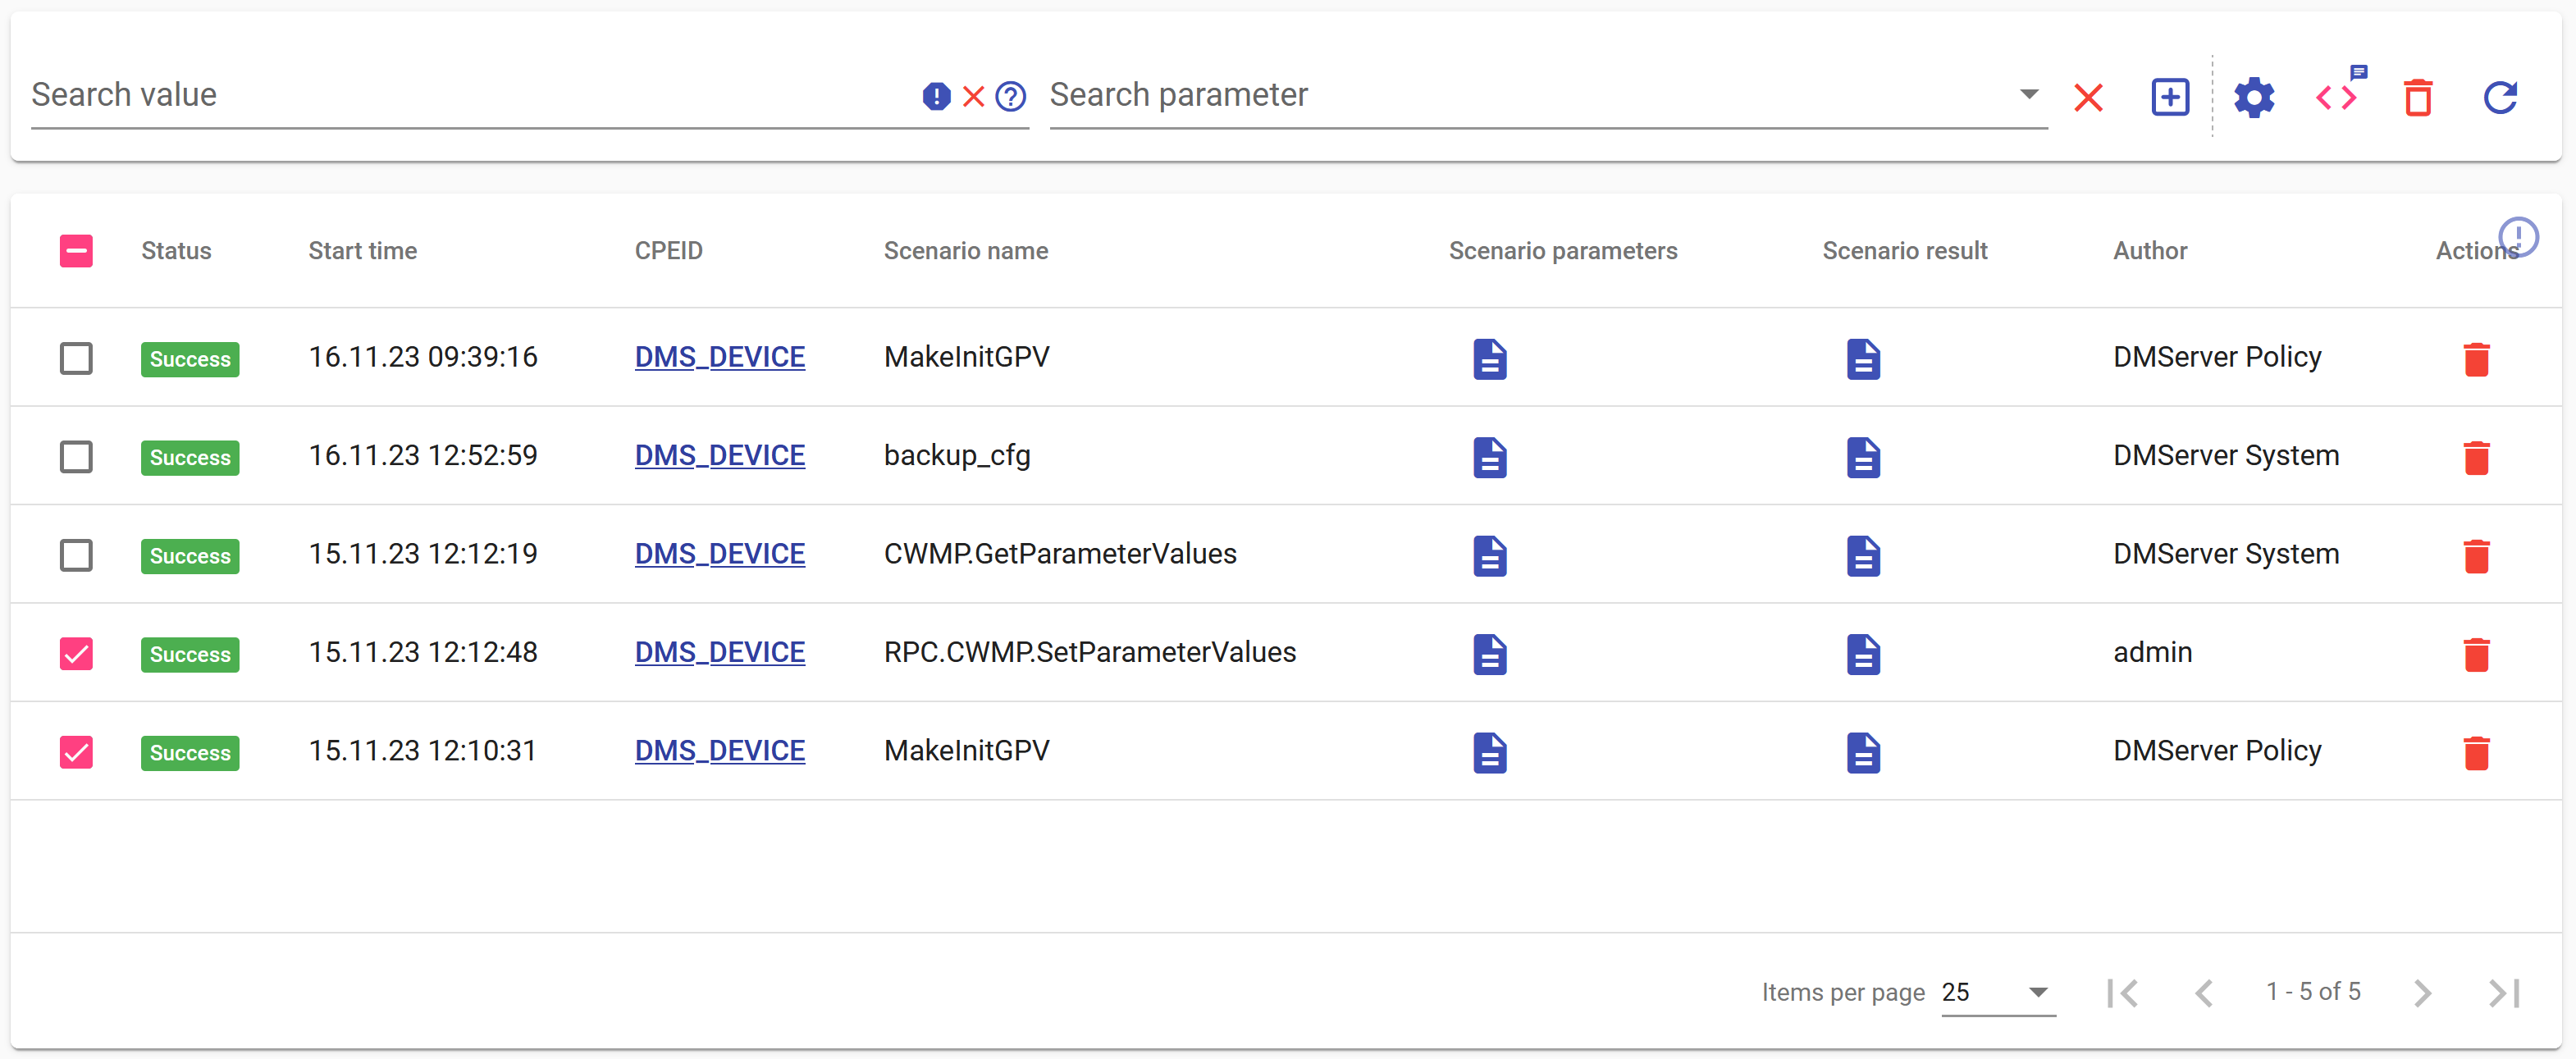
To delete one or more records from the table, select the ones you want to delete by checking the checkbox next to them. Click on the delete icon ![]() . A dialog box will appear where you can review the records to be deleted. If you are sure, confirm the deletion by clicking the "Confirm" button.
. A dialog box will appear where you can review the records to be deleted. If you are sure, confirm the deletion by clicking the "Confirm" button.
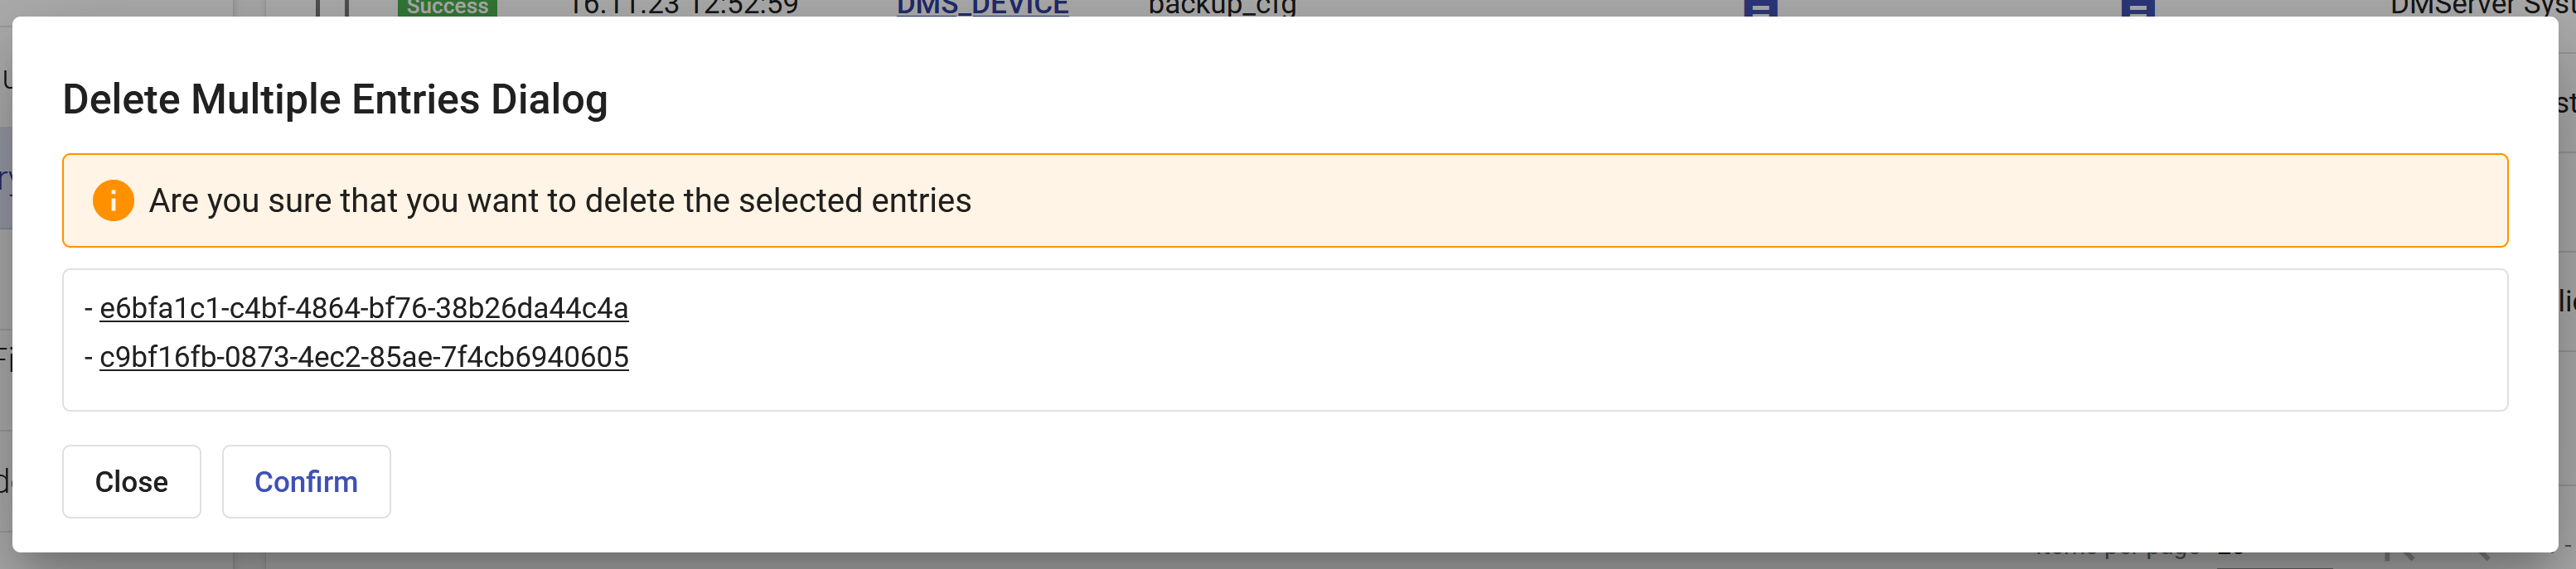

Please, be cautious when deleting records, as their restoration is not available.
Add search parameter
In this portal, you can specify more complex search parameters by adding additional fields for searching records.


Expand / Collapse json fields
Some entries may contain JSON. By default, it is in collapsed form for better readability, but you can expand these fields by clicking on ![]()
CPE Device
Table "CPEStorage"
This table contains all the devices that interacted with the DMS. As you may have noticed, it is the same table as in the support portal. Therefore, here we will discuss the differences, and for more details, please refer to the support portal section
Actions
As an administrator, you have more options. To manage entries in this table, the following action buttons are available:
- For configuration on ACS level click on the "Edit Entry"
 icon.
icon.
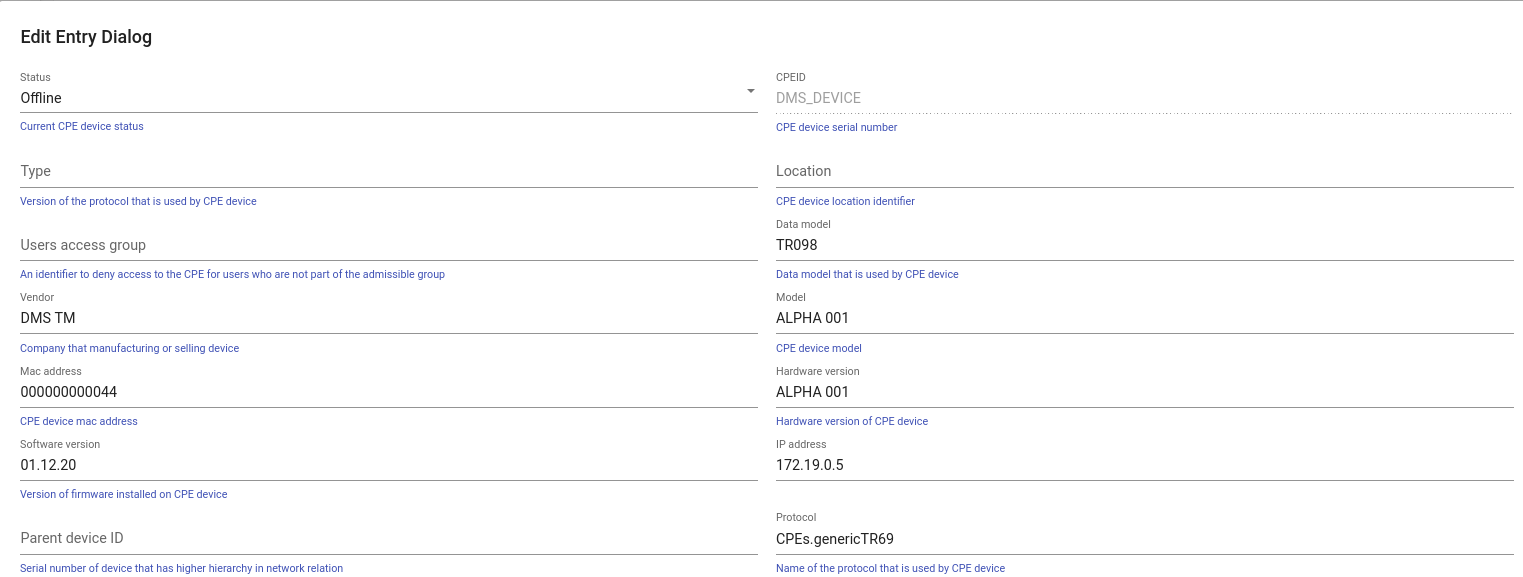 In the pop-up window you can set the required "IP address" for this device, change its "Location" or "Tags".
You can add "access group" info to CPE objects to regulate permission levels for users you create.
In the pop-up window you can set the required "IP address" for this device, change its "Location" or "Tags".
You can add "access group" info to CPE objects to regulate permission levels for users you create.
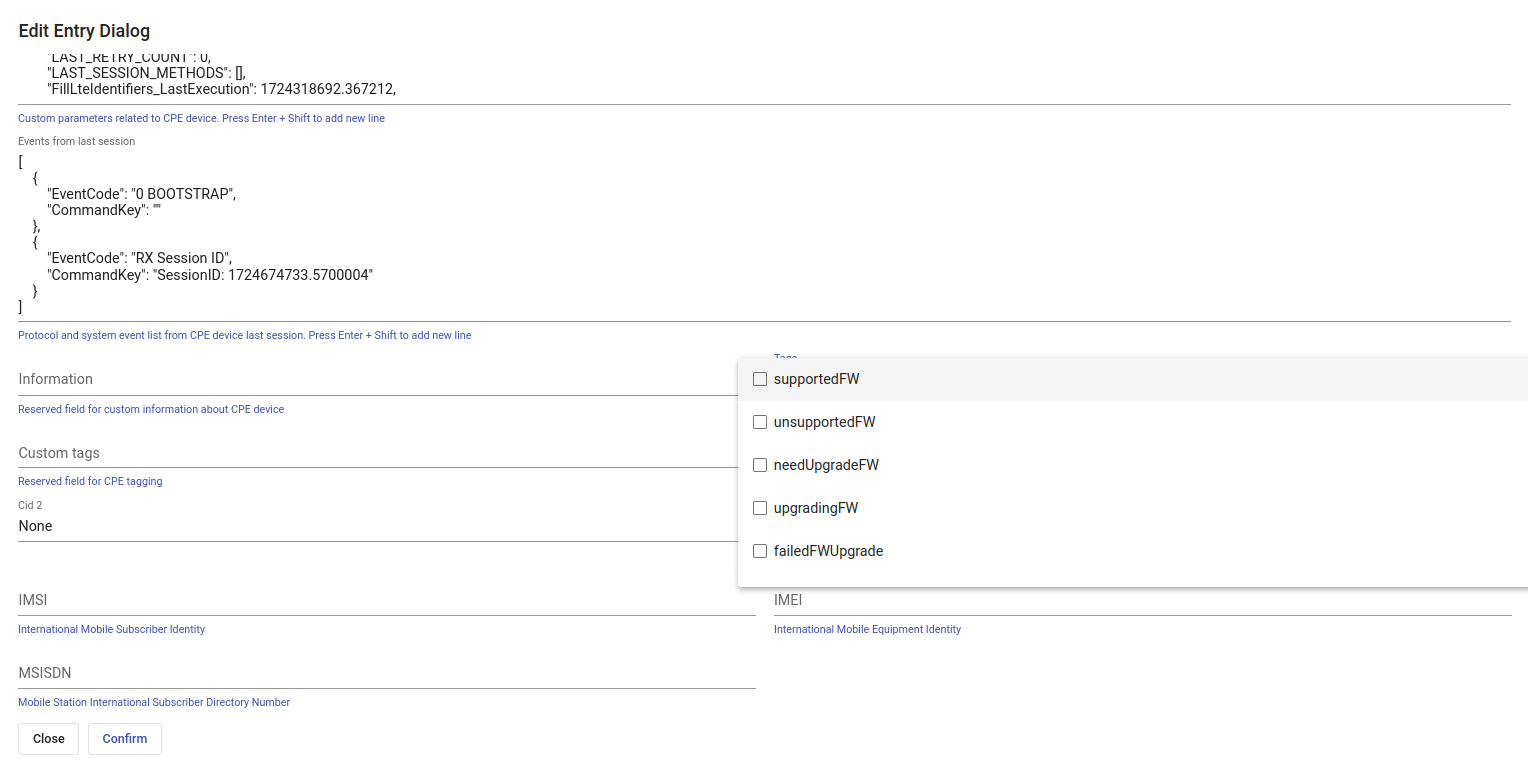 Also, here you can define custom parameters, change "CIDs", etc. To complete the operation press the "Confirm" button.
- There are cases where it is necessary to remove a device from this table, you can do this with the delete icon

- To open the device card and proceed to management, click on the gear icon
 (redirect to the Support portal).
 - Checkbox (To delete a group of entries)
Search
The search in the table works according to the description in this section
Campaigns
"Campaign" is an RPC call for multiple devices selected based on specific parameters.
Table "CampaignStorage"
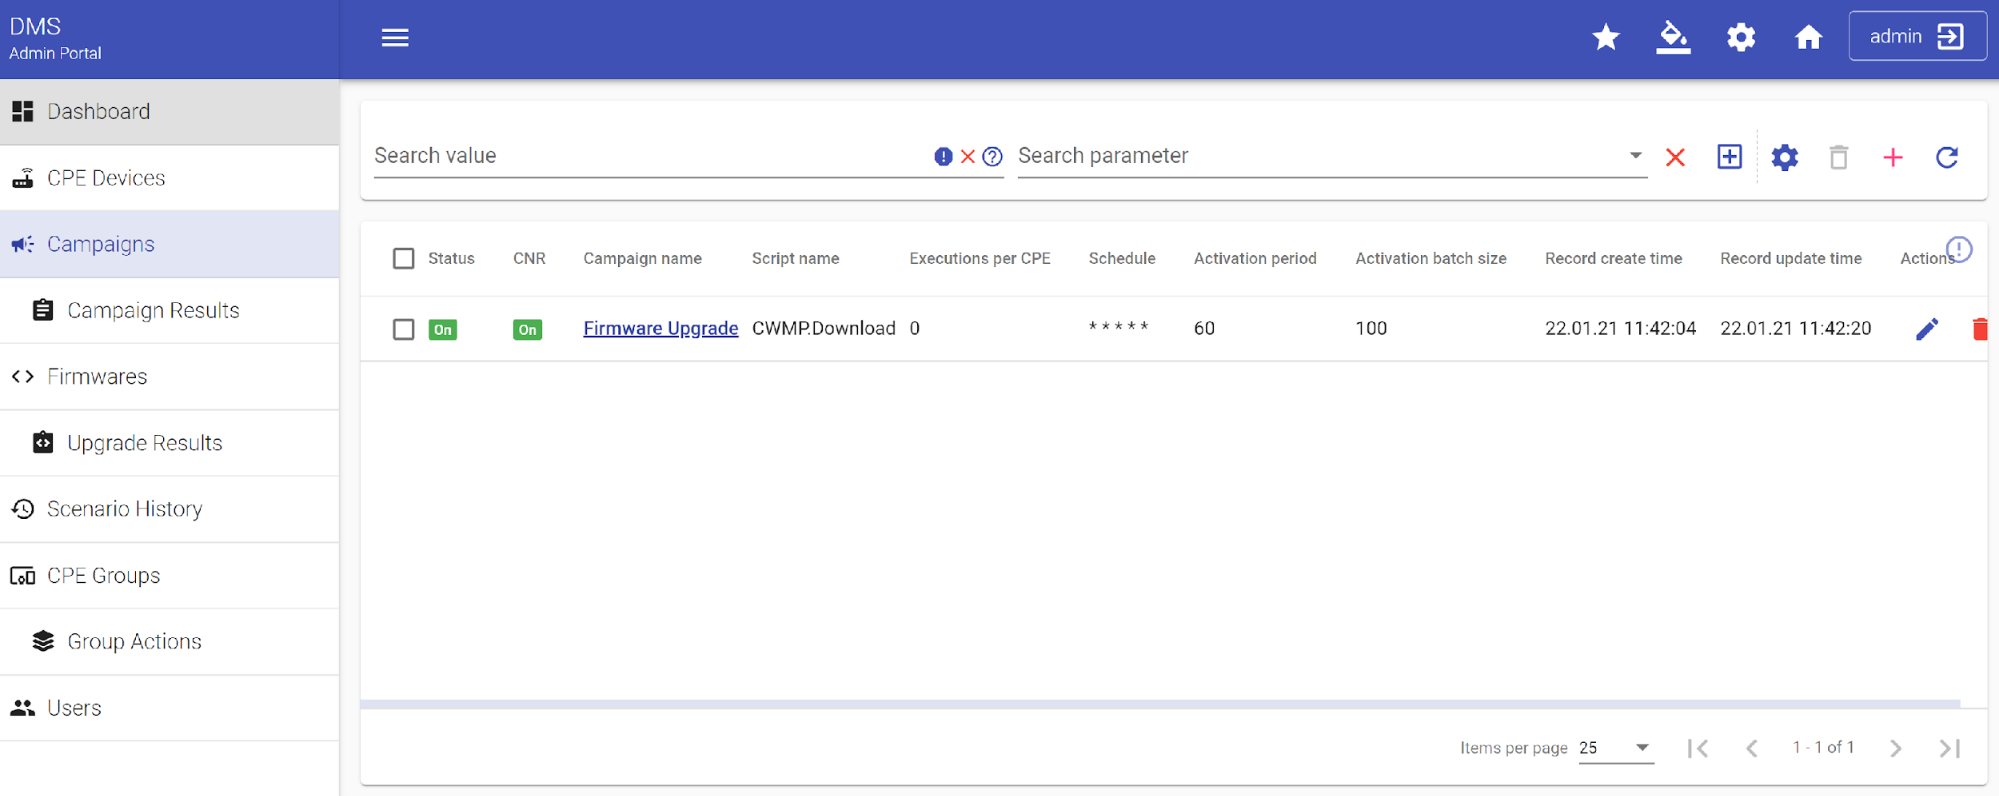
Here are your campaigns. Each entry in the table characterizes a Campaign through Status and other fields.
Actions
- To edit a created Campaign, as well as to enable or disable it, click on the edit icon.
- If a Campaign is no longer needed, you can delete it by clicking on the delete icon.
- Checkbox (To delete a group of entries)
Toolbar
To create new Campaign: Click on "Add new entry" icon ![]()
Search
The search in the table works according to the description in this section
Next section provides you with information about all already configured Campaigns and gives you a step-by-step tutorial on creating the new ones.
How to create Campaign
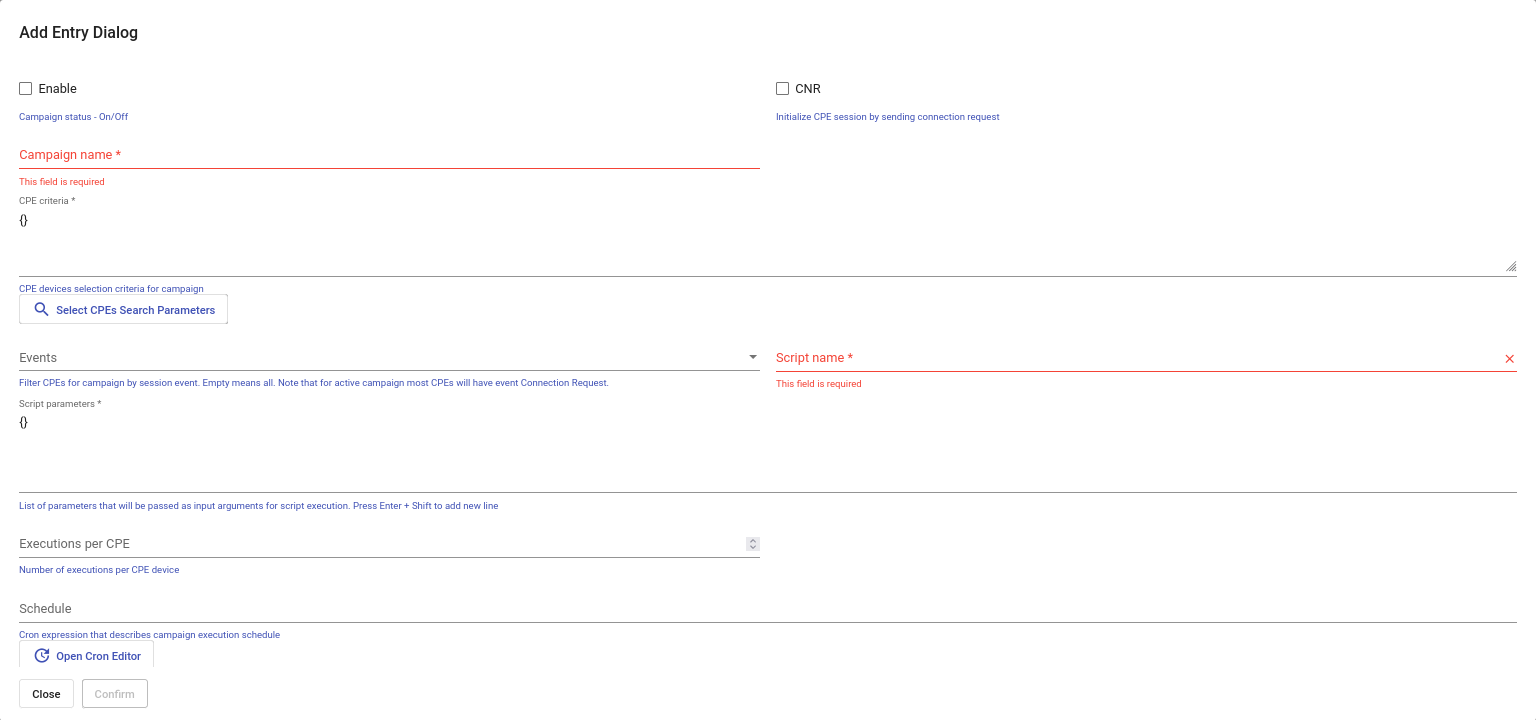
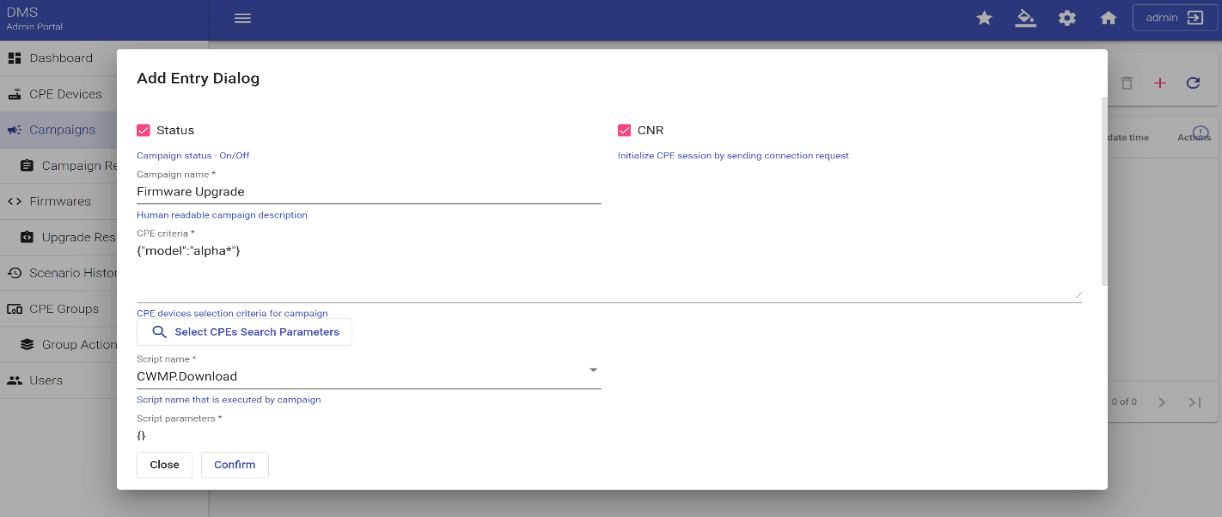
In the pop-up window fill in all information (required fields are indicated by a red color).
The available fields and their descriptions
| Field | Format | Description |
|---|---|---|
| "Enable" | Checkbox | Enables or disables the campaign |
| "CNR" | Checkbox | Whether to initialize CPE session by sending connection request or not |
| "Campaign Name" | String | Mandatory field, name assigned to the created campaign |
| "CPE Criteria" | JSON | Specify what CPEs to apply campaign to; can be filled manually or through separate "Select CPE's Search Parameters" window (example below) |
| "Events" | List of checkboxes | Filter CPEs for campaign by session event. Empty means all. Note that for active campaign most CPEs will have event Connection Request |
| "Script name" | Campaign | Select desirable campaign from the list of available campaigns |
| "Script parameters" | JSON | List of parameters that will be passed as input arguments for script execution |
| "Executions per CPE" | Number | Number of executions per CPE device |
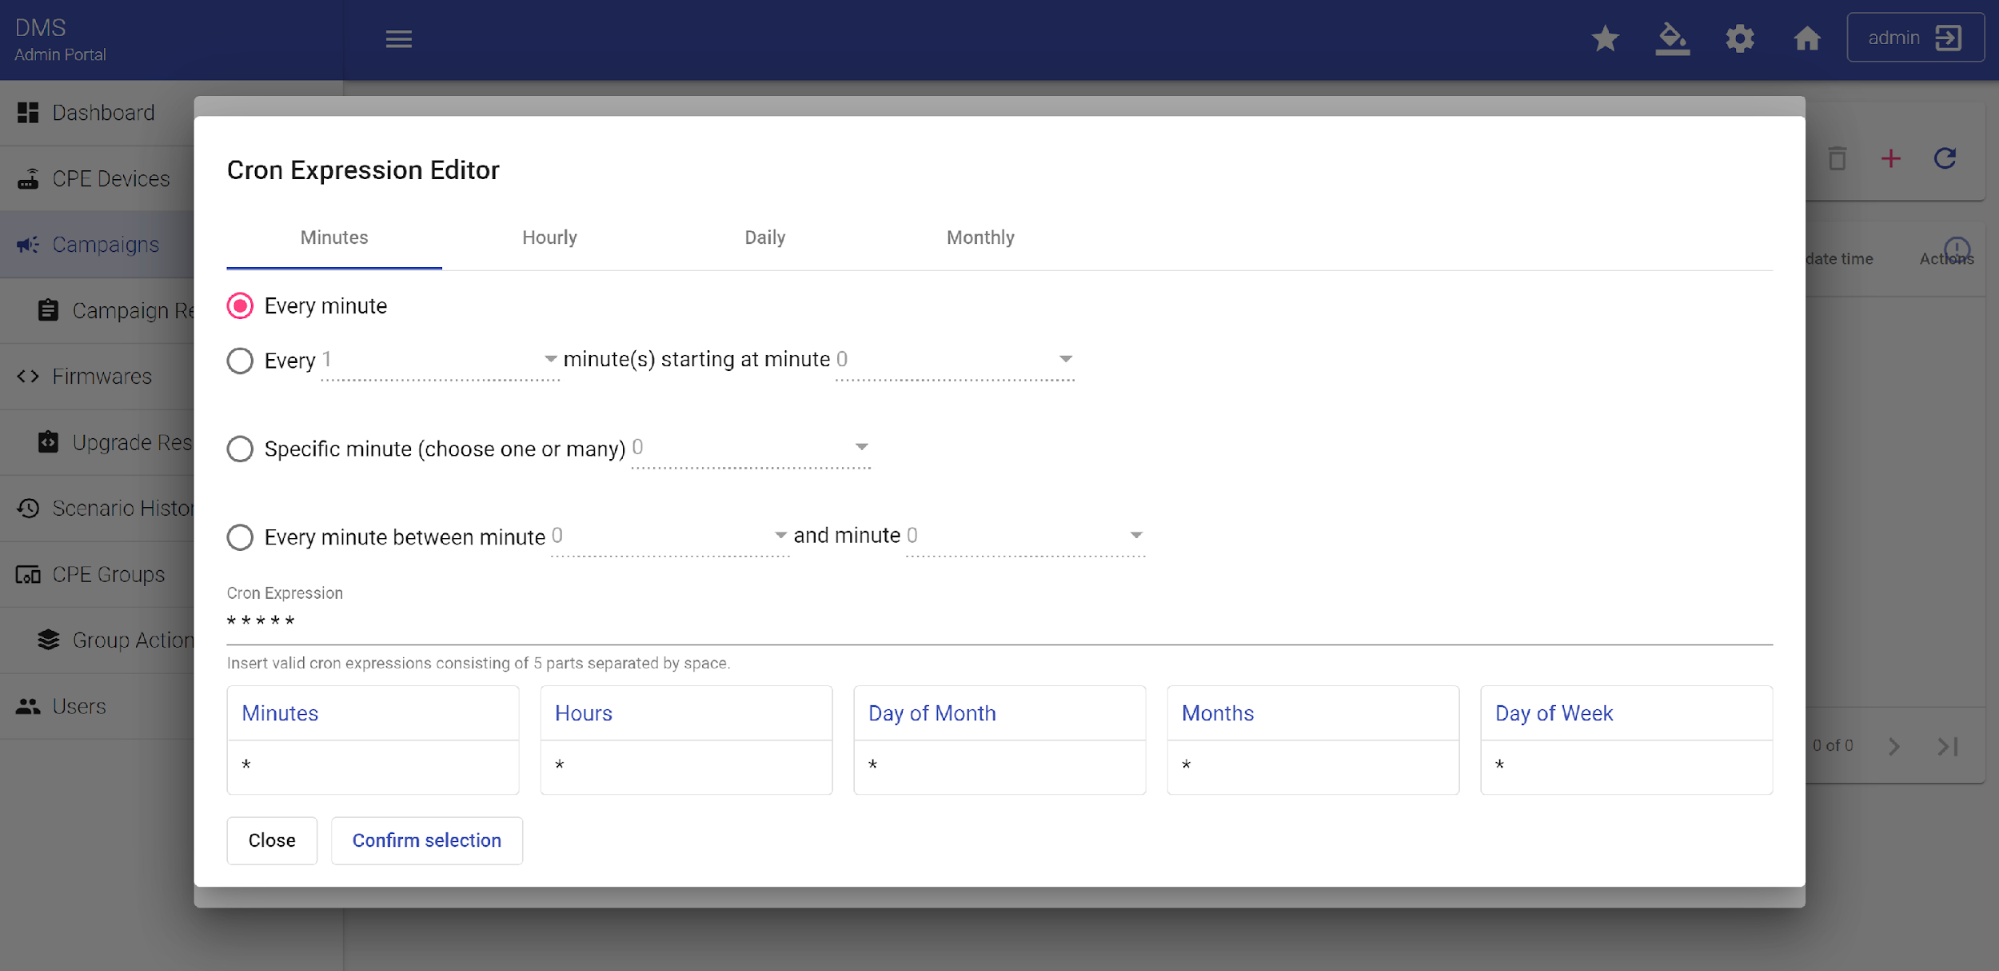
| "Schedule" | Expression | Cron expression that describes campaign execution schedule. Editable through "Open Cron Editor" window (example below) |
| "Activation period" | Number | Campaign activation interval in seconds. Applies to both connection request throttling (if CNR enabled) and pacing of parallel executions on CPE devices |
| "Activation batch size" | Number | Number of CPE devices that will be called during one activation period. Applies to both connection request throttling (if CNR enabled) and controlling the number of parallel executions on CPE devices |
| "Campaign execution priority" | Number | Priority sets the order of campaign execution on CPE. Lower value means higher priority |
Examples
Example №1 (Campaign creation example)
Mandatory fields "Campaign name" and "Script name"
Scripts descriptions can be found in Scenarios Section of this guide
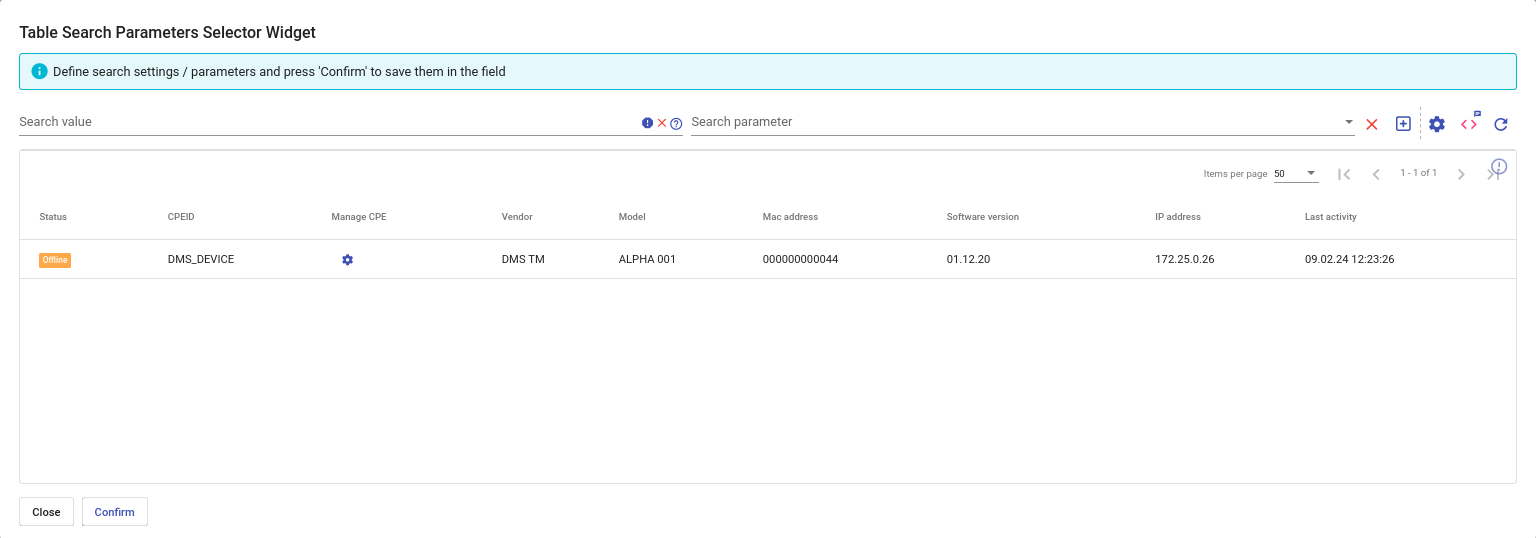
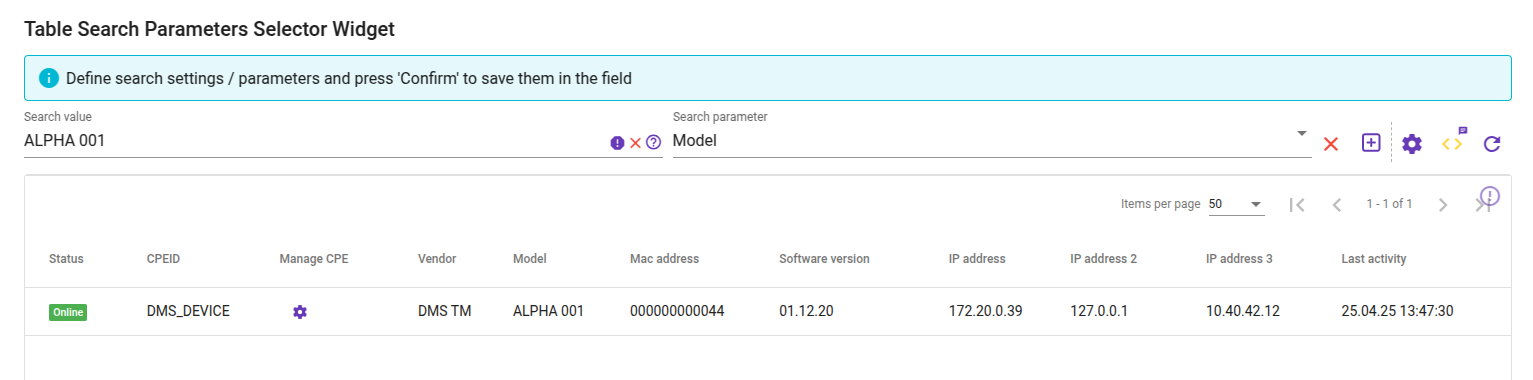
"CPE criteria" separate "Select CPE's Search Parameters" window
Other fields like "Script parameters", "Events", "Number of executions per CPE device", "Schedule" and "Activation period" etc.
"Events" parameters presented as in official technical report and can be found here in Table 8.
To establish the campaign execution schedule open "Cron Editor" and specify time of execution
Then activate "Status of campaign" and "CNR" if you want immediate application, and
Press the "Confirm" button to complete the operation. New Entry will be added and included in the chart of existing campaigns
Later, during the application of this campaign, you can edit the record ![]() by applying new parameters or correct existing data, and also delete campaign
by applying new parameters or correct existing data, and also delete campaign ![]() if its application is no longer relevant.
if its application is no longer relevant.
Example №2 (Configuring NTP Servers on CPE Devices)
This example demonstrates how to create a Campaign to configure Network Time Protocol (NTP) servers on CPE (Customer-Premises Equipment) devices. Proper time synchronization on devices ensures accurate logging, scheduling, and system operation.
To begin, create a new entry in the table in "Campaigns" menu by clicking on ![]() .
.
Enter a name for the Campaign:

Specify the selection criteria for which the Campaign should apply to CPE devices. For example, you can target all devices of a specific model, such as "ALPHA 001":

You can also use the Select "CPE's Search Parameters" popup to filter devices by other attributes:
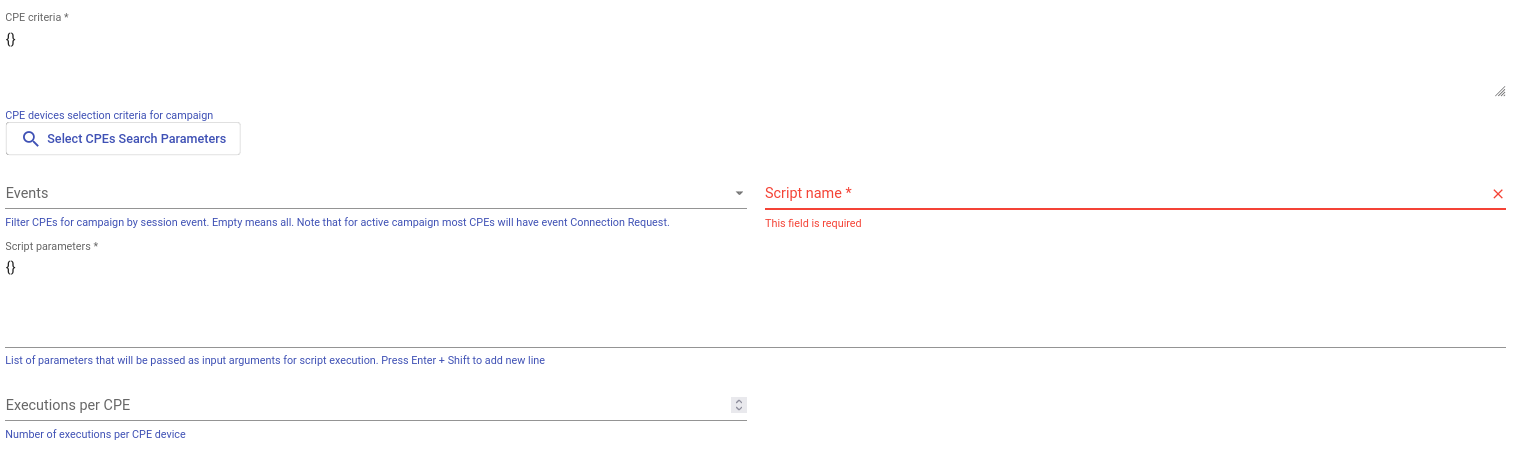
In the next step, choose the CWMP event that will trigger the Campaign. In this example, it is "2 PERIODIC" — a recurring event that occurs on the CPE based on its internal schedule.
Next, select the "CWMP.SetParameterValues" scenario, which allows you to define configuration parameters for the device. Provide the necessary NTP server parameters in JSON format. A complete list of available scenarios is provided in the Scenarios Section.
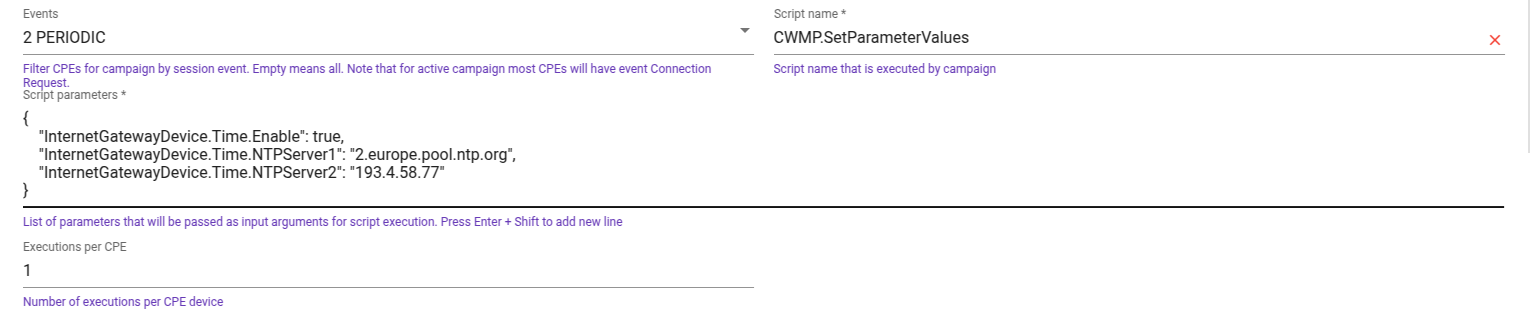
The following parameters are used in this example:
{
  "InternetGatewayDevice.Time.Enable": true,
  "InternetGatewayDevice.Time.NTPServer1": "2.europe.pool.ntp.org",
  "InternetGatewayDevice.Time.NTPServer2": "193.4.58.77"
}
These parameters enable the time synchronization service on the device and define two NTP sources — one by domain name and the other by IP address.
Set the "Executions per CPE" field to 1 to ensure the Campaign runs only once on each device.
To activate the Campaign, check the "Enable" checkbox:

Click Confirm to save and activate the Campaign.
Once executed, the Campaign will automatically configure the specified NTP servers on the devices, and their system time will be synchronized accordingly. This improves the reliability of logging and overall system stability.
Campaigns Results
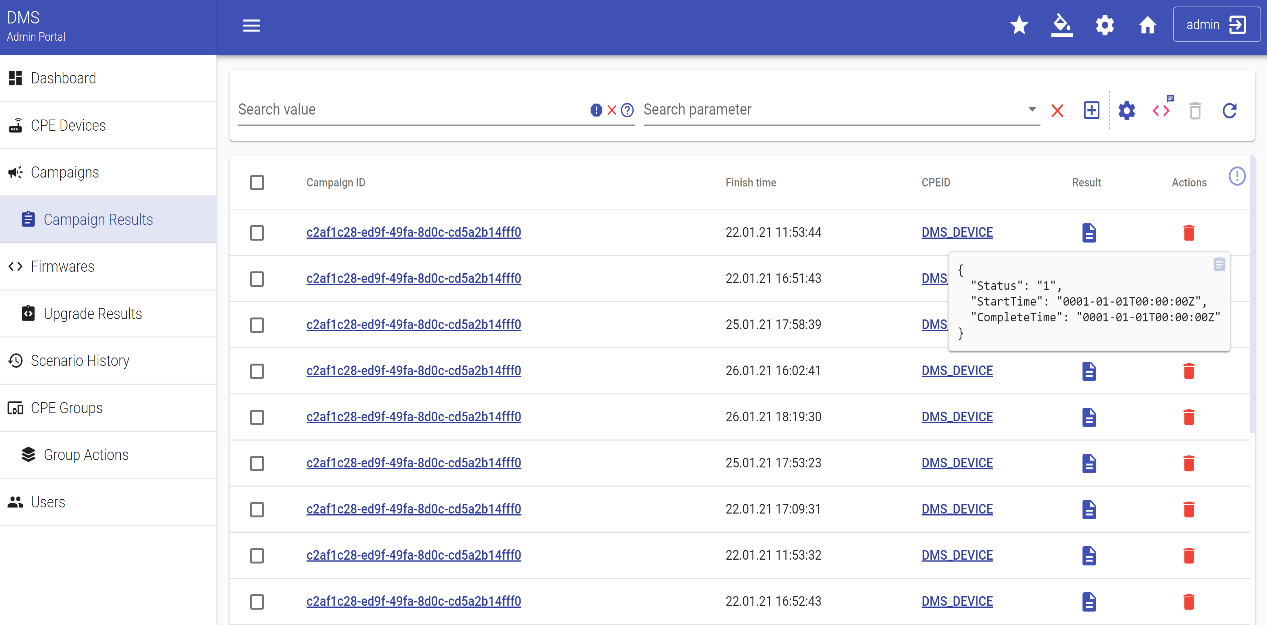
Table "CampaignResultStorage"
This section lists the logs of all executed campaigns. The results table shows all campaigns either in active or inactive phase. The table header contains the following columns that facilitate its use and work in general, their number can be configured using our standard Table configurator ![]() :
:
- "Campaign ID" (unique Record identifier)
- "Finish time" (time of campaign execution)
- "CPE ID" (unique identifier of CPE device)
- "Result" (summary of the campaign execution), and
- "Actions" (available for this record actions)

Actions
- You can find out the result of its execution by clicking on "Results"

- You can delete this Campaign from the table by clicking on "Delete" icon

- Checkbox (To delete a group of entries)
Search
The search in the table works according to the description in this section
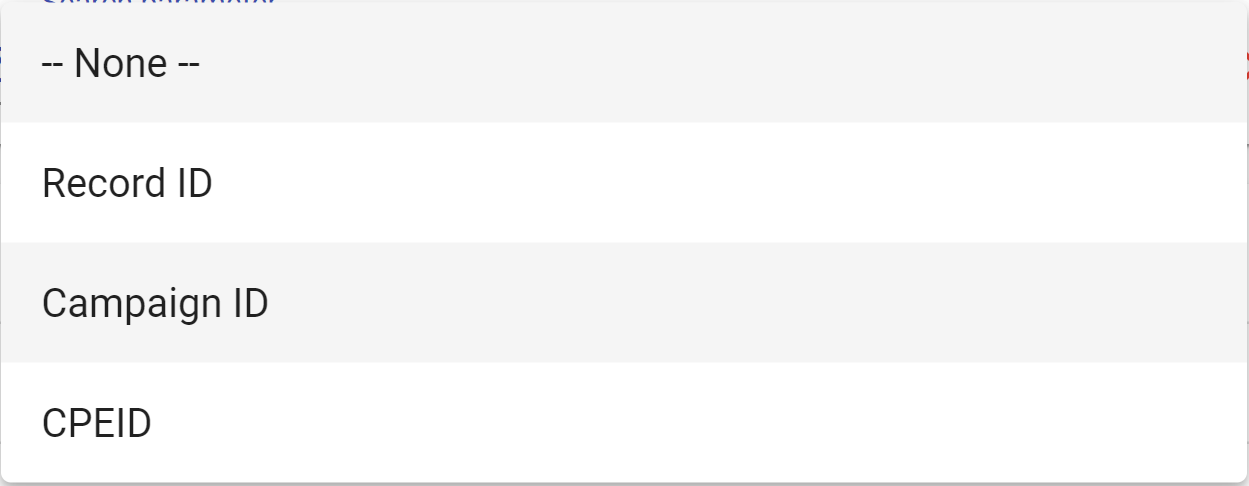
| Parameter | Meaning |
|---|---|
| Record ID | |
| Campaign ID | |
| CPEID |
 -->
-->
Firmwares
This section represents a specific campaign designed specifically for updating firmware for a group of your devices.
This section of Admin Portal describes the procedure for creating firmware upgrades and searching for required upgrades by certain parameters or values.
To create new FW upgrade rule, click on "Add new entry" key ![]() .
.
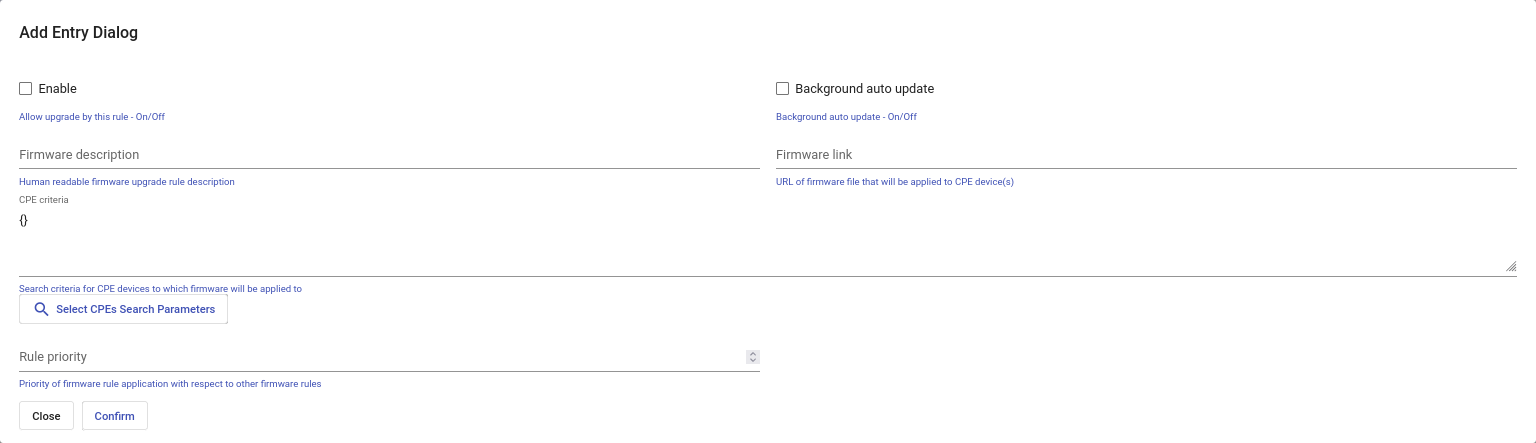
Inside the pop-up window specify:
- FW Link (just the filename for the FW files loaded on the ACS file server or the full URL for FW files hosted on an external file server);
- FW description;
- CPE criterion (the condition to be matched to apply the FW. The option “Select CPEs” facilitates the creation of the desired matching rule);
- Rule priority (the higher figure corresponds to the higher priority).
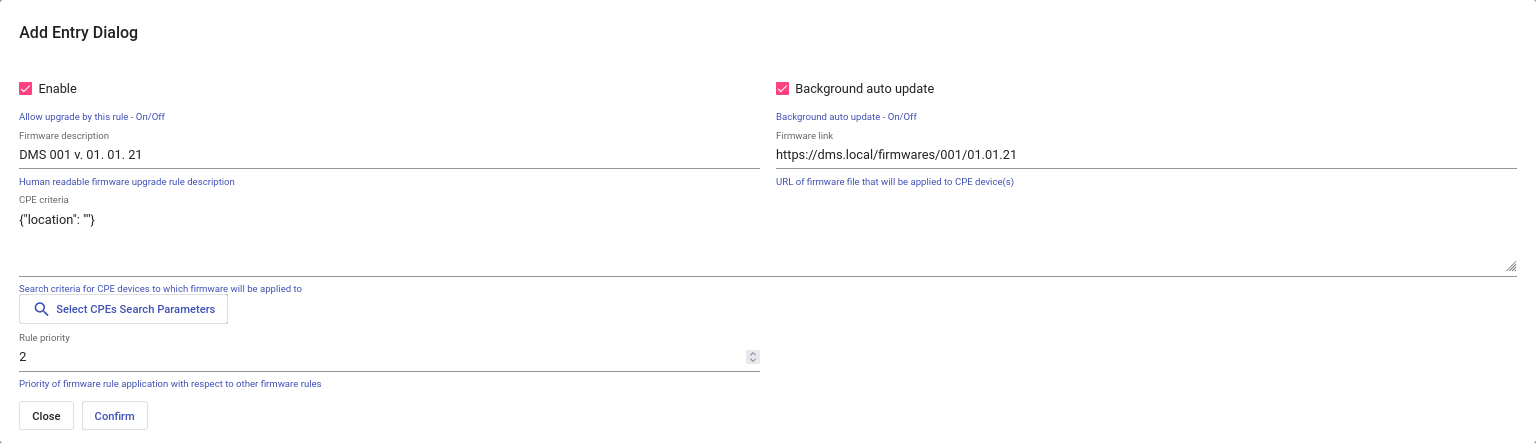
To activate the FW upgrade rule, enable the option “Background Auto-Update Enabled”. If enabled, any CPE contacting the ACS and matching the upgrade rule will be upgraded.
To complete procedure press "Confirm" button.
If you need to find a specific firmware upgrade among the already implemented, this can be done either by certain parameters or values. Click on the "Search parameter" drop down menu and select the required option. The list of parameters include: "Firmware ID", "Status", "Background auto update", "Firmware description", "Firmware link" "Author", "Editor".
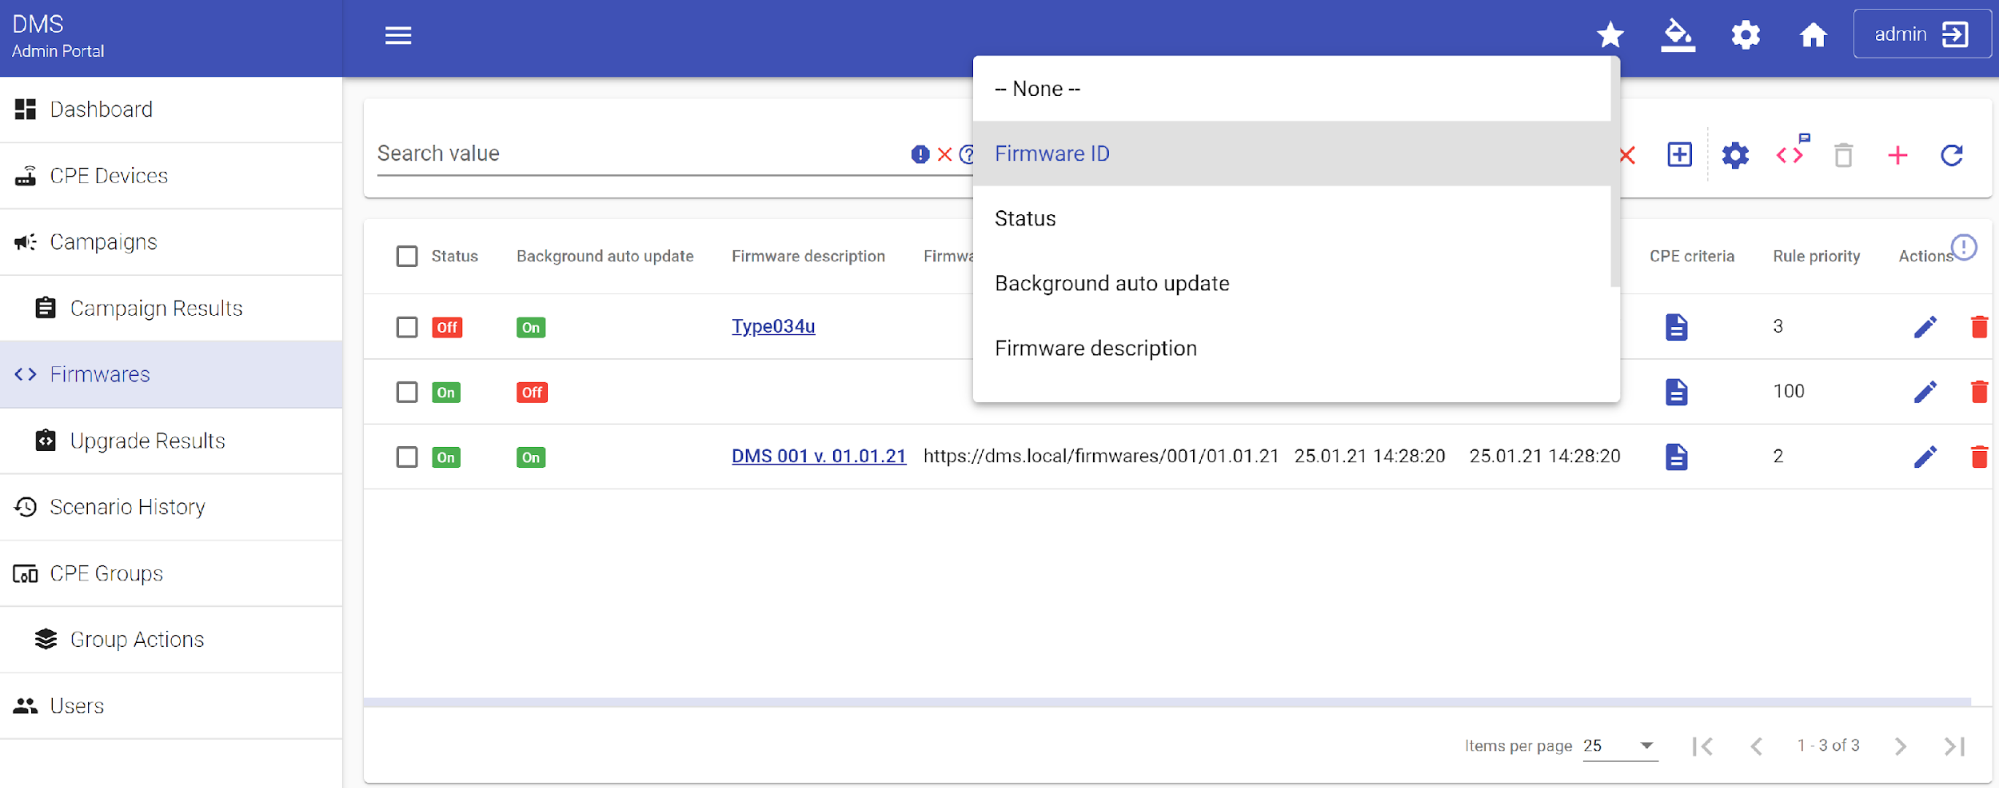
You can also search by "Search value", in this case, you can search by postfix (search_value*), prefix (*search_value) or both variants (*search_value*). It is also possible to search by exclusion (!search_value) by pressing the 'Enable \'Not equal\' operator' button. If your search value contains whitespace (ex - 'Huawei Inc') replace it with underline (ex - 'Huawei_Inc').
There are three principal ways of applying the firmware upgrade rule after you create it depending on the marked checkboxes:
- Enable: on, Background auto update: on
In that case FW upgrade rule will be applied next time the selected CPEs interacts with the ACS.
- Enable : on, Background auto update : off
In that case your FW upgrade rule will be applied next time the Campaign with "Campaigns.ApplyFirmwareUpgradeRules" script will be executed, with consideration to "CPE criteria" of the campaign. It should be noted that you can specify different FW upgrade options for different CPEs, but activate them all at the same time with one execution of said campaign.
- Enable: off
Use that case if you want to create FW upgrade rule for future and don't want it to be active yet.
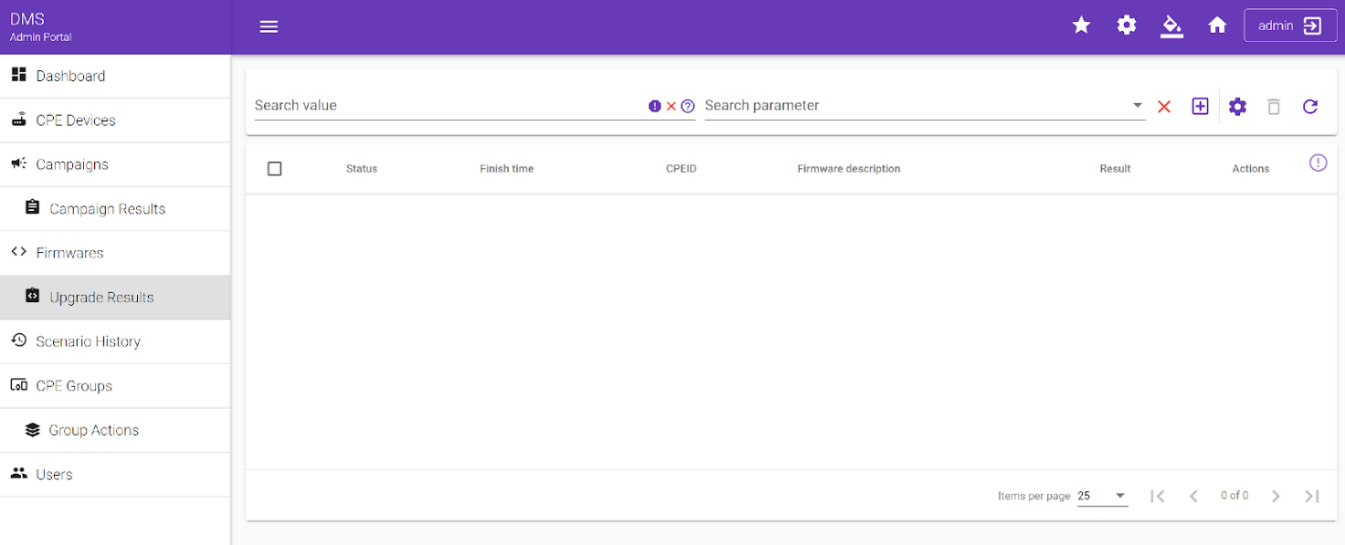
Upgrade Results
This section lists the logs of executed upgrade rules, specifying:
- "Status" (status of firmware upgrade procedure)
- "Finish time" (time of execution of firmware upgrade)
- "CPE ID" (unique CPE device serial number)
- "Firmware description" (specifies the description of firmware upgrade rule)
- "Result" (describes the result of firmware upgrade procedure execution)
- "Actions" (specifies the actions available for this record)
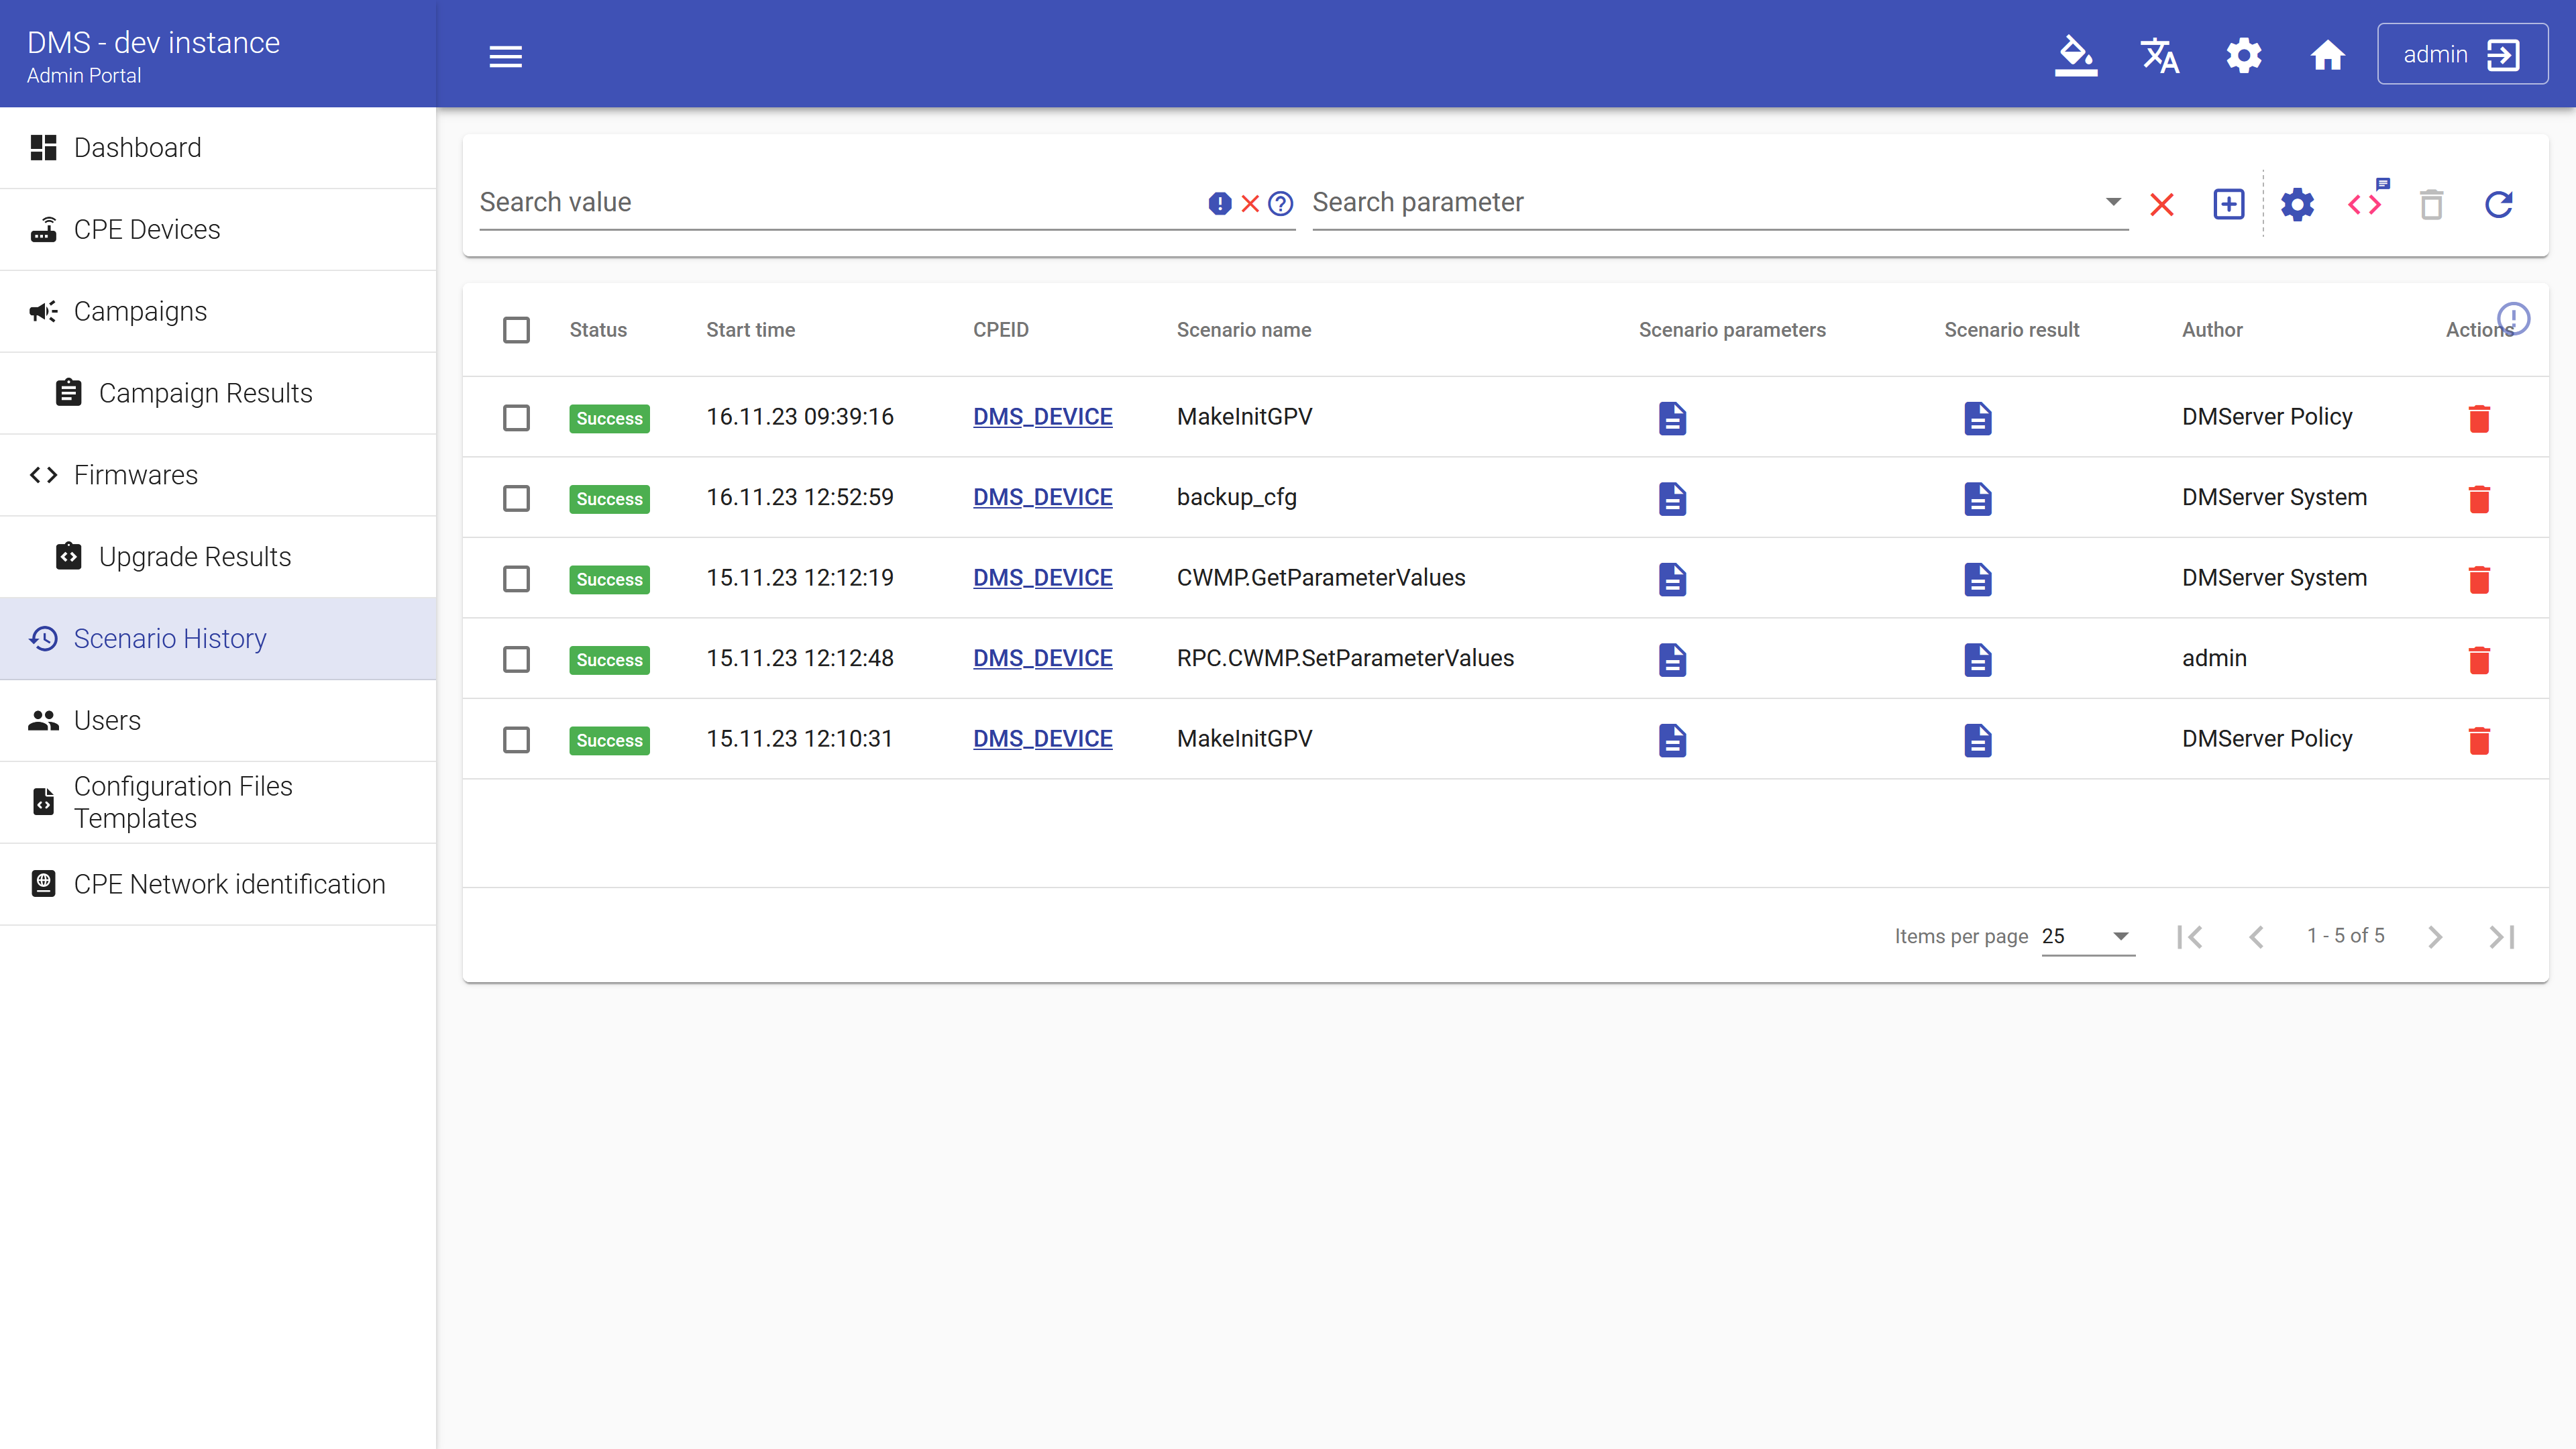
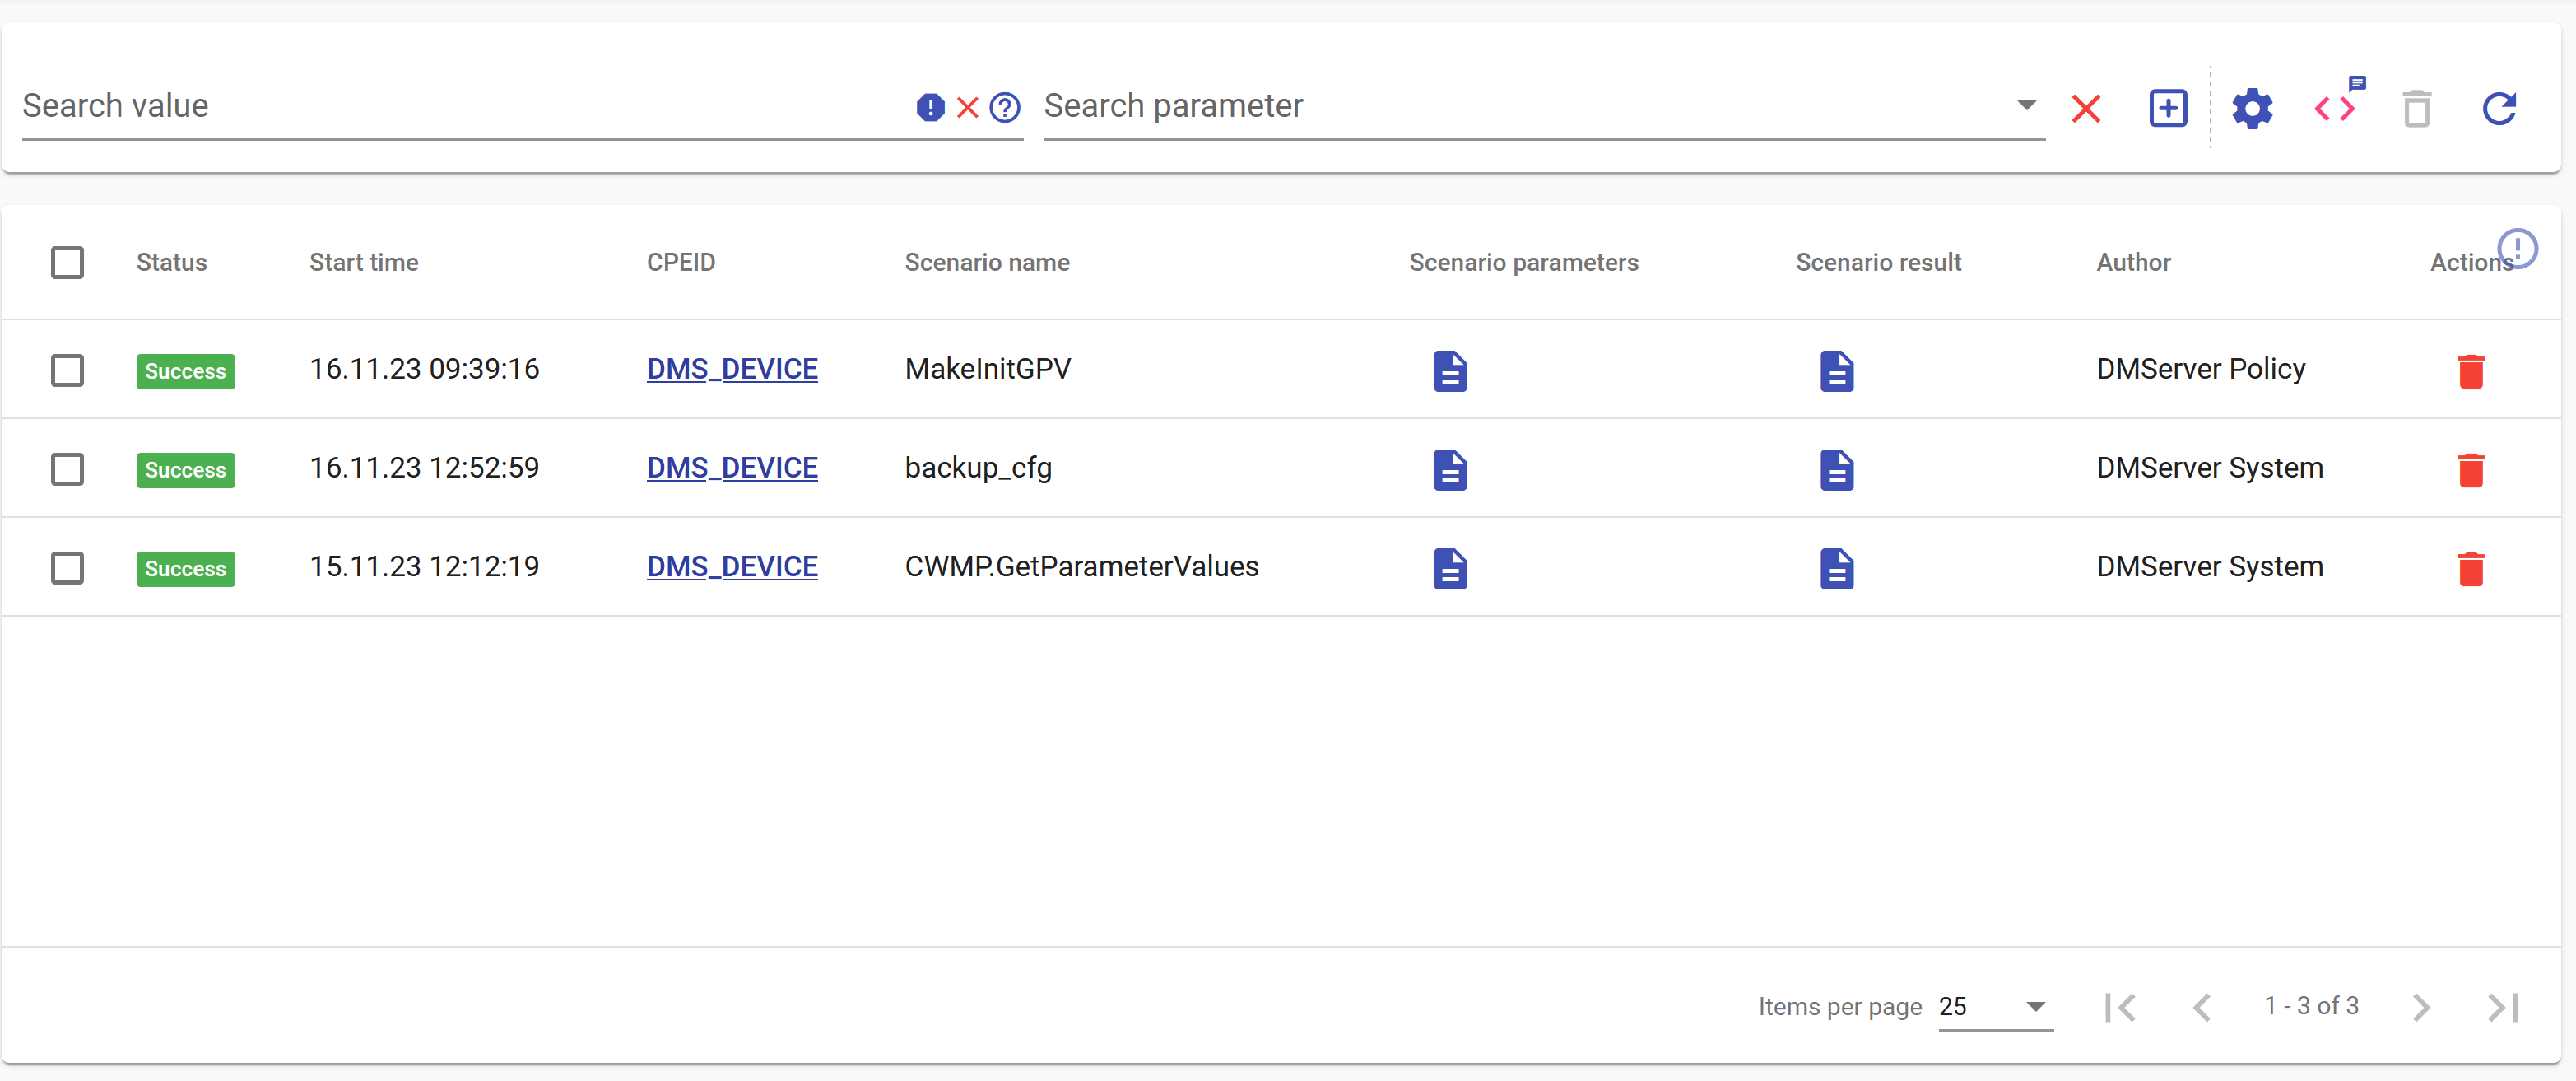
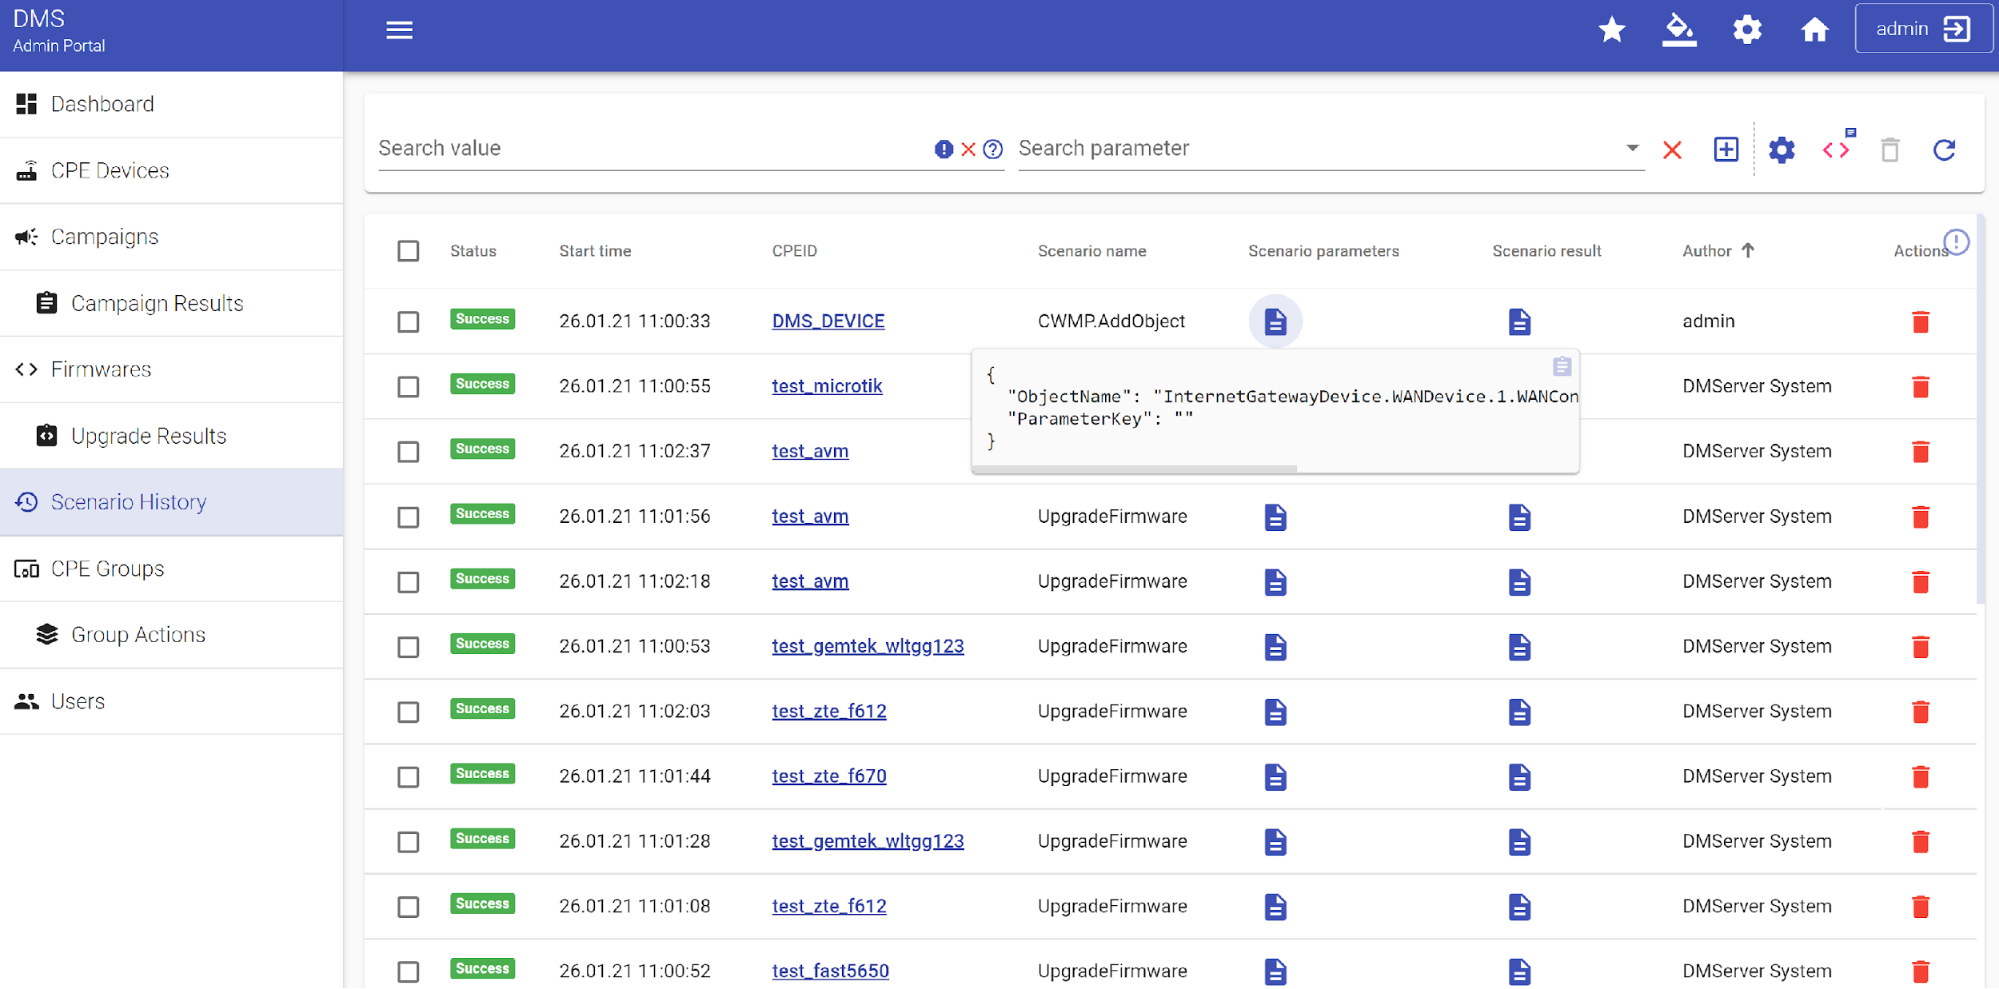
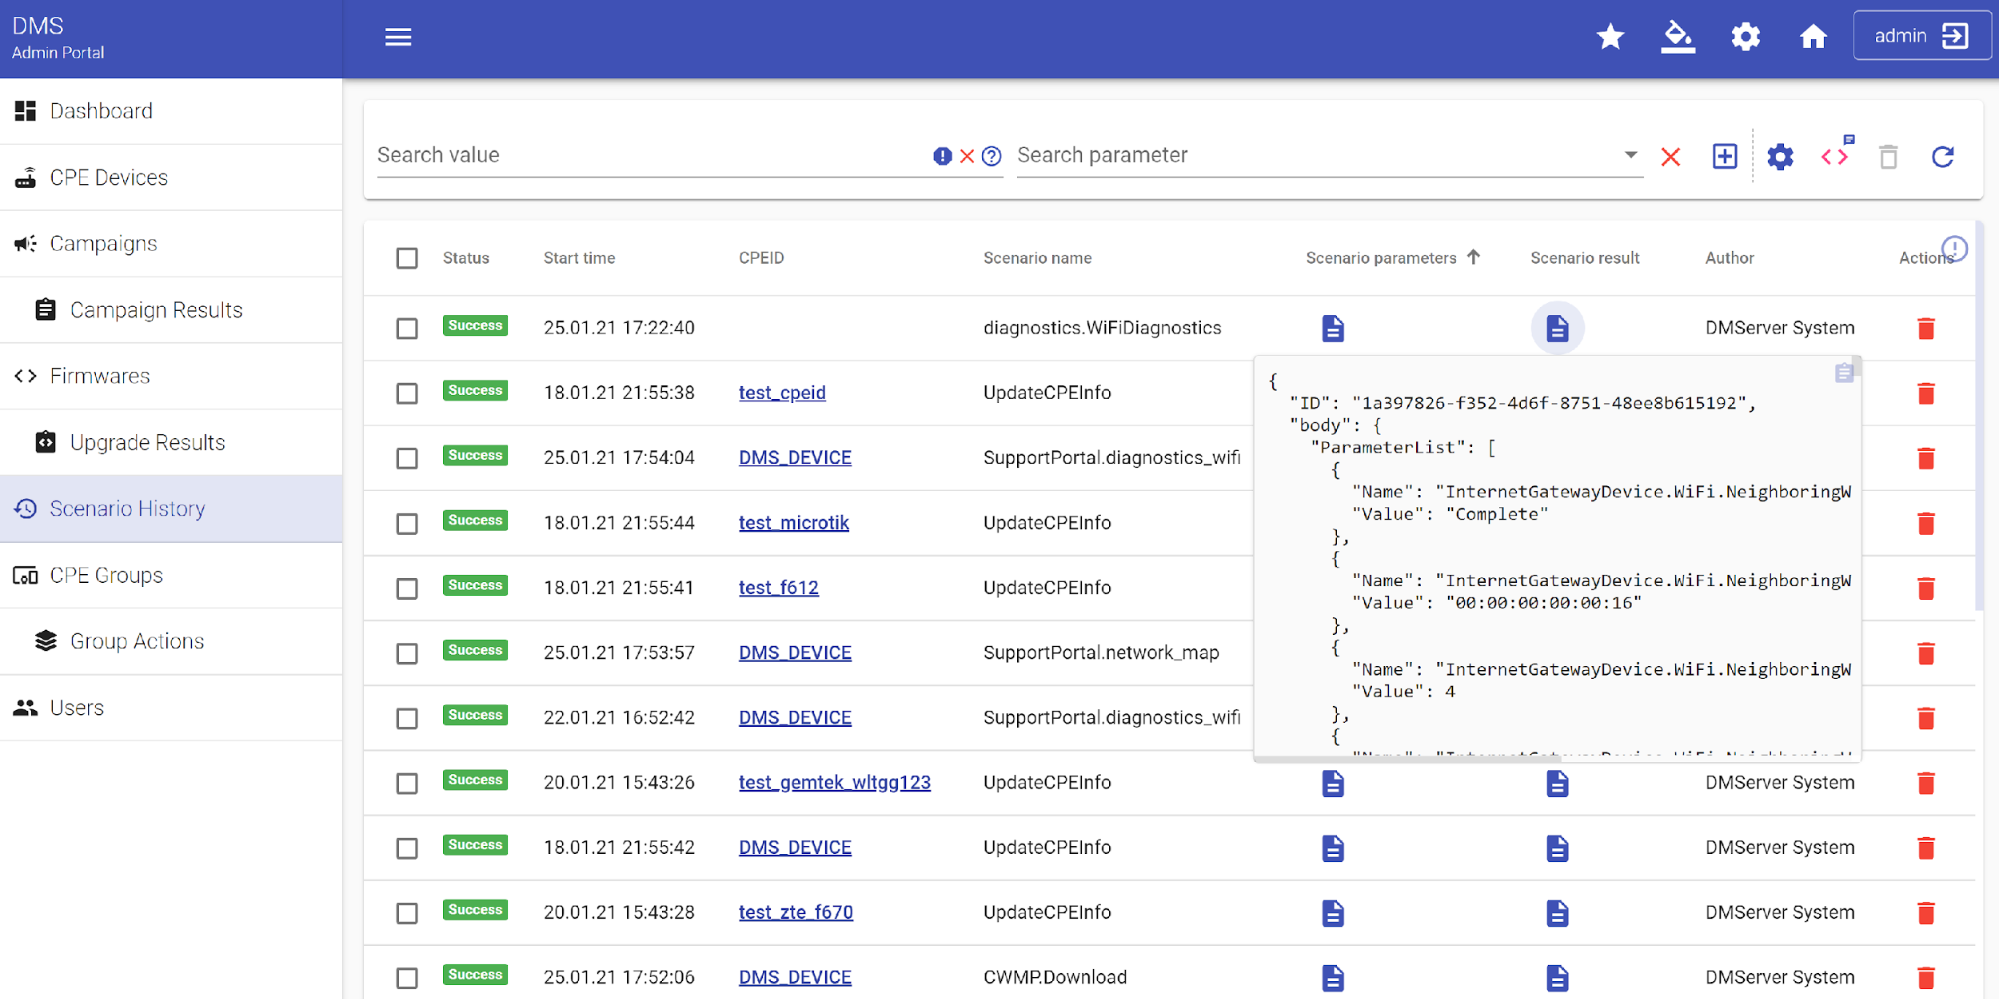
Scenario History
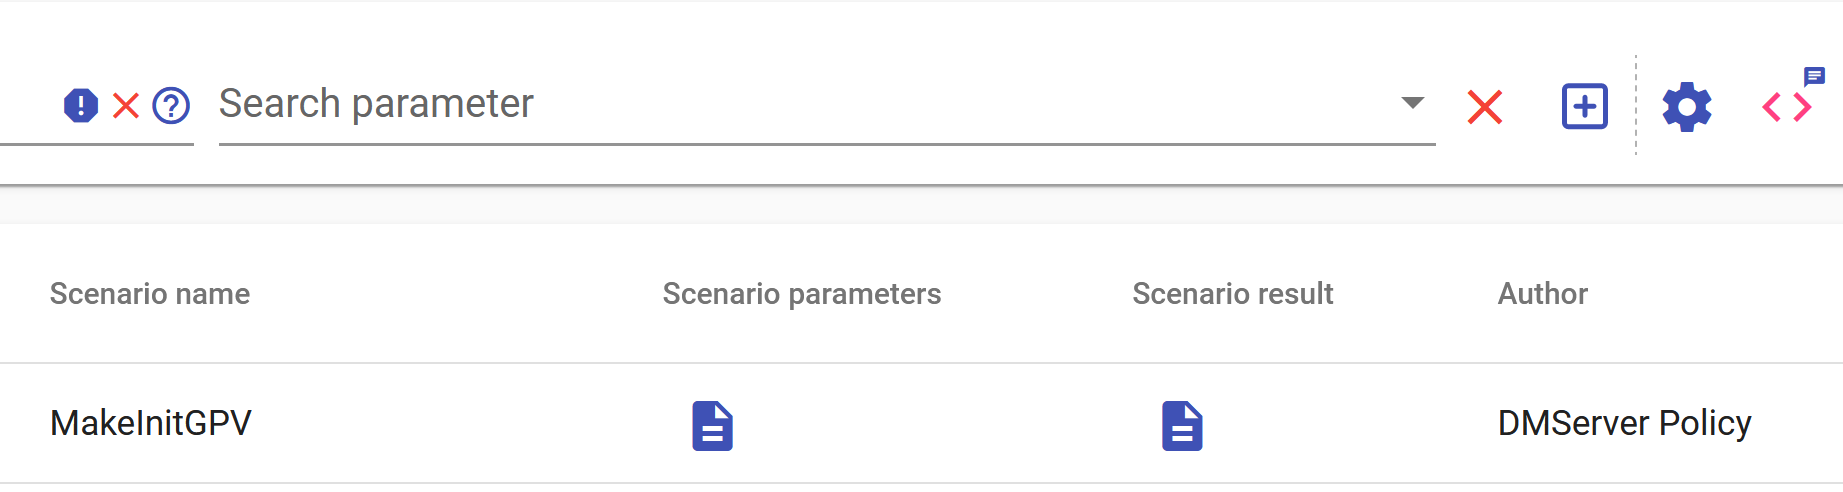
In this section you can see the history of executed scenarios, the time and results of their execution ("Success"/"Failed"), serial number of CPE devices to which these scenarios were applied, identifying name of every scenario and its parameters and also the author, who initiated the execution process.
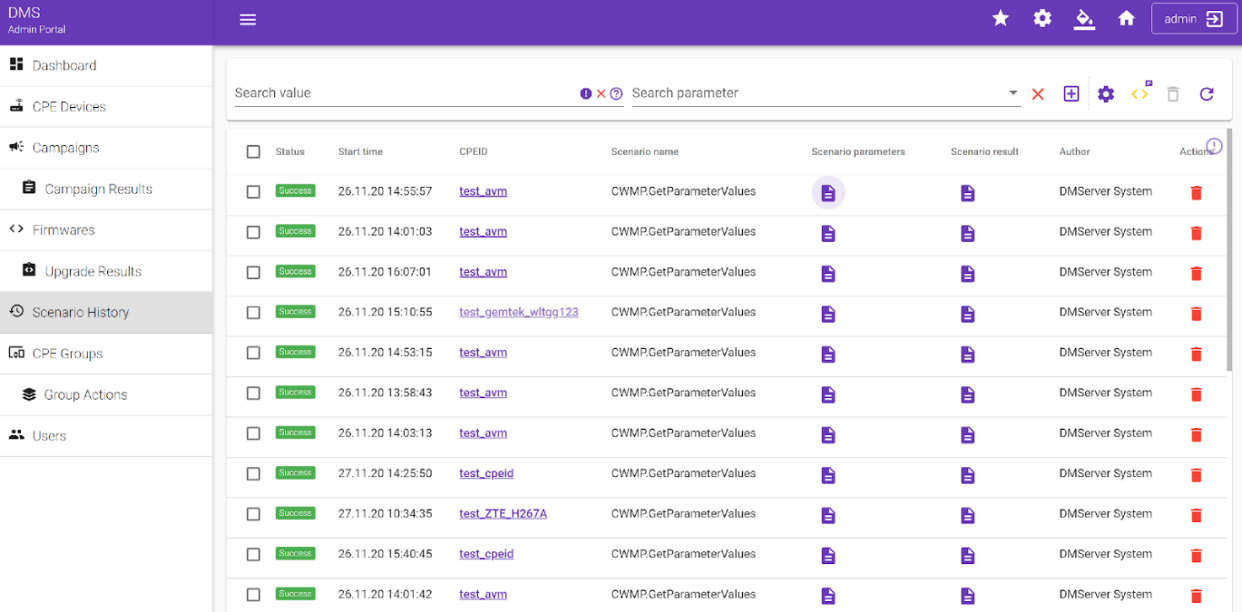
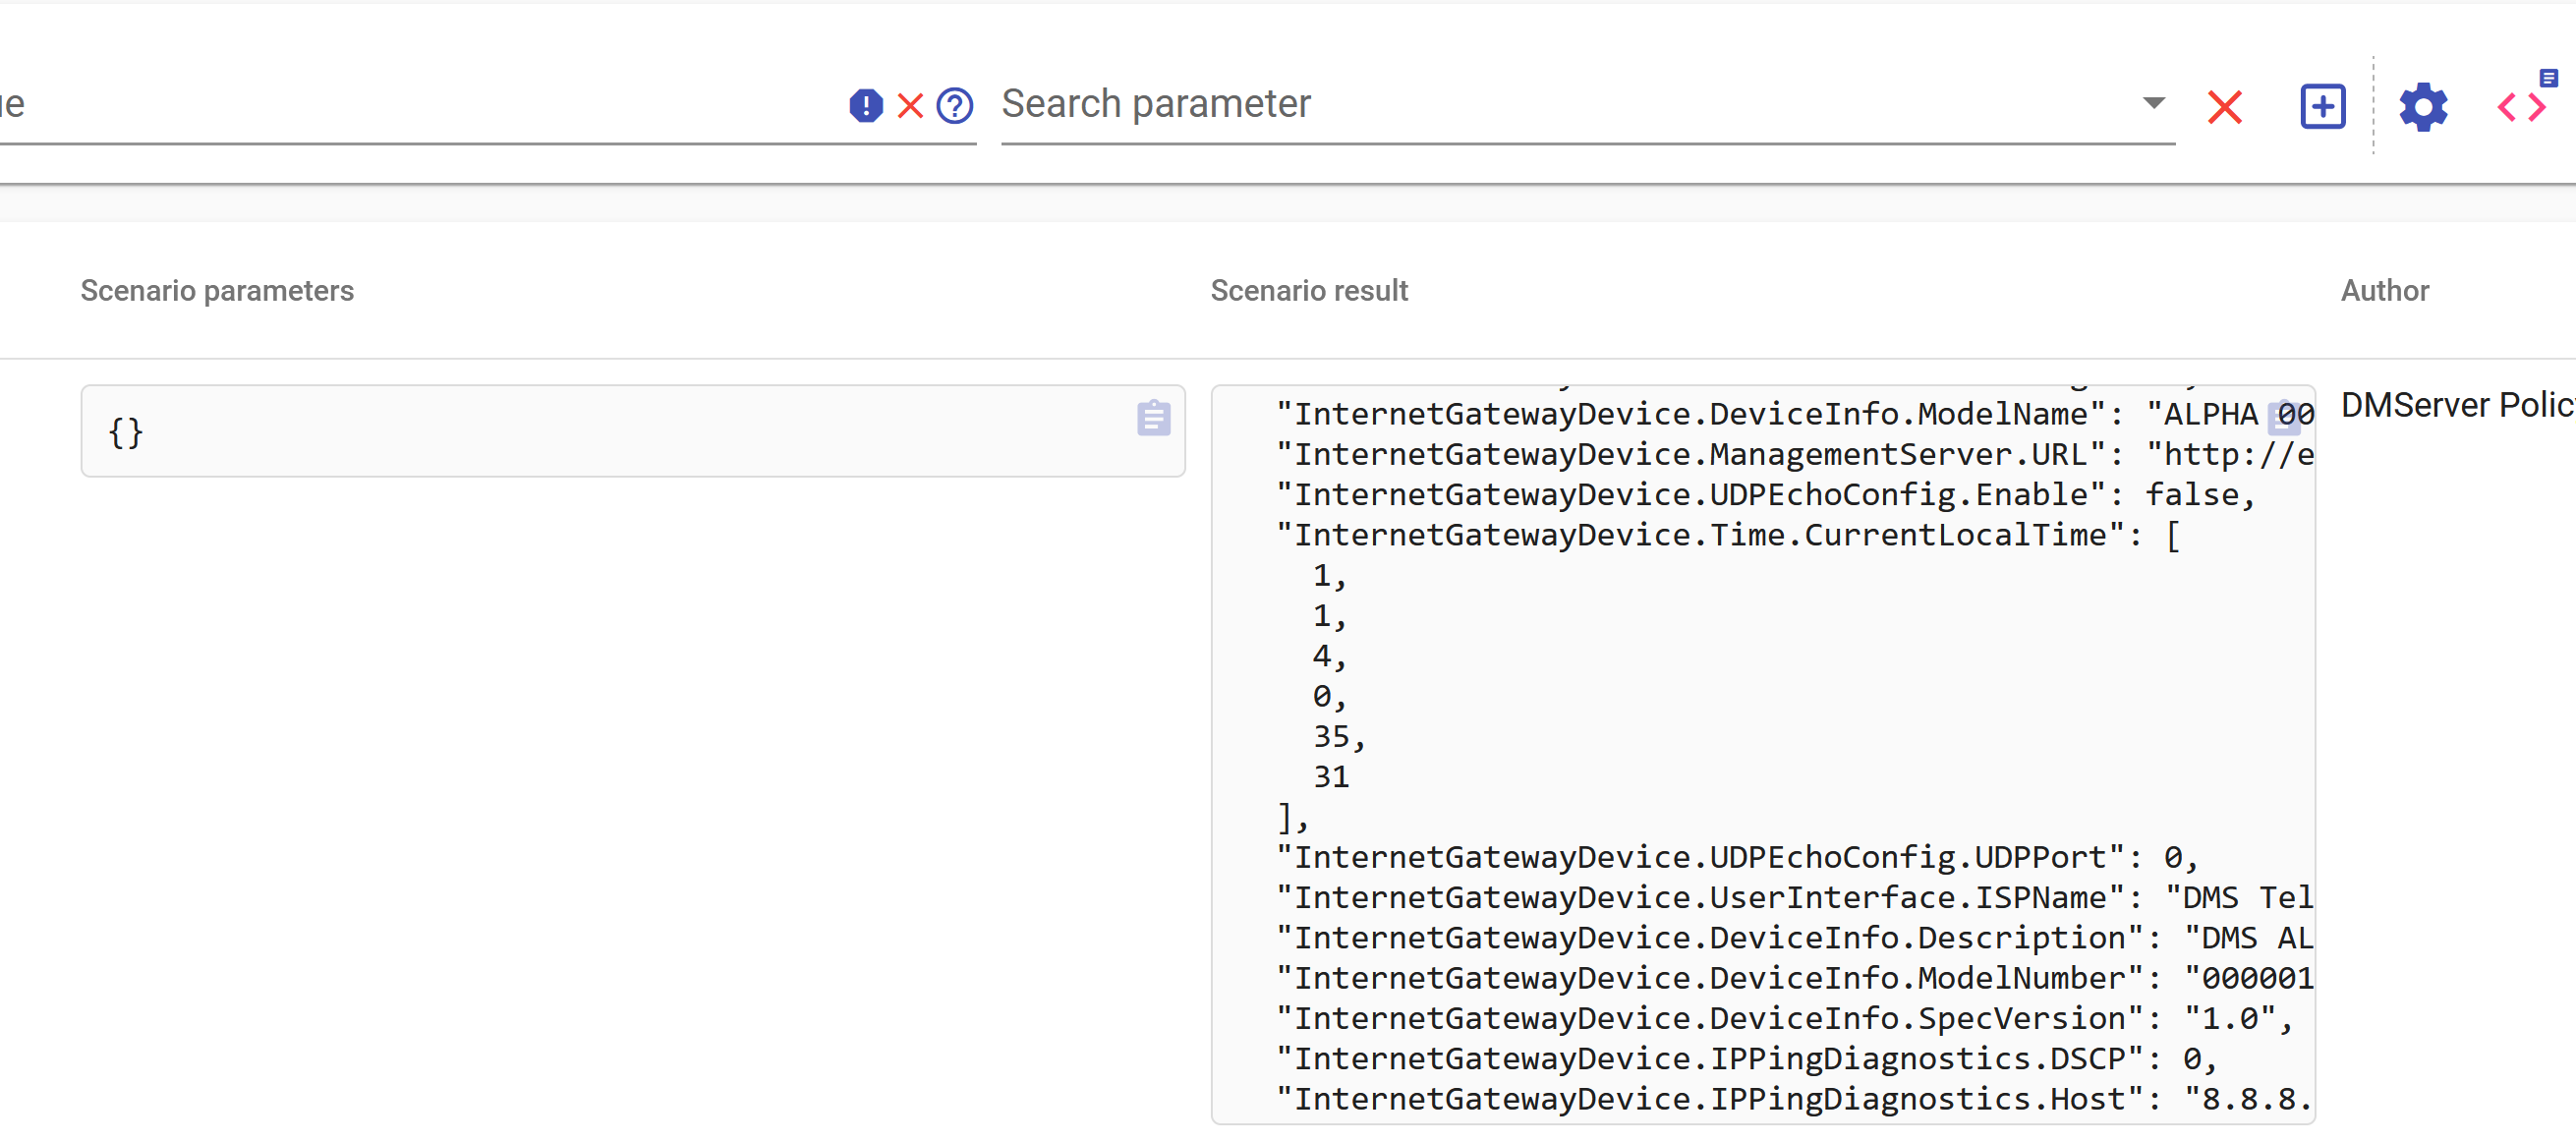
You can analyze scenario parameters in the pop-up window and in the same way to see scenario results.
In case you don’t need the information about the current scenario anymore, you can delete this entry from the scenario history database using the "Actions" ![]() icon.
icon.
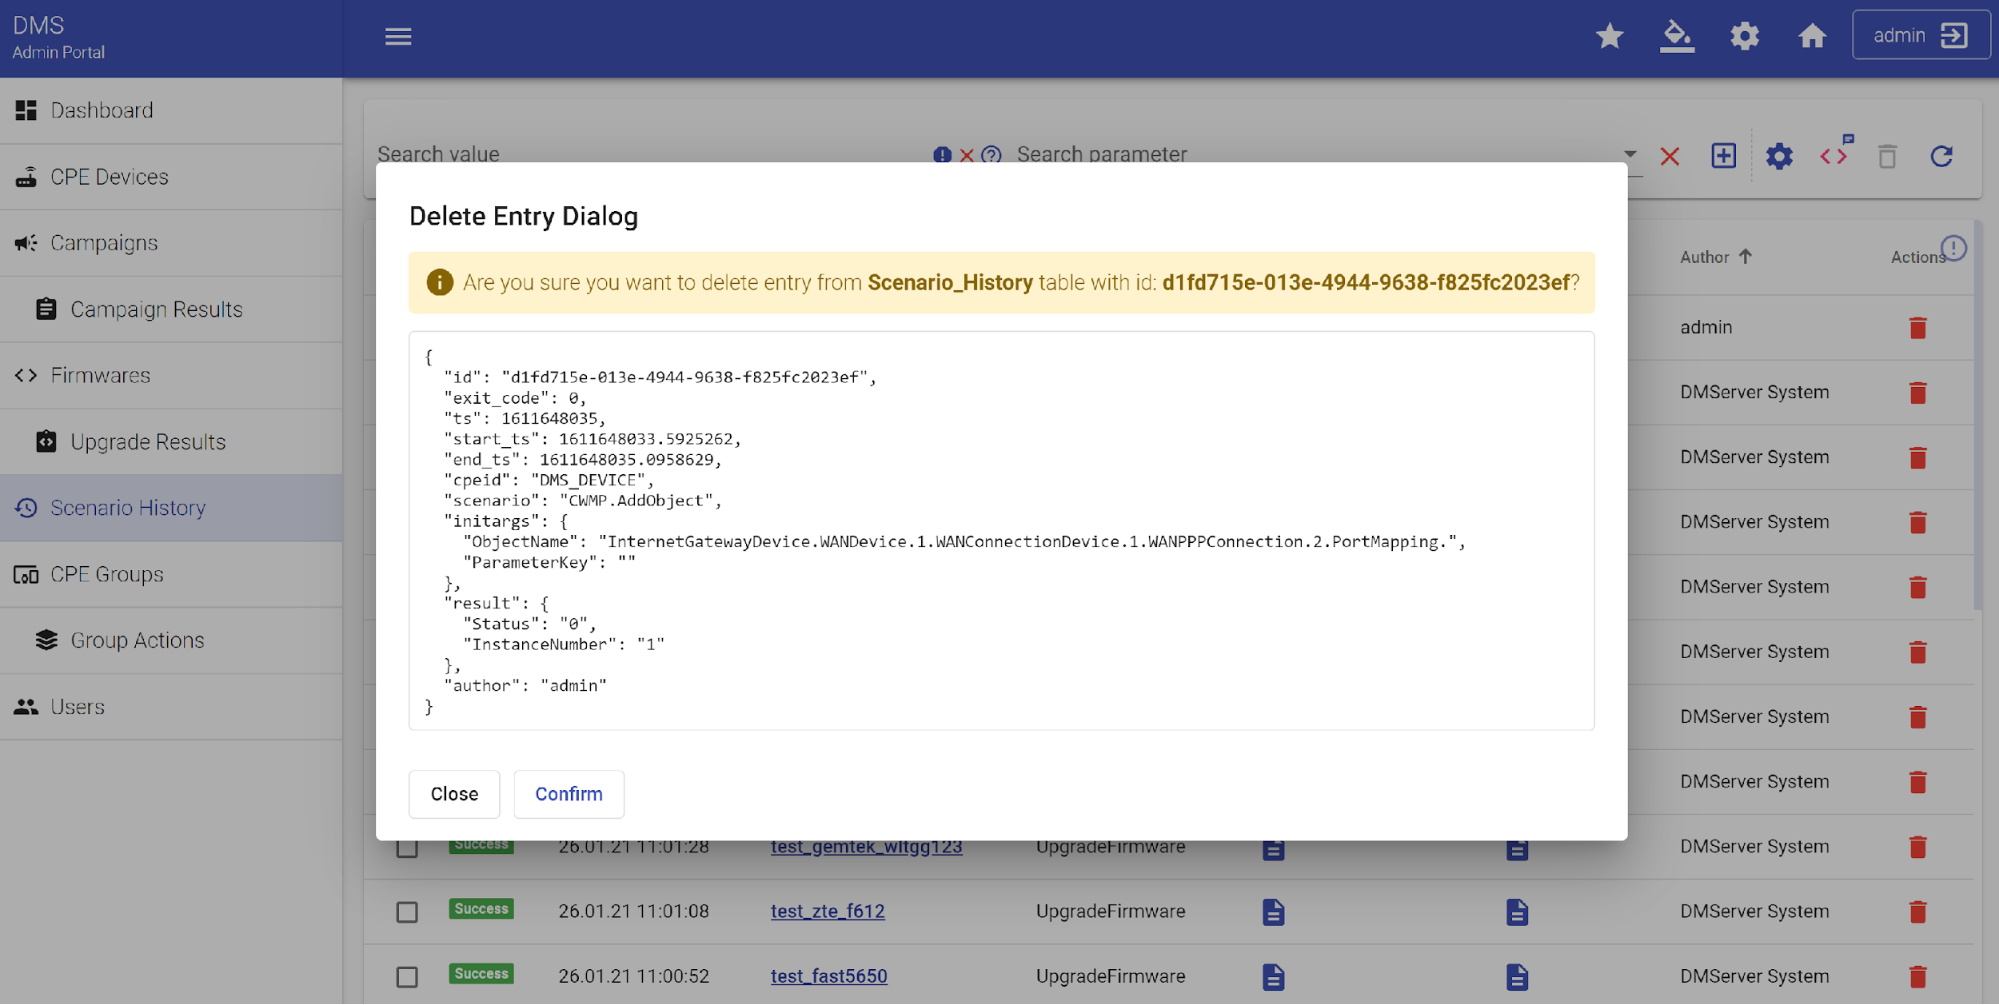
To complete this operation press the "Confirm" button. Searching for scenarios by parameters or values can be carried out in the similar way as in the cases described above in the previous Chapters. Therefore, we will not dwell upon it here in detail.
Users
This section allows you to manage the list of users to which you, as Administrator, can grant rights or define roles, in other words, whose activity you can control. The process of providing access and recording user activity deserves close attention, especially if access is needed to information with business-critical data or processes. The more rights will be granted the more risks to misuse the granted access or to make a mistake, which can be very expensive for a company's business.
This section provides information on how to create and manage user accounts in Device Management Server.

It is possible to add a new admin user by clicking on the ![]() icon in the upper right corner of the screen.
icon in the upper right corner of the screen.

Set the Name of the user and Password then define the level of access for this user.
Press the "Confirm" button.

The new user is now created. From now on, it is possible to change the password of the existing user or delete it.
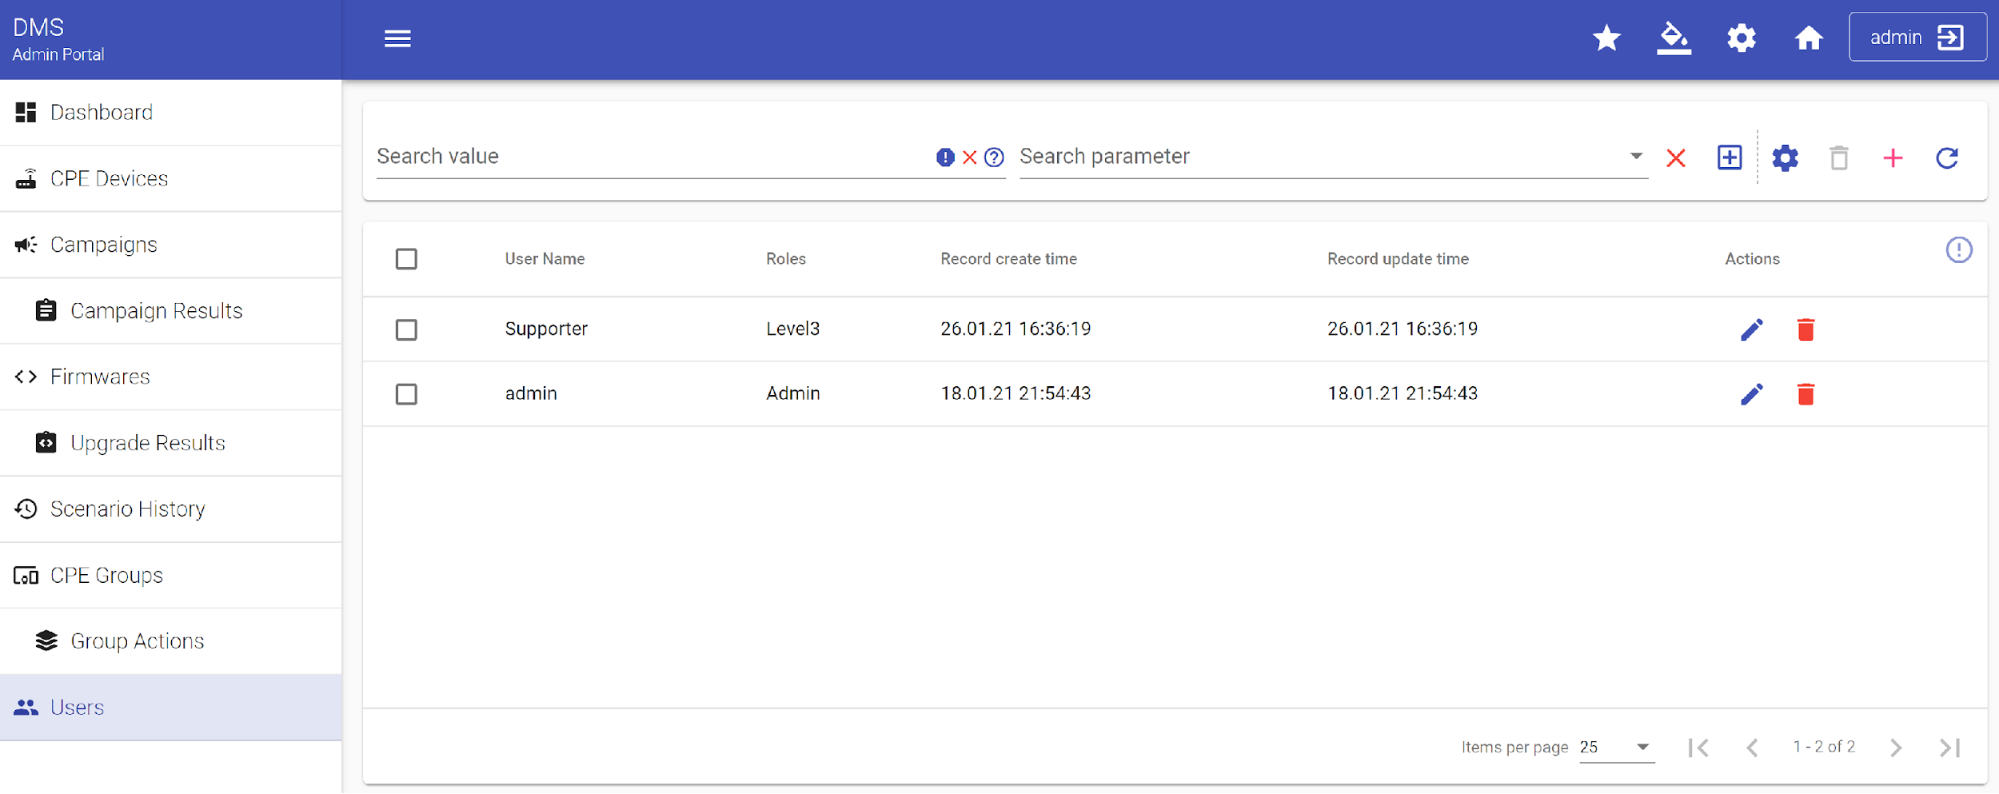
There is no definite password policy, but we suggest you choose a password with more than 6 characters, at least one number or capital letter. The username must not be included in the password and it must not contain a real word. Using the Actions key, you can set the access level for the current User or set definite roles for him. In addition, it is also possible to change the password or to set or change User ID
Roles are permission identifiers that control access to different parts of platform and include "Admin", "Level3", "API" and "Files". All of them have access to the Support Portal, "Level3" - only to Support Portal, "Files" also adds access to File Server, "API" - to the Device Management API, "Admin" - to all available services.

Access groups can be used to limit users to be able to interact through Support Portal only with certain CPEs, if the corresponding CPE object field is defined. Information about CPE access group can be changed in Admin Portal or through NBI.
User Action Logs
This section contains the history of all user actions performed in the new Support Portal (CSP). All operations performed by users through the support portal web interface are logged here, including device viewing, script execution, command sending, and other actions.
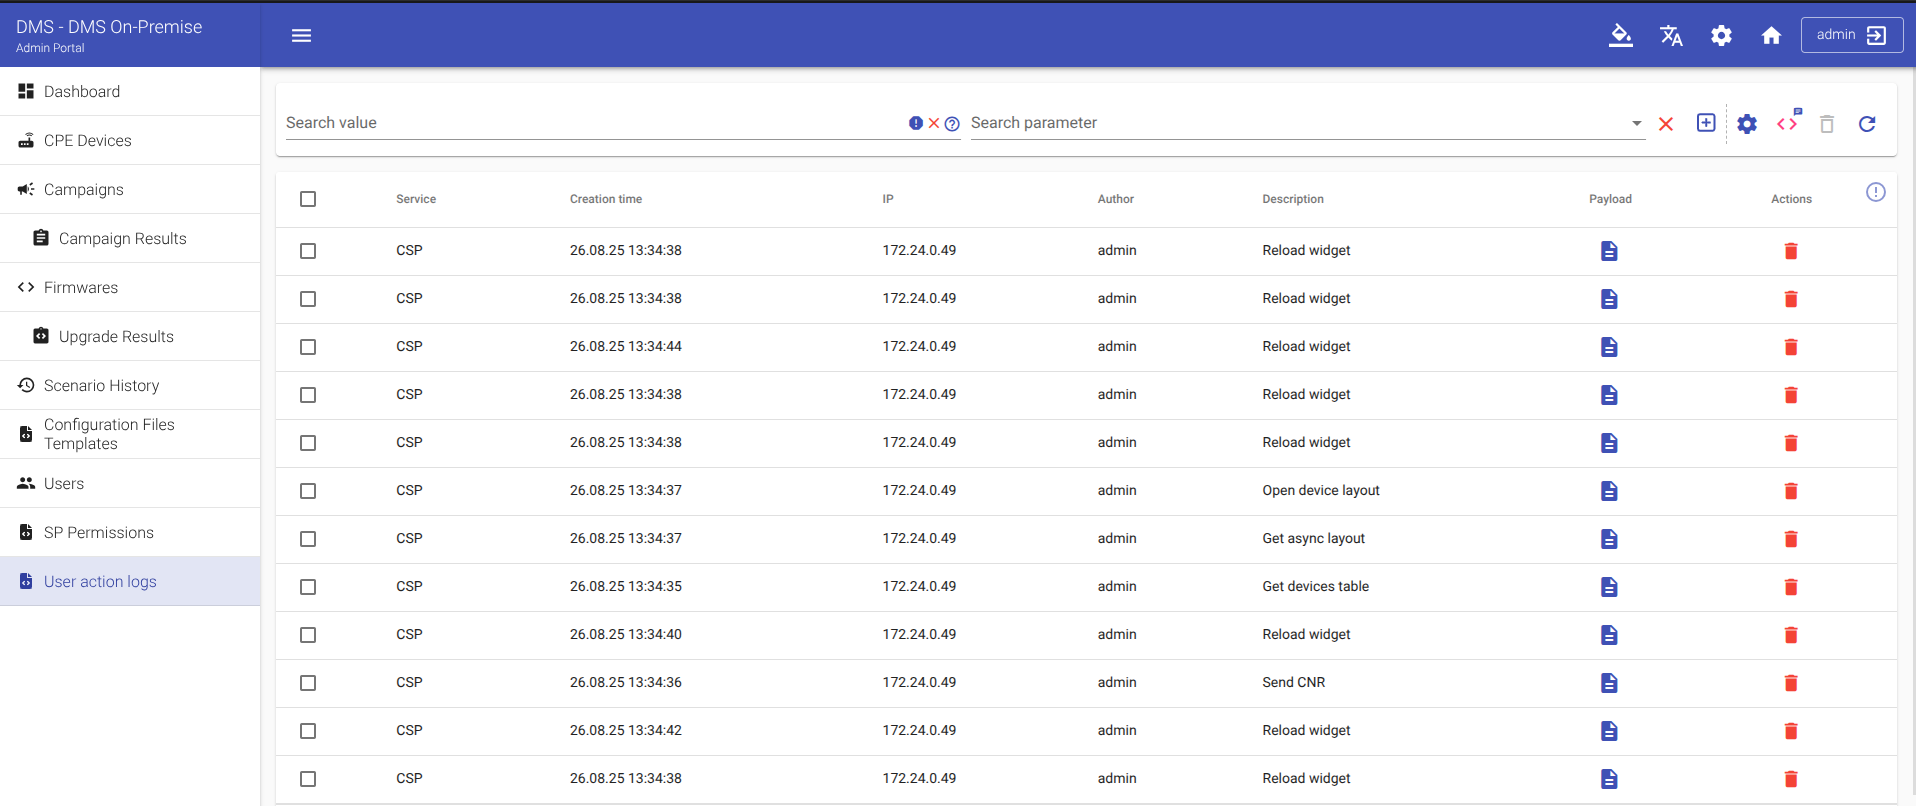
User Action Logs Table
The table contains the following columns:
- "Service" (name of the service where the action was performed)
- "Creation time" (time when the action was executed)
- "IP" (IP address of the user who performed the action)
- "Author" (name of the user who performed the action)
- "Description" (description of the performed action)
- "Payload" (detailed information about the performed action)
- "Actions" (available actions for the record)
Action Buttons
- To view detailed information about an action, click on the "Payload" icon
- You can delete a record from the log by clicking on the "Delete" icon
- Checkbox for bulk deletion of records
Search
Table search works according to the description in this section.
User action logs help track system changes, conduct security audits, and investigate incidents. The records contain complete information about who performed what actions and when in the system.